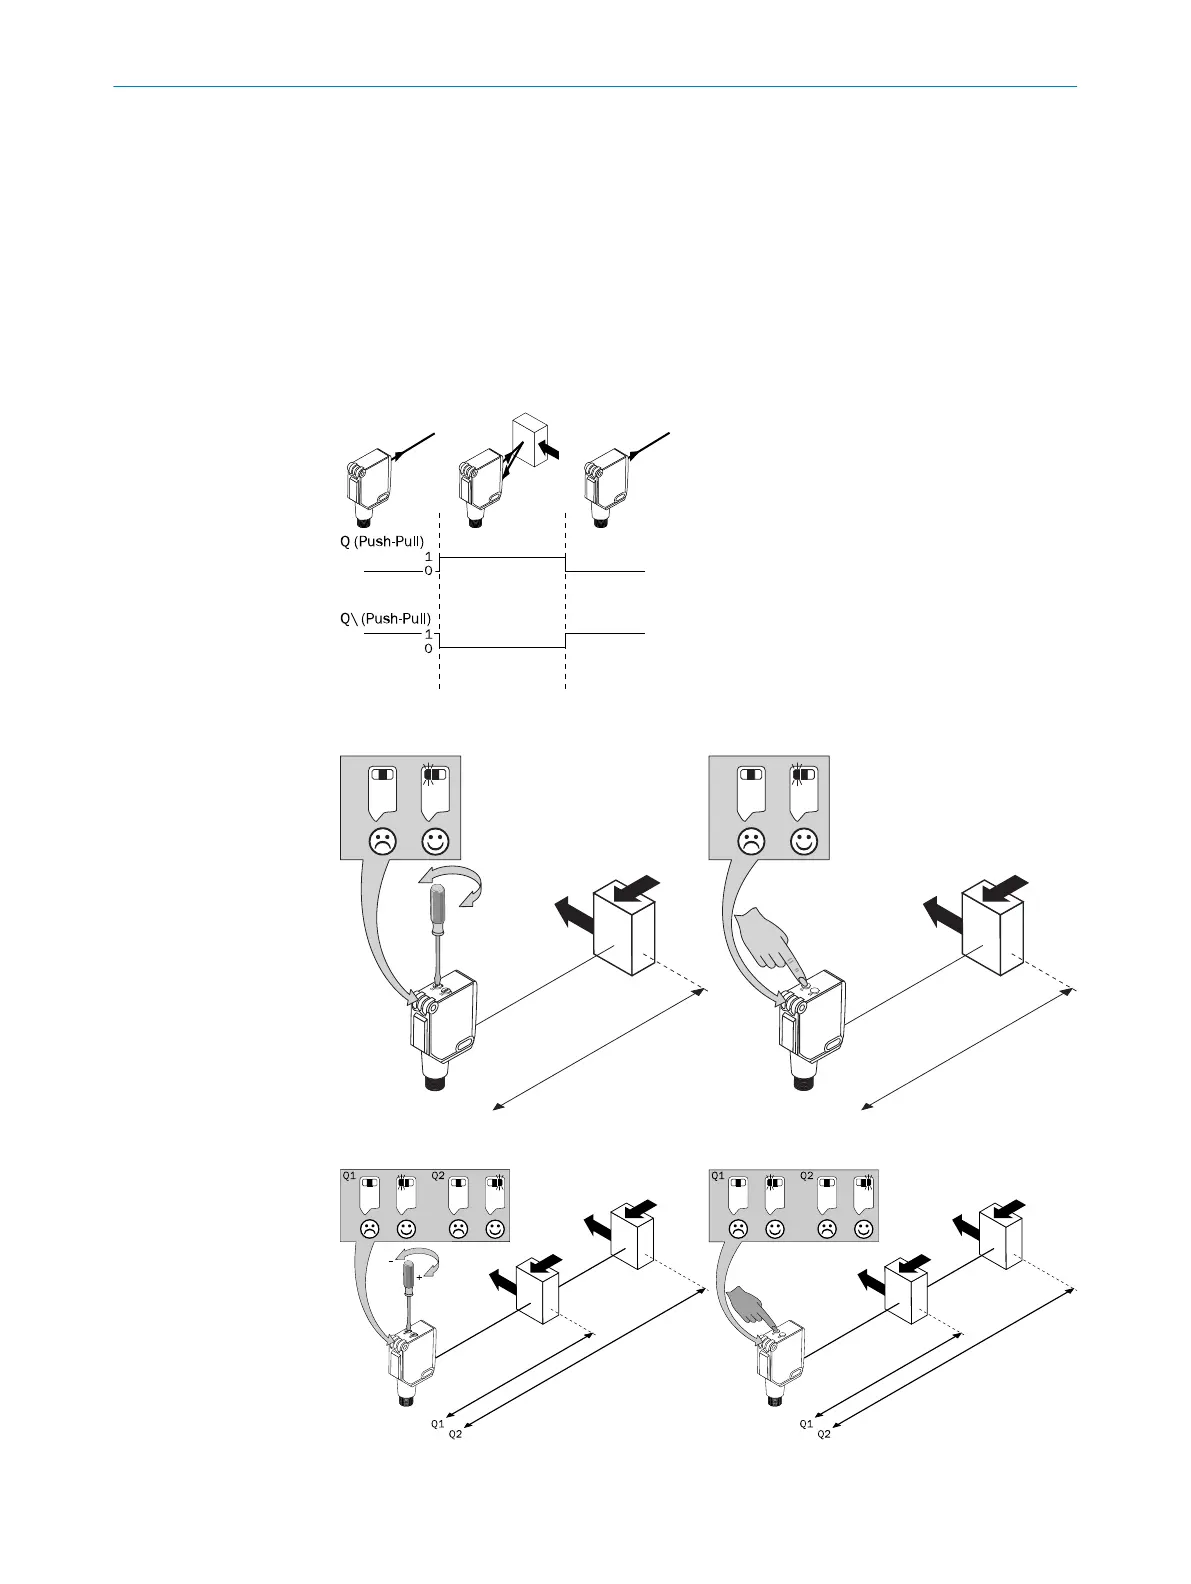
O ajuste da distância de comutação é efetuado com a pressão da tecla Teach-in. Não
acionar a tecla Teach-in com objetos pontiagudos. Recomendamos posicionar a distân‐
cia de comutação no objeto, por ex., como no gráfico E. Após o ajuste da distância de
comutação, o objeto é removido do caminho óptico, o fundo é suprimido e a saída de
comutação se altera (ver gráfico C).
Para o ajuste da distância de comutação através de IO-Link, por favor consulte o
manual de instruções anexo, IO-Link Photoelectric sensors.
O sensor está ajustado e operacional. Utilizar os gráficos C e E para verificar o funcio‐
namento. Se a saída de comutação não se comportar de acordo com o gráfico C,
verificar as condições de uso. Ver seção Diagnóstico de erros.
Figura: C
Figura 22: E-1
Figura 23: E-2
Figura 24: E-3 Figura 25: E-4
CONFIGURAÇÃO 36
8018110.1BVZ / 2021-05-18 | SICK
Subject to change without notice
57

 Loading...