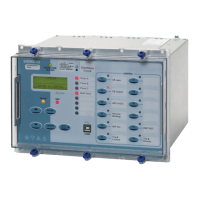
7SG15 MicroTAPP Description of Operation
©2013 Siemens Protection Devices Limited Chapter 1 Page 32 of 38
Remote Raise Initiate manual Tap Raise operation - Relay must be in Manual and
Remote modes.
Remote Lower Initiate manual Tap Lower operation - Relay must be in Manual and
Remote modes.
Remote Auto Switch to Auto operation – Relay must be in Remote mode.
Remote Manual Switch to Manual operation – Relay must be in Remote mode.
Select Auxiliary Target 1 Change Target Voltage. Available when the Relay is both in Local and
Remote modes. Only one Auxiliary Target can be active at a time. If
more than one input is raised, the highest numbered input (1, 2 or 3)
takes priority.
Select Auxiliary Target 2 Change Target Voltage. Available when the Relay is both in Local and
Remote modes. Only one Auxiliary Target can be active at a time. If
more than one input is raised, the highest numbered input (1, 2 or 3)
takes priority.
Select Auxiliary Target 3 Change Target Voltage. Available when the Relay is both in Local and
Remote modes. Only one Auxiliary Target can be active at a time. If
more than one input is raised, the highest numbered input (1, 2 or 3)
takes priority.
Local / Remote Select Local (input low) or Remote (input high) mode. This will only
have an effect if setting "Local / Remote Control" is set to "Status Input".
[102] Voltage Target Increase Step increase Target Voltage. To maximum of +20%.
[102] Voltage Target Decrease Step decrease Target Voltage. To maximum of -20%.
[102] Voltage Target Reset Reset Target Voltage level.
Select Group 1 Temporarily switch Active Settings Group to Group 1.
Select Group 2 Temporarily switch Active Settings Group to Group 2.
Select Group 3 Temporarily switch Active Settings Group to Group 3.
Select Group 4 Temporarily switch Active Settings Group to Group 4.
Select Group 5 Temporarily switch Active Settings Group to Group 5.
Select Group 6 Temporarily switch Active Settings Group to Group 6.
Select Group 7 Temporarily switch Active Settings Group to Group 7.
Select Group 8 Temporarily switch Active Settings Group to Group 8.
As for outputs, any functional input can be allocated to any status input.
Communication Interface
Station Address Sets Relay address for communications.
IEC870 on Port Selects the port to be used.
COM 1 Baud Rate Selects transmission speed.
COM 1 Parity
Determines whether or not a parity check is transmitted with communication
data.
COM 1 Line Idle Sets the communication line idle sense.
COM 1 Data Echo Enables connection of relays in a Ring.
COM 2 Baud Rate Selects transmission speed.
COM 2 Parity
Determines whether or not a parity check is transmitted with communication
data.
COM 2 Line Idle Sets the communication line idle sense.
COM 2 Data Echo Enables connection of relays in a Ring.
COM 2 Direction Configures COM 2 to use Relay Front or Rear port, or to Auto-Detect which
is active.
IEC60870 Class 2
Refresh Rate
Interval between creation of new IEC60870 class 2 measurand data
frames.
IEC60870 Class 2
Window
Percentage of nominal figures which must be exceeded for new IEC60870
class 2 measurand data frame to be created.
Data Storage
Clear All Events Clears all Event records
Clear All Faults Clears all Fault records
Tap-Changer Maintenance
Delta Count Alarm Number of Tap-Changer operations before an Alarm is given.
Sum I
2
Alarm Accumulated I
2
level which must be exceeded before Alarm is given.
 Loading...