Installation
70/214 Revision 11 • INSTALLATION AND OPERATING INSTRUCTIONS • 8DA10 • 861-9601.9
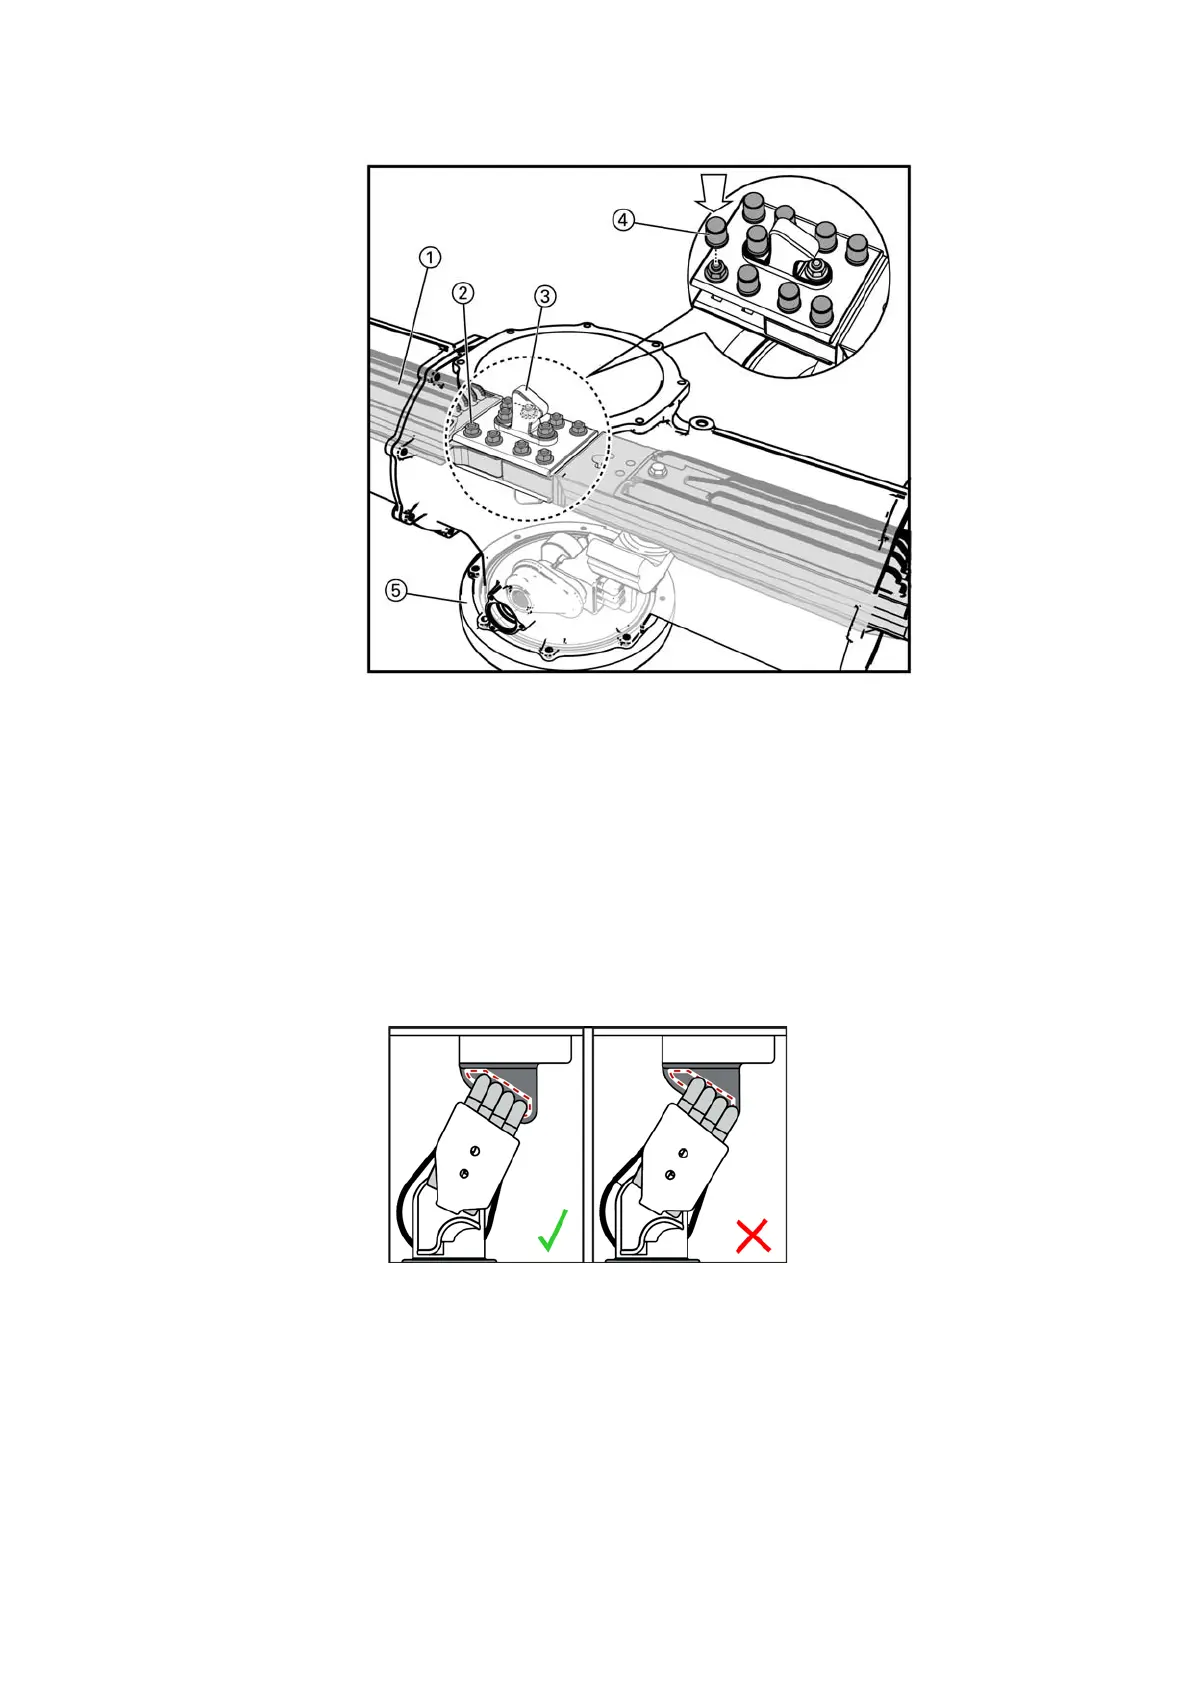
➭ Fit the protective caps on the bolted joints of the busbar.
➭ Clean the inside of the housing with a hand vacuum cleaner. The hand vacuum cleaner
should feature a sufficiently long, flexible tube (maximum diameter 20 mm) and
a plastic tip.
➭ Clean the bushing plate ⑤ inside with a cloth.
➭ Push the rotary post insulator onto the disconnector shaft. Due to the coding, the rotary
post insulator can only be pushed onto the disconnector shaft in one position.
➭ Mount the transformer connection housing of the disconnectable busbar voltage
transformer with supporting plate and disconnector at the busbar housing. To do this,
compress the potential spring of the disconnector. The disconnector with the potential
spring must be fully positioned in the driver of the rotary post insulator.
➭ Verify contact overlapping with suitable means.
Fig. 58: Example for correct and incorrect position of
the contact fingers on the fixed contact
➭ Position further transport units.
➭ Re-install the voltage transformer type 4MU4.
Fig. 57: Fitting protective caps
①
Busbar in the fixed-
mounted panel
②
Cup head bolt
M10x65 with
hexagon nut and
conical spring washer
③
Upper disconnector
contact
④
Protective caps (9x)
⑤
Bushing plate

 Loading...