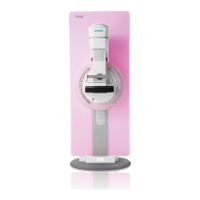
Do you have a question about the Siemens MAMMOMAT Inspiration and is the answer not in the manual?
| Brand | Siemens |
|---|---|
| Model | MAMMOMAT Inspiration |
| Category | Medical Equipment |
| Language | English |
Details MEE tests for installation, changes, disassembly, or major component repairs.
Tests performed annually by MP to check for performance degradation.
Tests performed monthly by the technologist, typically on the first working day.
Tests performed by technologist when artifacts or incorrect settings are suspected.
Table indicating when and by whom different QC tests should be performed.
Emphasizes familiarity with the operator manual before QC tests.
Outlines steps for addressing test failures and performance degradation.
Lists essential documents for QC, including operator and viewing station manuals.
Lists all measurement devices and materials needed for QC tests.
To determine if the detector is damaged, dusty, or needs calibration.
Lists cleaning materials needed for detector maintenance.
Steps for cleaning and calibrating the detector.
Defines acceptable visual standards for the detector.
Details statistical methods for evaluating QC test results.
Formula and definition for calculating relative deviation from the average.
Methods for calculating linear correlation and offset for detector response.
Formula for calculating the signal-to-noise ratio.
To test AEC security cut-off and measure AEC stability.
Lists specific plates and shielding for the AEC test.
Step-by-step instructions for performing the AEC test.
Defines acceptable limits for AEC test results.
To identify dust, damage, or artifacts on the detector.
Lists phantom and compression plate for artifact detection.
Step-by-step guide for performing the artifact detection test.
States that no clinically relevant artifacts should be visible.
To measure detector response uniformity across its surface.
Lists phantom and compression plate for uniformity testing.
Steps for performing the detector uniformity test.
Defines acceptable maximum relative deviation for uniformity.
To measure detector linearity and system noise against input air kerma.
Lists phantom, dose meter, and compression plate for linearity test.
Steps for performing the detector linearity test.
Specifies criteria for linearity, offset, and SNR.
To ensure adequate phantom imaging quality.
Lists ACR phantom and compression plate for imaging quality test.
Steps for performing the phantom imaging quality test.
Lists minimum counts for fibers, specks, and masses.
To detect spatial resolution problems in different detector parts.
Lists bar pattern phantom, PMMA phantom, and compression plate.
Steps for performing the spatial resolution test.
Specifies the maximum detectable spatial frequency.
To ensure the mechanical integrity of the system.
Lists phantoms, stopwatch, and compression plate.
Steps for checking various mechanical functions and movements.
States that all mechanical integrity steps must be passed.
To assess the quality of the acquisition workstation monitor.
Lists SMPTE test pattern.
Steps for cleaning and setting up the monitor test.
Specifies visibility of 5%/95% squares and bar patterns.
To assess the quality of the laser camera/printer.
Lists calibrated densitometer.
Steps for printing and evaluating the SMPTE image.
States that optical densities must be within action limits.
