Chapter 2
Installing the Device
RUGGEDCOM RUGGEDCOM RSG2488
Installation Guide
12 Connecting Power
little as possible. To achieve minimum RF exposure, install the device when it is configured not to
transmit and set it to operational mode remotely, rather than having a technician enable transmission
on-site. For maintenance of the base station, or other operations which require RF exposure, the
exposure should be minimized in time and according to the regulations set forth by the country of
installation or the Federal Communications Commission (FCC).
IMPORTANT!
The antenna installation must be as per Article 810 of the NEC. Specifically, the grounding conductor
must not be less than 10 AWG (Cu). The scheme should be either:
• in accordance with UL 96 and 96A Lightning Protection Components and Installation Requirements
for Lightning Protection Systems (LPS)
• tested in accordance with UL 50 and UL 497
NOTE
For technical specifications, refer to Section 4.5, “GPS Antenna Specifications”.
1. Mount the antenna to a pole or wall in an area that provides good signal coverage and is away from any
signal noise emanating from other communications equipment. Make sure 90° of the sky is visible to the
antenna.
2. If required, connect the optional lightning arrestor, line amplifier or bandpass filter to the antenna.
3. Connect the antenna assembly to the GPS port on the device.
Section 2.3
Connecting Power
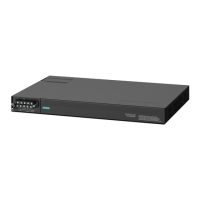
The RSG2488 supports dual redundant AC and/or DC power supplies that can be installed in any combination.
The use of two power modules is recommended to provide redundancy and load balancing.
The RSG2488 can be equipped with either a screw-type or pluggable terminal block, which provides power
to both power supplies. The screw-type terminal block is installed using Phillips screws and compression
plates, allowing either bare wire connections or crimped terminal lugs. Use #6 size ring lugs for secure, reliable
connections under severe shock or vibration.
DANGER!
Electrocution hazard – risk of serious personal injury or death. The device may have two power
supplies equipped, which may be connected to separate power sources. Make sure all power sources
are off before servicing the power supply terminals.
CAUTION!
Electrical hazard – risk of damage to equipment. Do not connect wiring to unused power supply input
terminals. For instance, if a Low DC power supply is installed in the PS1 slot, do not connect the PS1
High AC/DC terminals to a power source.
IMPORTANT!
• In a high AC/DC and low DC (24/48 V) power supply arrangement, the placement of the AC and
DC power supplies is not slot-dependent. However, if a high AC/DC power supply is installed in slot
PS1, the high AC/DC wiring must be connected to the high terminal block PS1 terminals. If a low DC
power supply is installed in slot PS1, the low DC wiring must be made to the low terminal block PS1

 Loading...