Installation
3.2 System Installation
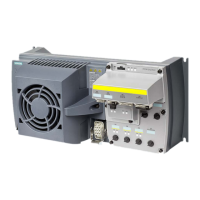
Distributed converter for SIMOGEAR geared motors
42 Getting Started, 04/2018, FW V4.7 SP10, A5E36100338B AG
Fitting the blanking plate
Using the four screws, fit the blank plate to the side of the
Terminal Housing.
Ensure that no cables or components are trapped between
the blanking plate and the Terminal Housing seal, as this
would adversely affect the IP rating of the Terminal
Housing.
Screws tightening torque: 1.5 Nm.
Fitting the Control Module
Ensuring that no wiring is trapped by the Control Module,
place the module on the four supporting posts of the
Terminal Housing.
Using the four screws (self-retaining), secure the Control
Module into place.
Screws tightening torque: 1.5 Nm.
Fitting the Communications and Power Interface (CPI)
Using the four screws, fit the CPI to the side of the Terminal
Housing.
Ensure that no cables or components are trapped between
the CPI and the Terminal Housing seal, as this would
adversely affect the IP rating of the Terminal Housing.
Screws tightening torque: 1.5 Nm.
The Communications and Power Interface (CPI) can be
fitted on the left or right side of the Terminal Housing, but
must always be fitted on the opposite side of the Terminal
Housing from the internal braking resistor.
 Loading...
