56
AUTO BRACKETING
This function of the camera lets you take a sequence of pictures of the same
subject at three different exposure levels; Appropriate Exposure, Under
Exposure and Over Exposure. If it is difficult to determine the proper exposure,
please use this function.
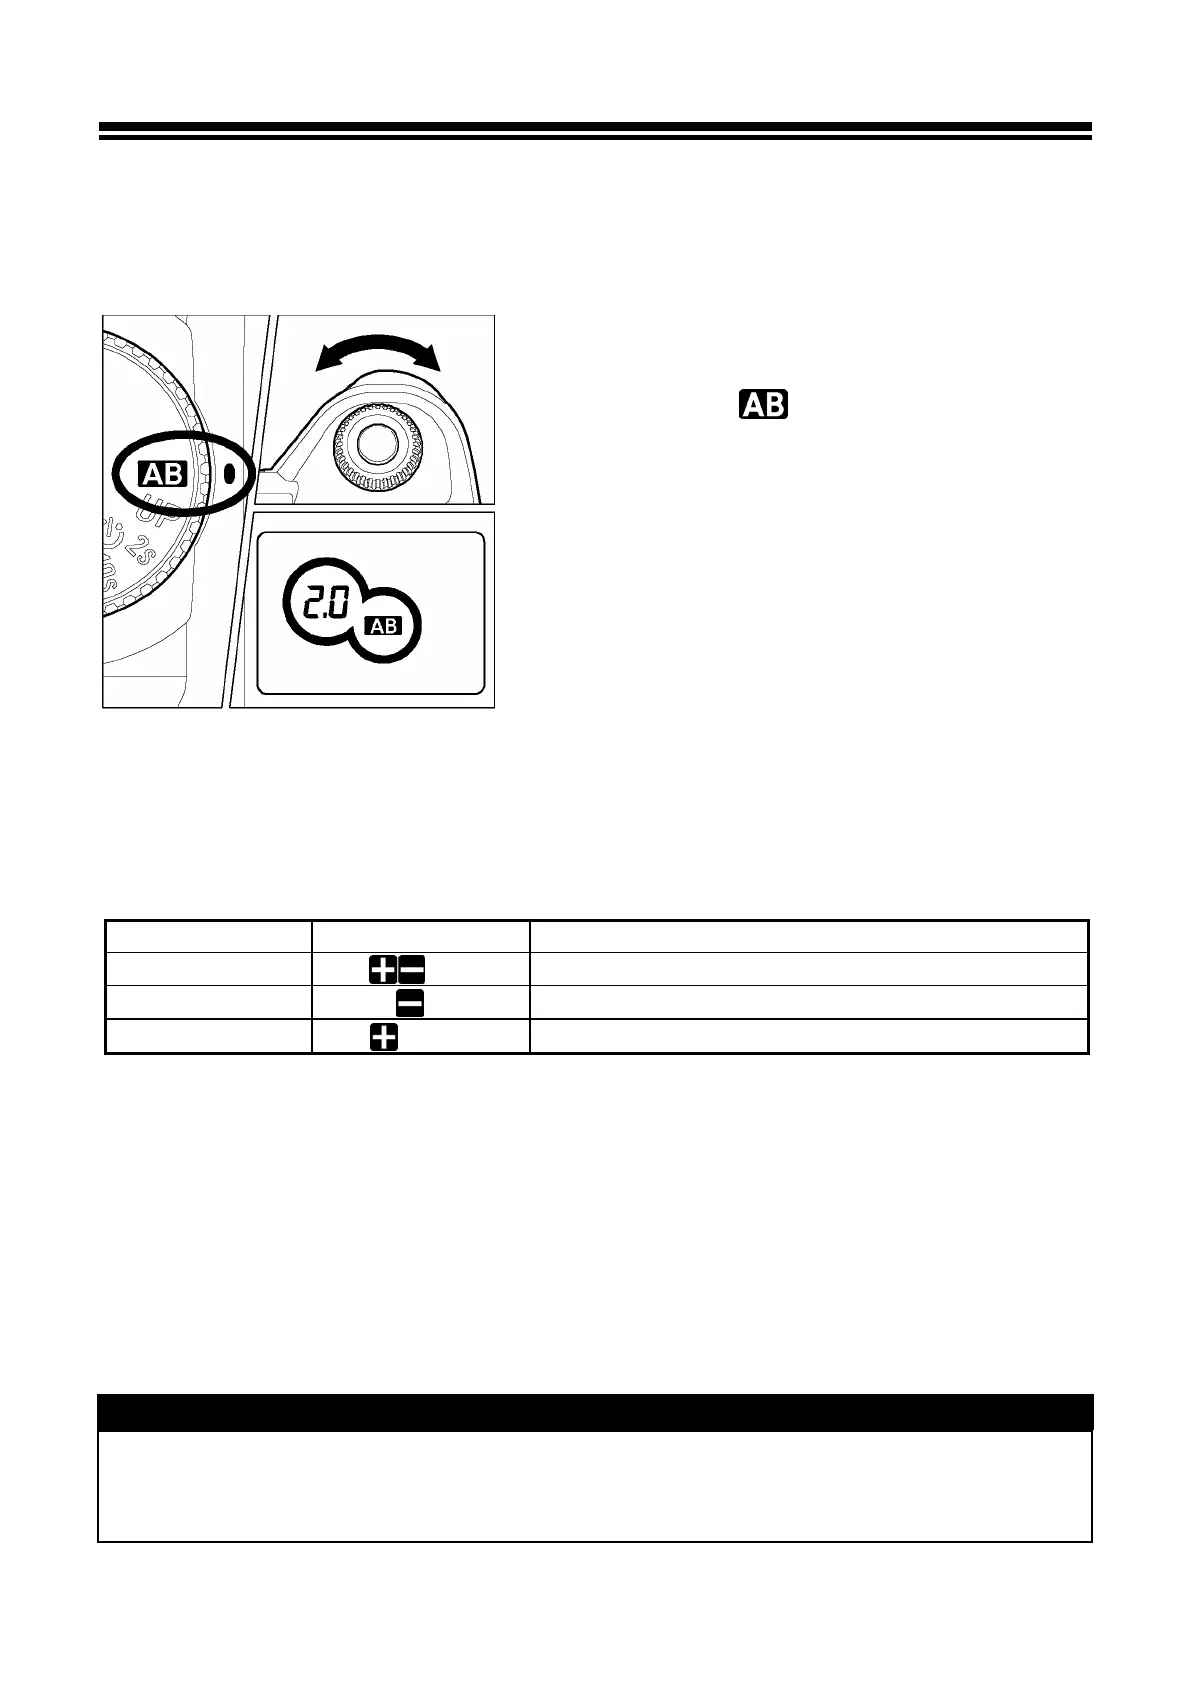
1
Set the “D”-dial to position.
2
Turn the “C”-dial to set the bracketing amount. (It
can be set in 1
⁄
3 EV step increments up to ±3
EV).
3
Set the “D”-dial to drive area (P.1 4 ).
■ The camera will take three pictures in the following sequence; Appropriate
exposure, under exposure and over exposure.
■ For example: If you set the bracketing amount to 2.0, the indicator in the
viewfinder will show as follow.
P
,
A
,
S
mode
M
mode
First Frame
0.0
* Measured Value
Second Frame
2.0
-2.0 EV deviation from Measured Value
Third Frame
2.0
+2.0 EV deviation from Measured Value
(* Measured value is the difference between the correct exposure value of the
camera and your setting value).
■ The exposure bracketing can be used with 4 different modes.
P
Mode ; Both shutter speed and aperture value will be changed.
A
Mode ; Only shutter speed will be changed.
S
Mode ; Only aperture value will be changed.
M
Mode ; Only shutter speed will be changed.
WARNING !!
• Once you set the auto bracketing mode, the camera will continuously hold that
auto bracketing mode until you set the bracketing amount to “0.0”.