8simon.es/simon100 GUÍA DE INSTALACIÓN Y CONFIGURACIÓN
Simon | 100
INSTALLATION
Once specified the placement of Hub iO Socket
(ref.10002432-039), we will proceed with the
installation.
The Hub iO Socket is installed in the same way as any
socket, in a universal box. Once your location is selected,
proceed to install it following the corresponding
instruction sheet:
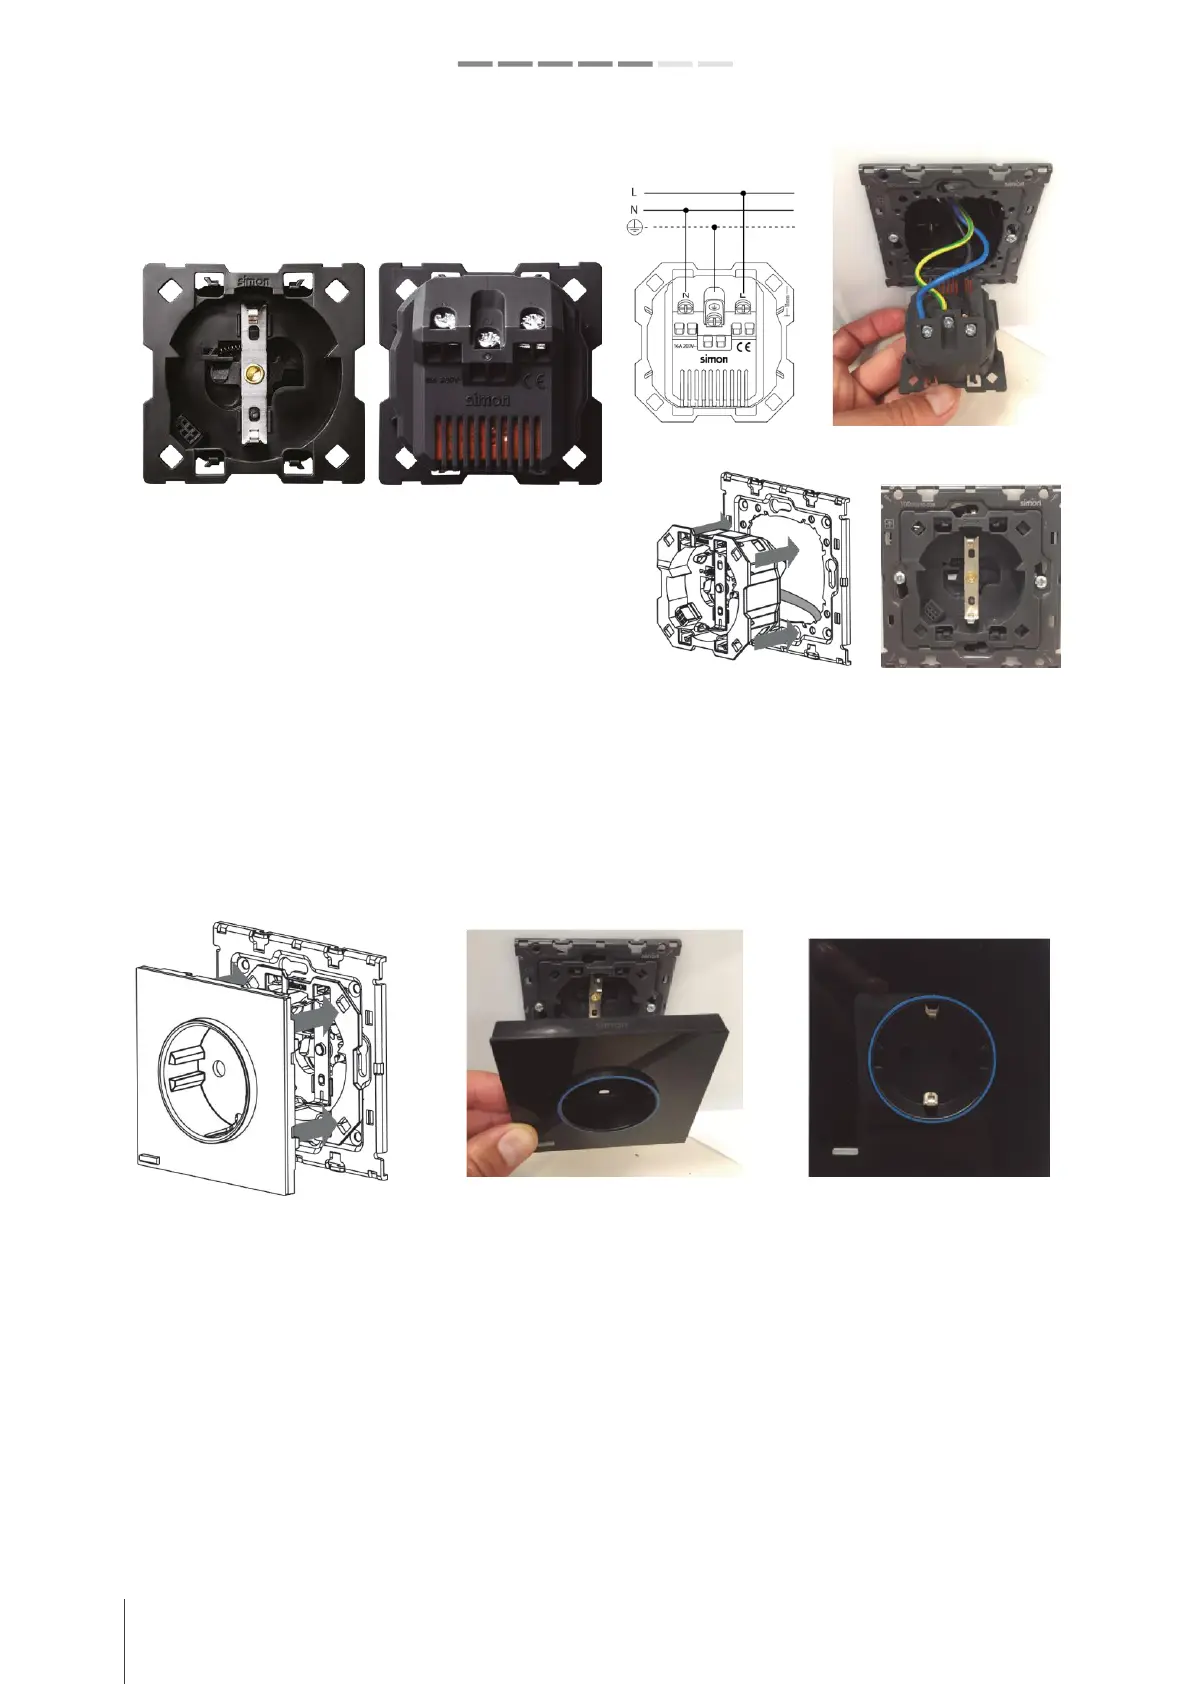
1. CUT THE TENSION FROM THE CORRESPONDING
MAGNETOTHERM
2. FIX THE FRAME TO THE BOX.
3. CONNECT THE CABLES TO THE TERMINALS FOR
PHASE, NEUTRAL AND GROUND
4. ASSEMBLE THE PLUG AND PLUG TO THE
FRAME
5. MOUNT THE FRONT COVER OF THE SOCKET HUB IN THE PLUG BASE
The front HUB iO integrates Wi-Fi and Z-Wave antennas. He will recognize it because it has a blue ring on the front.
There are two types of caps or front of the HUB iO, make sure you have the correct one:
• When installing the HUB iO in boxes of 2, 3 or 4 elements will be necessary the front cover in modular format
(ref.10003041-13X) to be able to combine with the corresponding frames. It can also be installed in a 1-element box,
but it will be necessary to add a 1-element frame (ref.10000610-13X) to complete the solution.
• Soon the front cover will be available in KIT format (ref.10020108-13X), with a clean aesthetic and without cuts (as
seen in the following images), which only serves for 1 element box.