20 simon.es/simon100 INSTALATION AND CONFIGURATION GUIDE
Simon | 100
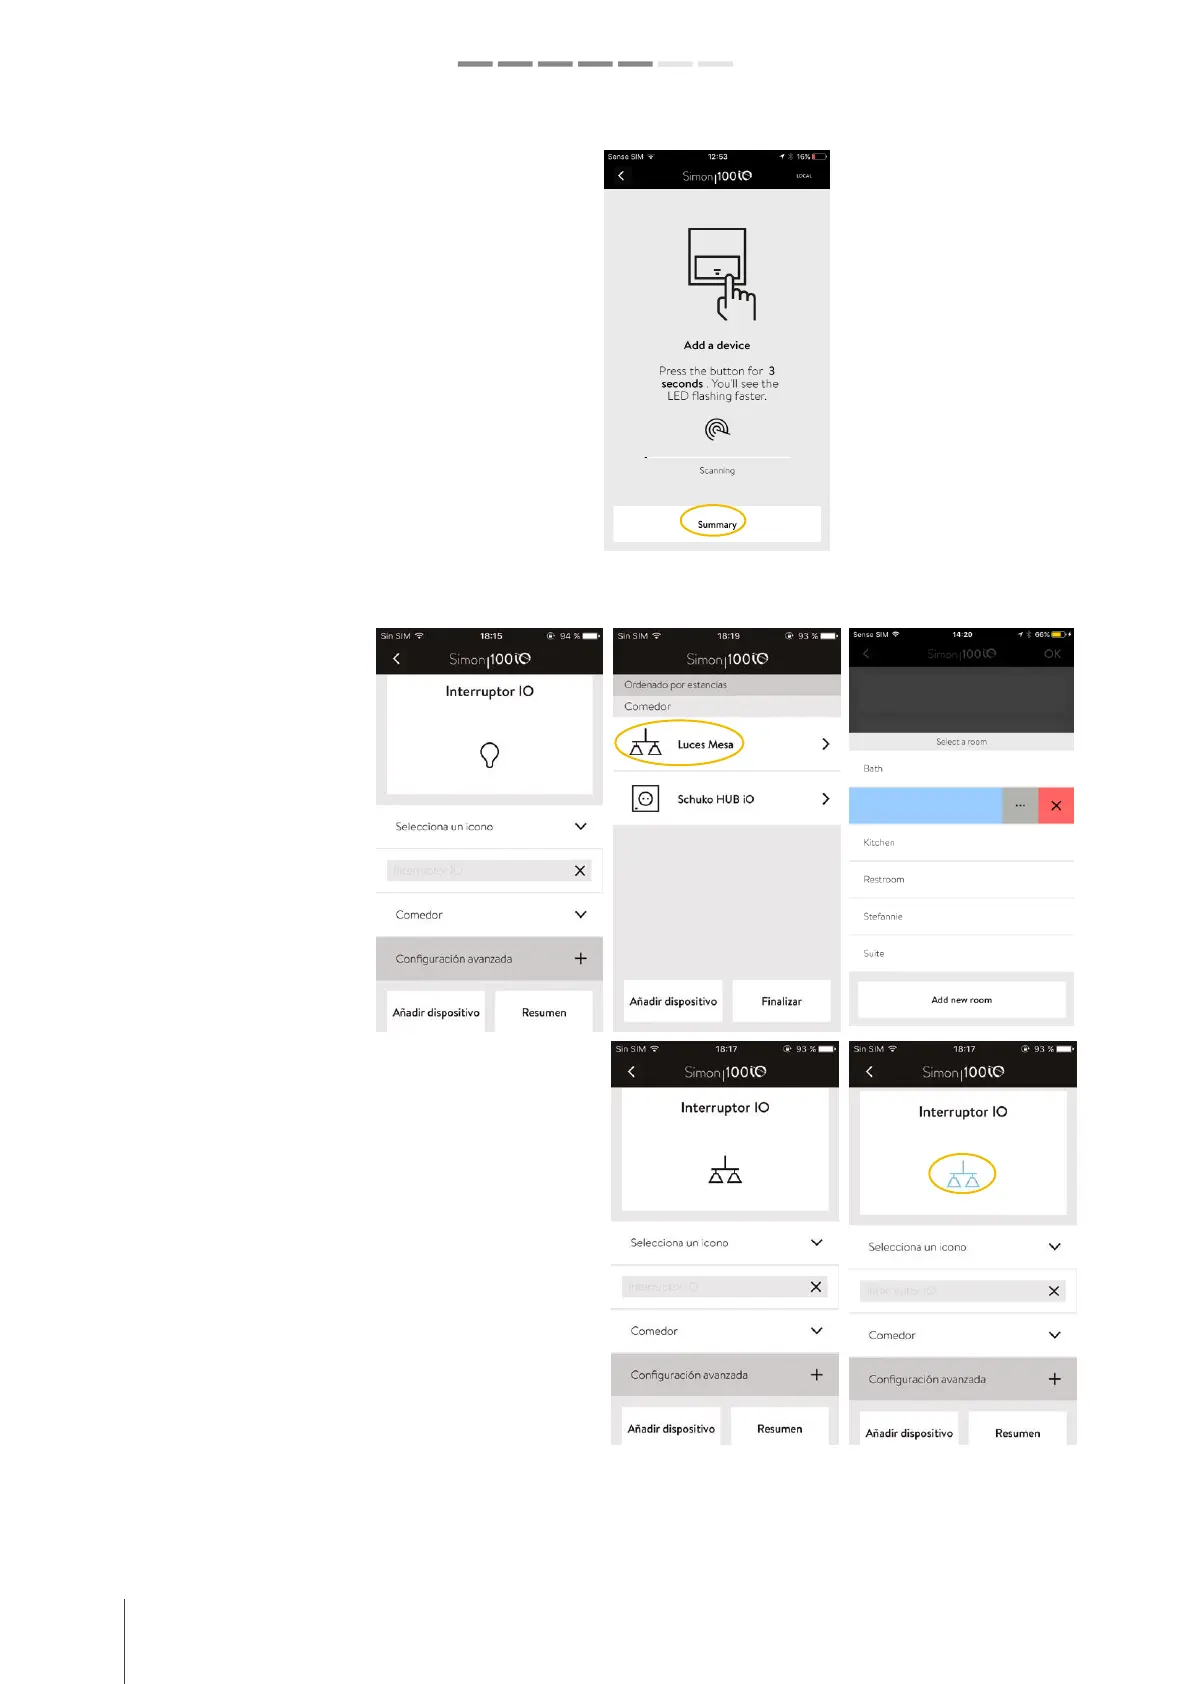
ADDING SIMON DEVICES
A
DD A SWITCH iO
Once the device is added, the application will
recognize the type of function that has been
installed and a screen will be displayed to indicate
in which room it is installed and the possibility of
assigning a name and icon to the installed device.
You can also assign advanced settings to each
device, as will be explained later.
In the following
example we changed
the icon, assigned the
room "Dining room"
and changed the name
to "Lights Table", for a
better visual
identification that
corresponds to the
actual room:
Rooms can be created
or deleted selecting
Add New Room or
moving the room to
the left.
When adding the device, in this case an iO Switch
(but it is for everyone) you will see that the
application screen has a "Rocker", an interactive
area on the icon that can be activated and that
changes color to the Press it. With the touch you
will be acting in the same way as you would from
the installed physical Switch. It is a way of verifying
that the device has been recognized and that the
load is switched on by pressing the physical Rocker
or the virtual icon:
OFFF (Light OFF) ON (Light ON)