18
4007ES Operator’s Manual (579-1165)
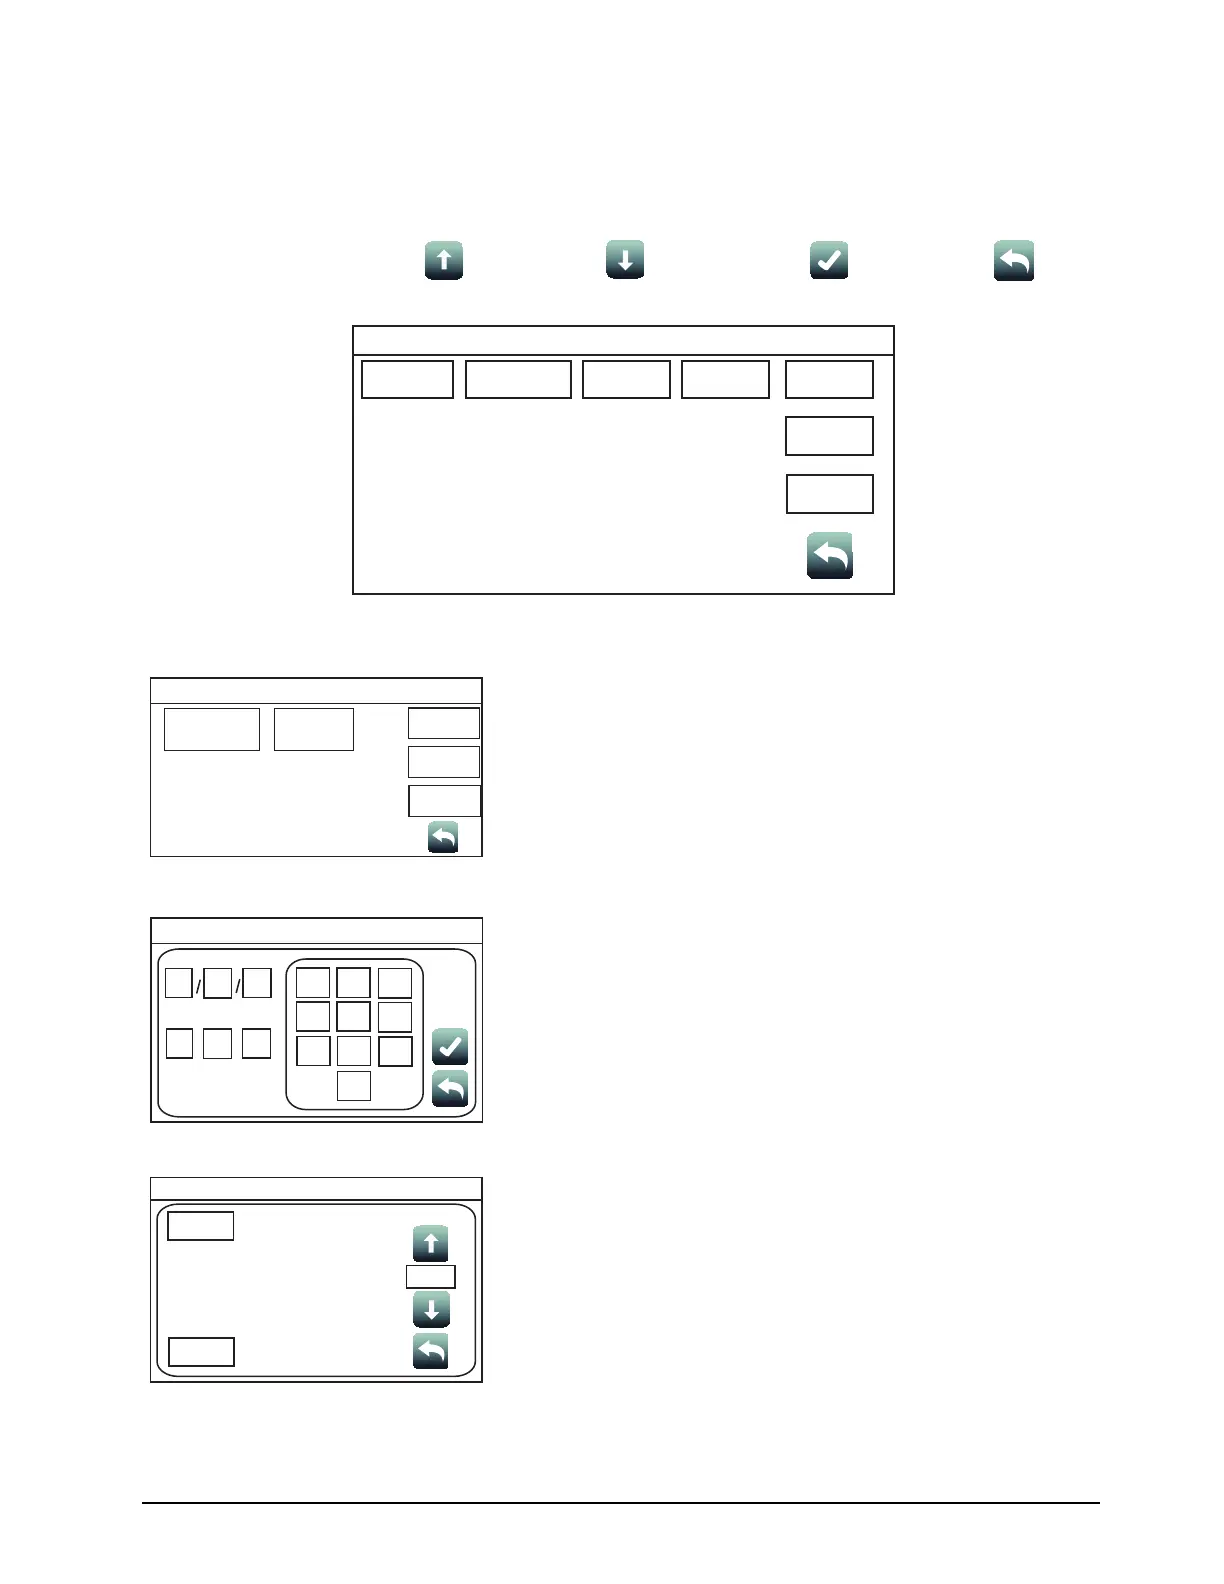
Panel Setup Overview: Use the Panel Setup function to modify the configuration of the basic panel components.
Tap on a menu icon to access that option’s main screen. Refer to Figure 6 for access levels
required to use each option inside the Panel Setup screen.
Screen Buttons:
Scroll Up
Scroll down
Accept
Return
Figure 8. Panel Setup Screen
Panel Setup
Swap Config
Set Time/Date
Touchscreen
Calibration
Mass
Storage
USER
BUTTON 1
USER
BUTTON 2
USER
BUTTON 3
Date
Time
Swap Config:
Tap the Swap Config button to access the functions below. These
functions allow roll back to the previous versions of the panel firmware.
• Show Alternate Config Version: Tap this button to display the
previous version of the panel
firmware.
• Use Alternate Config Version: Tap this button to install the
previous version of the panel
firmware.
Set Time/Date:
Tap the Set Time/Date button to access the screen where the date and
time displayed at the panel can be updated:
1. Press the button that corresponds to either day, month, year, hour,
minute or second.
2. Enter a new value using the touchscreen keypad.
3. Repeat steps 1 and 2 for the date and time values that remain.
4. Press the Accept button for the new date and time to take effect
immediately.
Touchscreen Calibration:
Tap the Touchscreen Calibration button to access the calibration
screen and adjust the sensitivity of the user interface touchscreen.
Follow these steps to adjust:
1. Increase or decrease the touchscreen sensitivity by using the Scroll
Up and Scroll Down buttons.
2. Tap the Calibrate button and then tap the “+” signs that appear to
adjust the precision of the touchscreen pressure sensors.
3. Return to the System Menu screen.
Continued on next page
Swap Config
Show Alternate
Config Version
Use Alternate
Config
USER
BUTTON 1
USER
BUTTON 2
USER
BUTTON 3
Date
Time
Day Month
Year
Hrs Mins
Sec
::
12
3
4
56
7
89
0
Panel Setup
0101 01
01 01
01
Date
Time
Calibrate
Clear
Sensitivity
3x
Panel Setup
Date
Time
Panel Setup