| 15
Hardware mounting | Halo pulse compression radar installation manual
Hardware mounting
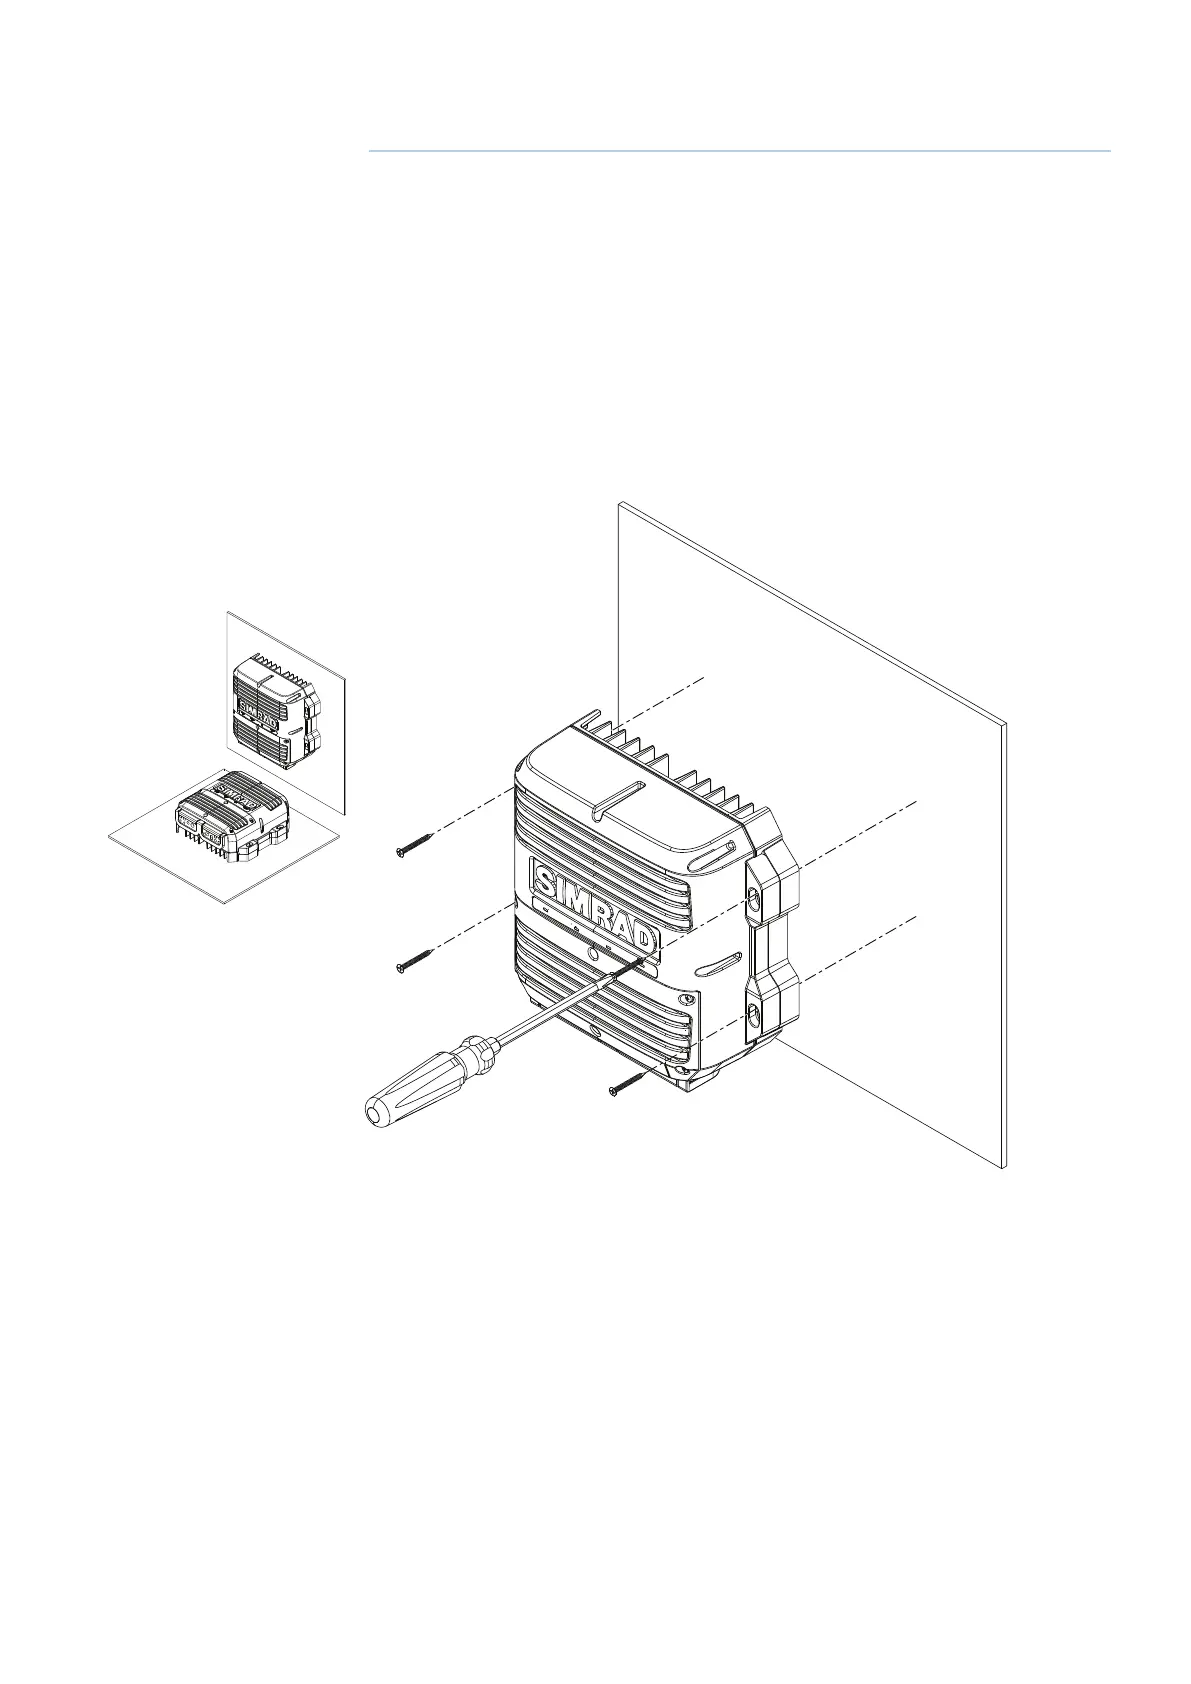
Install the RI-12 radar Interface module
Install the RI-12 in a dry location away from spray, rain, drips and condensation or excessive
heat. The mounting position should be easily accessible.
Always mount the RI-12 vertically, with the cable entry points facing downwards. This is to assist
in cooling and to assist stopping any possible water ingress though the cable grommets.
The RI-12 must be located where it can be easily connected to the ship’s ground, the pedestal
interconnection cable, the power cable and the NMEA 2000 network. Check that these cables
and the ship’s ground can easily reach the radar processor BEFORE you drill.
Use fasteners suited to the mounting surface material. If the material is too thin for self tappers,
reinforce it, or mount the RI-12 with machine screws nuts and washers. Use only 304 or 316
stainless steel fasteners. Mark the screw locations using RI-12 box as a template, and drill pilot
holes.
4