____________________________________________________________________________________________________________________________
Operating Instructions Sinarback eMotion 75 LV / 75 / 54 LV 7
4 Basic Settings
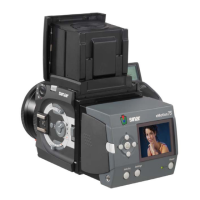
4.1 Operating Elements
The arrow keys arranged in a circle serve for navigating the images
or the menus. With the OK/Menu key in the center you can access
the menu for the operation of the camera during the shoot, i.e. you
can verify the settings in the menus. If the display shows an image,
you can use the lower arrow key to call up the images from the
internal memory or the images on the CF card for viewing. With the
Info/Esc key you can exit the respective menu without accepting
their settings. When an image is displayed on the screen, you can
use the Info/Esc key to call up various items of information. The
following subjects will be displayed in sequence when you press the
Info/Esc key repeatedly:
• Image without additional information
• Image with histogram and camera information
• Image with camera information and picture information
The Settings key brings up the menu for the basic settings of the Sinarback eMotion.
The Power key is used for switching the Sinarback eMotion on or off.
4.1.1 Activating the Sinarback eMotion
The Sinarback eMotion is activated by pressing the Power key. When the power has been switched on, the
LED next to the Power key will light up in an orange color. When the starting process has been completed,
that LED will light up in green to indicate that the Sinarback eMotion is now ready for action.
4.1.2 The Menus
The Sinarback eMotion has two different menus. One is the Settings menu, which is used for making the ba-
sic settings for the Sinarback eMotion. The other one is the Image Control menu, which is called up via the
OK/Menu key. This one is the control center during the exposure. The arrow keys are used for navigating
within these menus. To confirm a setting, use the OK/Menu key located in the center of the arrow keys. To
cancel the changes, use the Info/Esc key.
 Loading...