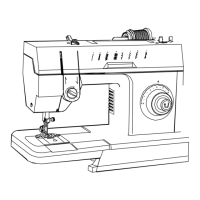
REGULATING
THE
STITCH
LENGTH
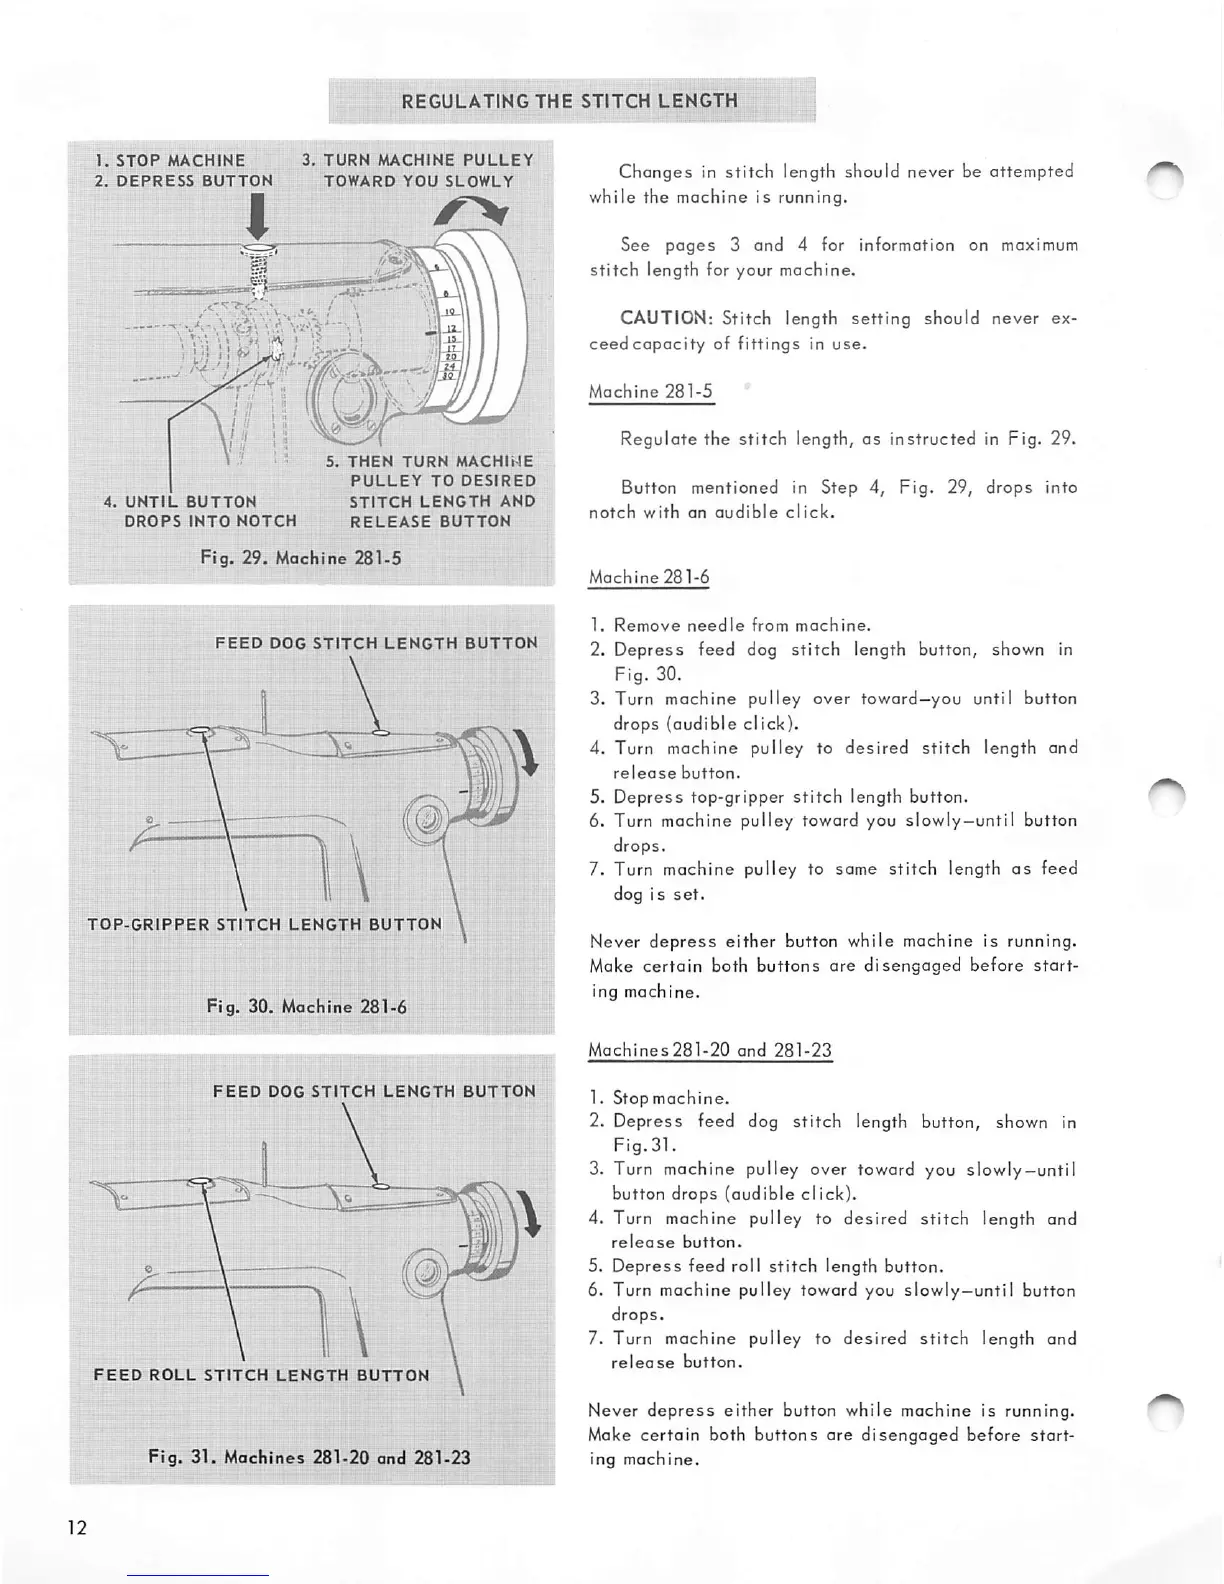
STOP
MACHINE
3.
TURN
MACHINE
PULLEY
2.
DEPRESS
BUTTON
TOWARD
YOU
SLOWLY
/'
—7^
'i
'((JhMU
V ' 5. THEN TURN
MACHINE
PULLEY
TO
DESIRED
4.
UNTIL
BUTTON
STITCH
LENGTH
AND
DROPS
INTO
NOTCH
RELEASE
BUTTON
Fig.
29.
Machine 281-5
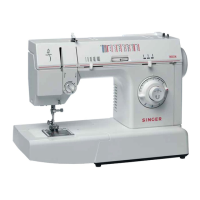
FEED
DOG
STITCH
LENGTH
BUTTON
TOP-GRIPPER
STITCH
LENGTH
BUTTON
Fig.
30.
Mochlne
281-6
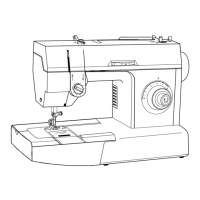
FEED
DOG
STITCH
LENGTH
BUTTON
FEED
ROLL
STITCH
LENGTH
BUTTON
Fig.
31.
Machines
281-20
and
281-23
Changes
in
stitch
length should never be attempted
while
the
machine
is running.
See
pages
3 and 4 for information on maximum
stitch
length for your machine.
CAUTION: Stitch length
setting
should never ex-
ceedcopacity
of
fittings
in
use.
Machine
281-5
Regulate
the
stitch
length,
as
instructed
in Fig. 29.
Button mentioned in Step 4,
Fig.
29,
drops
into
notch
with
an
audible
click.
Machine
281-6
1.
Remove
needle
from
machine.
2.
Depress
feed dog
stitch
length button, shown in
Fig. 30.
3. Turn machine pulley over toward—you until button
drops (audible click).
4. Turn machine pulley to
desired
stitch
length and
release
button.
5.
Depress
top-gripper
stitch
length button.
6. Turn machine pulley toward you slowly—until button
drops.
7. Turn machine pulley to same
stitch
length
as
feed
dog is
set.
Never
depress
either
button while machine is running.
Make
certain
both
buttons
are
disengaged
before
start
ing
machine.
Machines281-20
and
281-23
1.
Stopmachine.
2. Depress feed dog stitch length button, shown in
Fig.31.
3. Turn machine pulley over toward you slowly—until
button drops (audible click).
4. Turn machine pulley to
desired
stitch
length and
release
button.
5.
Depress
feed roll
stitch
length button.
6. Turn machine pulley toward you slowly—until button
drops.
7. Turn machine pulley to
desired
stitch
length and
release
button.
Never
depress
either
button while machine is running.
Make certain both buttons are
disengaged
before
start
ing machine.