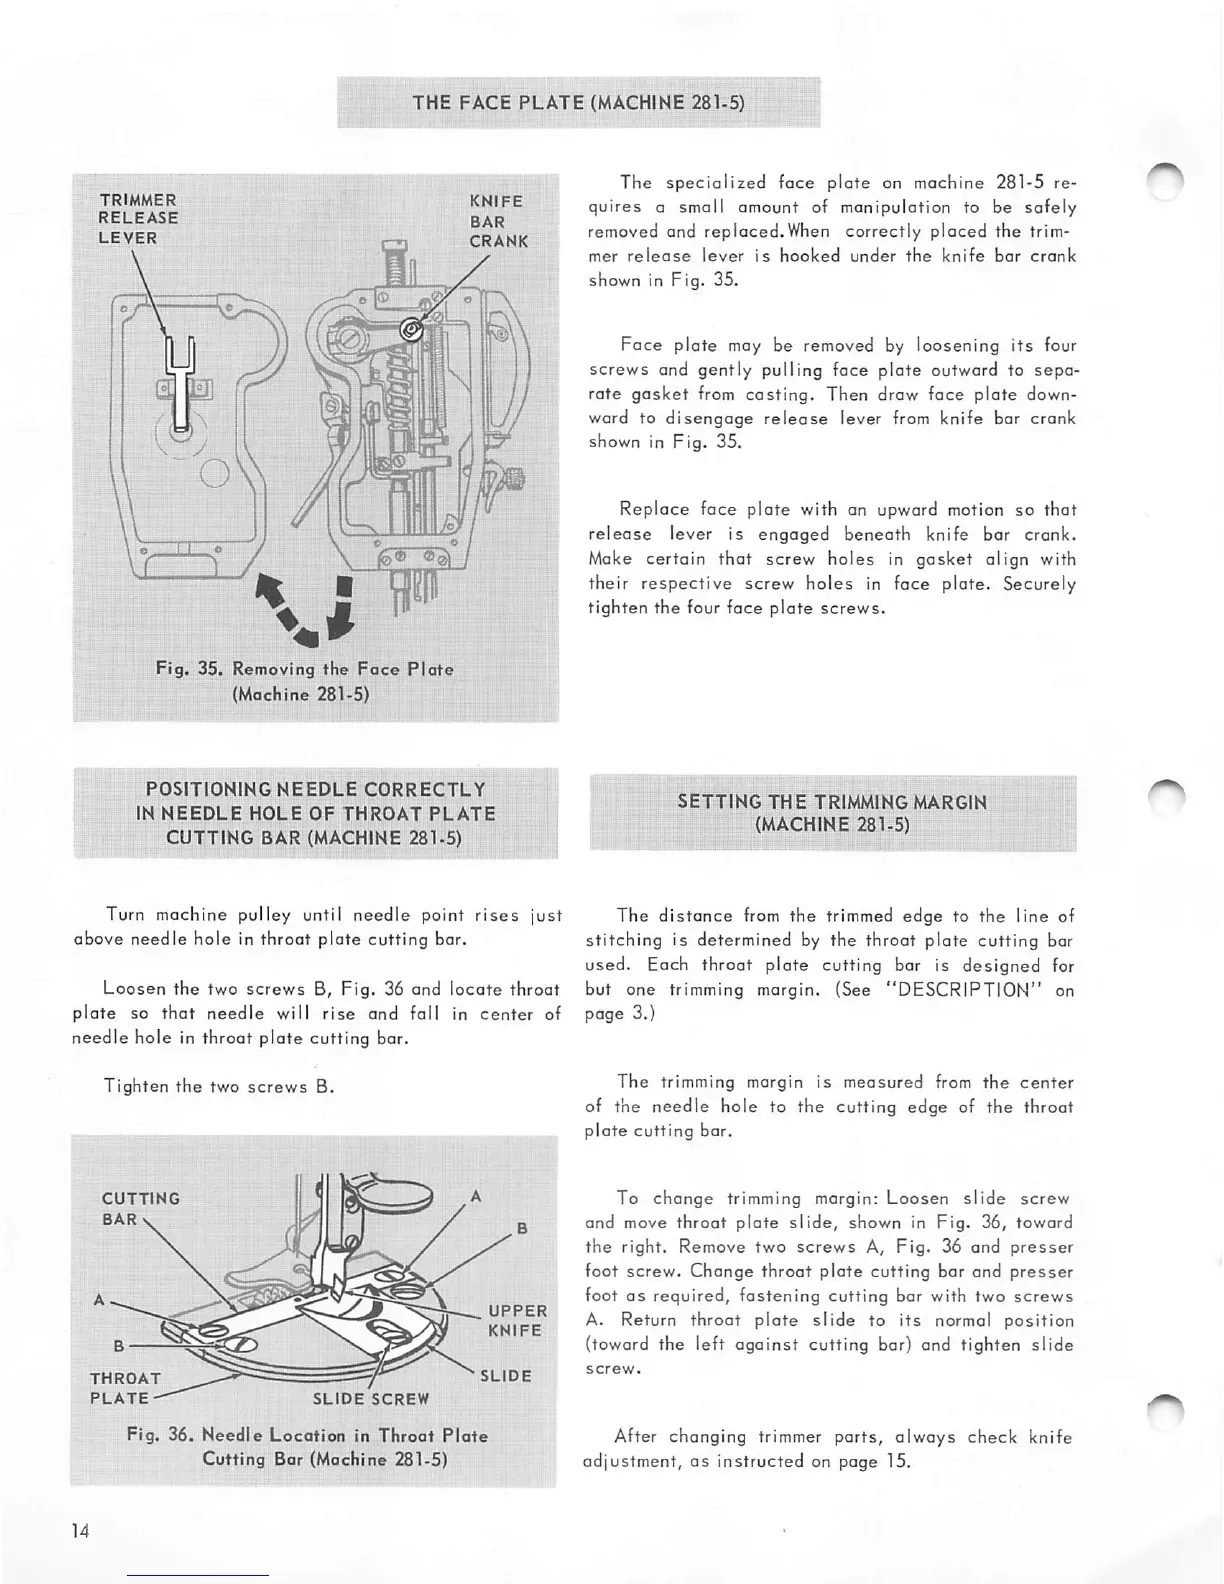
THE
FACE
PLATE
(MACHINE
281-5)
TRIMMER
RELEASE
LEVER
% •
\*
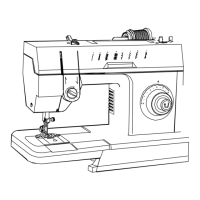
Fig.
35. Removing the
Face
Plate
(Machine
281-5)
KNIFE
BAR
CRANK
POSITIONING
NEEDLE
CORRECTLY
IN
NEEDLE
HOLE
OF
THROAT
PLATE
CUTTING
BAR (MACHINE 281-5)
The
specialized
face
plate
on
machine
281-5 re
quires a small amount of manipulation to be
safely
removed and replaced.When correctly
placed
the trim
mer
release
lever
is
hooked
under
the
knife
bar
crank
shown in Fig. 35.
Face plate may be removed by loosening
its
four
screws
and gently pulling face
plate
outward to
sepa
rate
gasket
from
casting.
Then draw face
plate
down
ward to
disengage
release
lever from knife bar crank
shown in Fig. 35.
Replace
face
plate
with an upward motion so
that
release
lever is engaged beneath knife bar crank.
Make certain that screw holes in gasket align with
their respective screw holes in face plate. Securely
tighten
the
four
face
plate
screws.
SETTING
THE
TRIMMING
MARGIN
(MACHINE 281-5)
Turn machine pulley until needle point
rises
just The
distance
from
the trimmed edge to the line of
above needle
hole
in throat plate cutting bar.
Loosen
the
two
screws
B, Fig. 36 and
locate
throat
plate
so
that
needle
will
rise
and
fall in
center
of
needle hole in throat plate cutting bar.
Tighten
the
two
screws
B.
CUTTING
BAR
V
THROAT
PLATE^
SLIDE
SCREW
UPPER
KNIFE
Fig. 36.
Needle
Location
in
Throat
Plate
Cutting
Bar
(Machine
281-5)
stitching
is determined by the throat
plate
cutting bar
used. Each throat plate cutting bar is designed for
but one trimming margin. (See
"DESCRIPTION"
on
page 3.)
The
trimming margin is
measured
from
the
center
of the
needle
hole to
the
cutting edge of the throat
plate
cutting
bar.
To
change
trimming margin:
Loosen
slide
screw
and move
throat
plate
slide,
shown in
Fig.
36, toward
the
right. Remove
two
screws
A,
Fig.
36 and
presser
foot screw. Change throat
plate
cutting bar and
presser
foot
as
required,
fastening
cutting bar with two
screws
A.
Return
throat
plate
slide
to
its
normal
position
(toward the left
against
cutting bar) and tighten
slide
After changing trimmer parts, always check knife
adjustment,
as
instructed
on page 15.