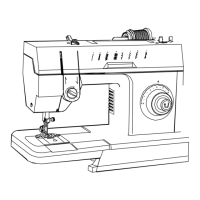
SETTING
THE
CHECK
SPRING
HEIGHT
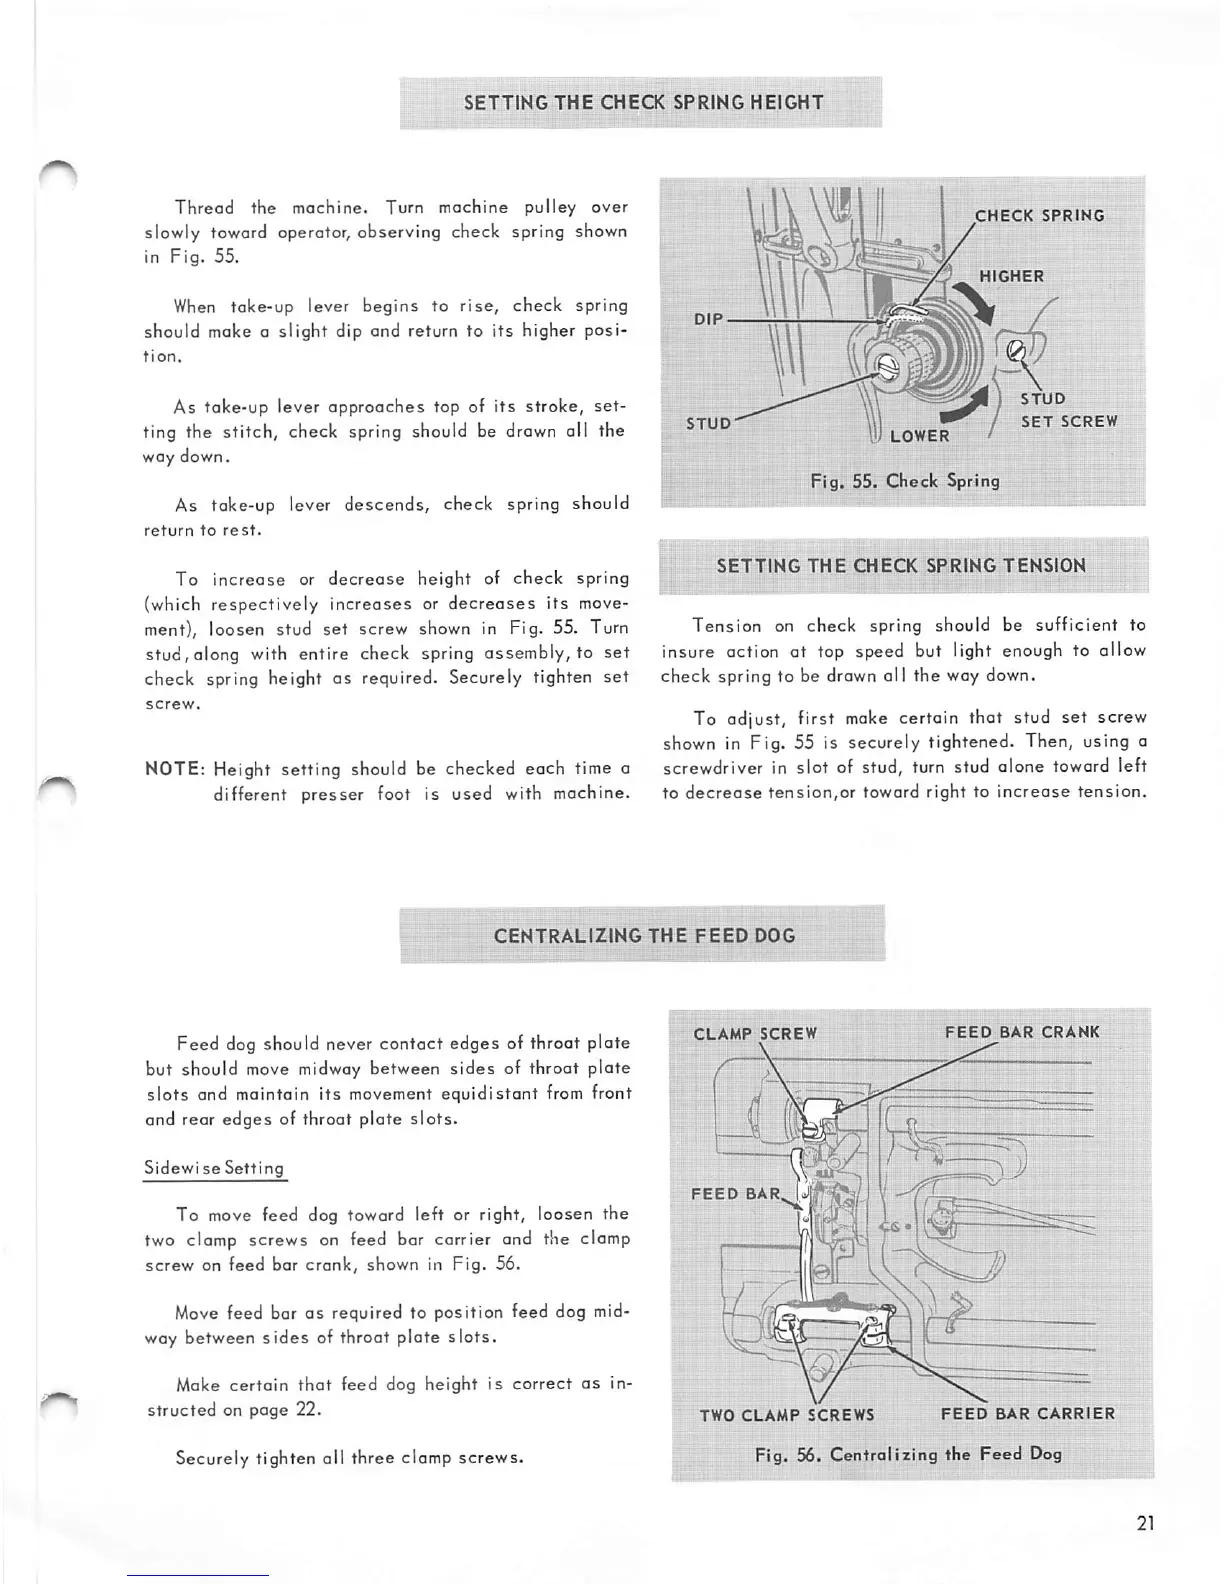
Thread
the mochine. Turn machine pulley
over
slowly toward operator, observing check spring shown
in
Fig.
55.
When
take-up lever begins to
rise,
check spring
should moke a
slight
dip and return to
its
higher posi-
As toke-up lever
approaches
top of
its
stroke,
set
ting the stitch, check spring should be drawn all the
way down.
As take-up lever descends, check spring should
return
to
rest.
To
increase
or
decrease
height of
check
spring
(which
respectively
increases
or
decreases
its
move
ment), loosen stud
set
screw shown in Fig. 55. Turn
stud, along with entire check spring ossembly, to set
check spring height as required. Securely tighten set
NOTE: Height setting should be checked each time a
different presser foot is used with machine.
ir
LOWER
CHECK
SPRING
HIGHER
\
STUD
SET
SCREW
1.
Fig.
55.
Check
Spring
SETTING
THE
CHECK
SPRING
TENSIO
Tension on check spring should be sufficient to
insure action at top speed but light enough to allow
check spring to be drawn all
the
way down.
To adjust, first
make
certain that stud set screw
shown in Fig. 55 is securely tightened. Then, using a
screwdriver in
slot
of stud, turn stud alone toward left
to
decrease
tension,or
toward right to
increase
tension.
CENTRALIZING
THE
FEED
D0(
Feed dog should never contact edges of throat plate
but should move midway between sides of throat plate
slots
and maintain
its
movement
equidistant
from front
and rear
edges
of throat plate
slots.
Sidewi
se
Setting
To move feed dog toward left or right, loosen the
two clamp screws on feed bar carrier and the clamp
screw
on feed bar
crank,
shown in
Fig.
56.
Move
feed bar as required to position feed dog mid
way between
sides
of throat plate
slots.
Make
certain
that
feed dog
height
is
correct
as
in
structed
on
page
22.
Securely tighten all three clamp screws.
CLAMP
SCREW
FEED
BAR
CRANK
FEED
BAR
Am
TWO
CLAMP
SCREWS
FEED
BAR
CARRIER
Fig. 56. Centralizing the Feed Dog