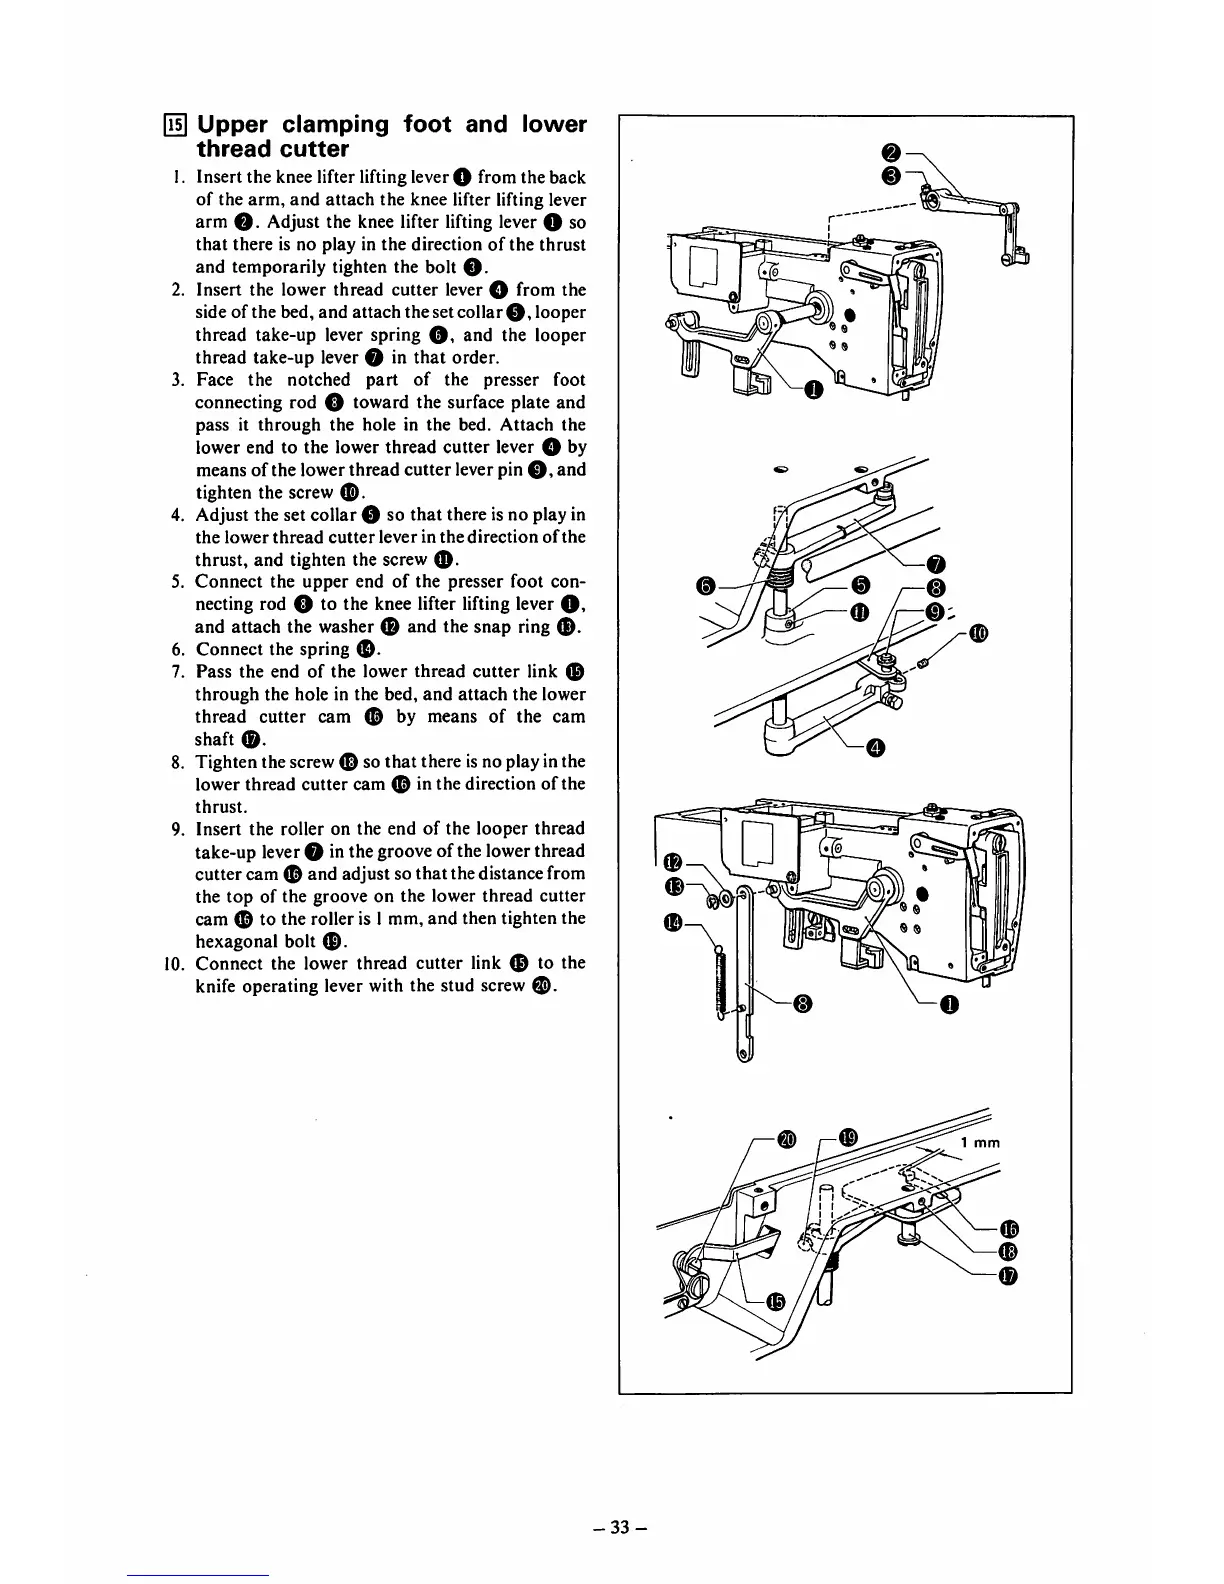
^
Upper
clamping
foot
and
lower
thread
cutter
1.
Insert the knee lifter lifting lever O froni the back
of the
arm,
and
attach the knee lifter lifting lever
arm
O-
Adjust the knee lifter lifting lever O so
that
there is no play in
the
direction
of
the
thrust
and temporarily tighten the bolt
O-
2. Insert the lower thread cutter lever O from the
side of the bed, and attach the setcollar
0,
looper
thread take-up lever spring
0,
and the looper
thread take-up lever 0 in that order.
3. Face the notched
part
of
the presser foot
connecting rod 0 toward the surface plate and
pass it
through
the hole in the bed.
Attach
the
lower end to the lower thread cutter lever 0 by
means of the lower thread cutter lever pin
0,
and
tighten the screw
0.
Adjust the set collar 0 so that there isno play in
the
lower
thread
cutter
lever
in
the
direction
of
the
thrust, and tighten the screw
0.
Connect
the
upper
end
of
the
presser foot con
necting rod 0 to the knee lifter lifting lever
0,
and attach the washer 0 and the snap ring
0.
Connect the spring
0.
Pass the end of the lower thread cutter link 0
through
the hole in the bed,
and
attach
the
lower
thread cutter cam 0 by means of the cam
shaft
0.
Tighten the screw0 so that there isno play inthe
lower thread
cutter
cam 0 in the direction
of
the
thrust.
9.
Insert
the
roller
on
the
end
of
the
looper
thread
take-up lever0 in the groove of the lowerthread
cutter cam 0 and adjust so thatthe distancefrom
the
top
of the
groove
on the lower
thread
cutter
cam 0 to the roller is I mm,
and
then tighten the
hexagonal bolt
0.
10. Connect the lower thread cutter link 0 to the
knife operating lever with the stud screw
0.
4.
5.
8
-33-
0