[T]
Thread
breakage
detection
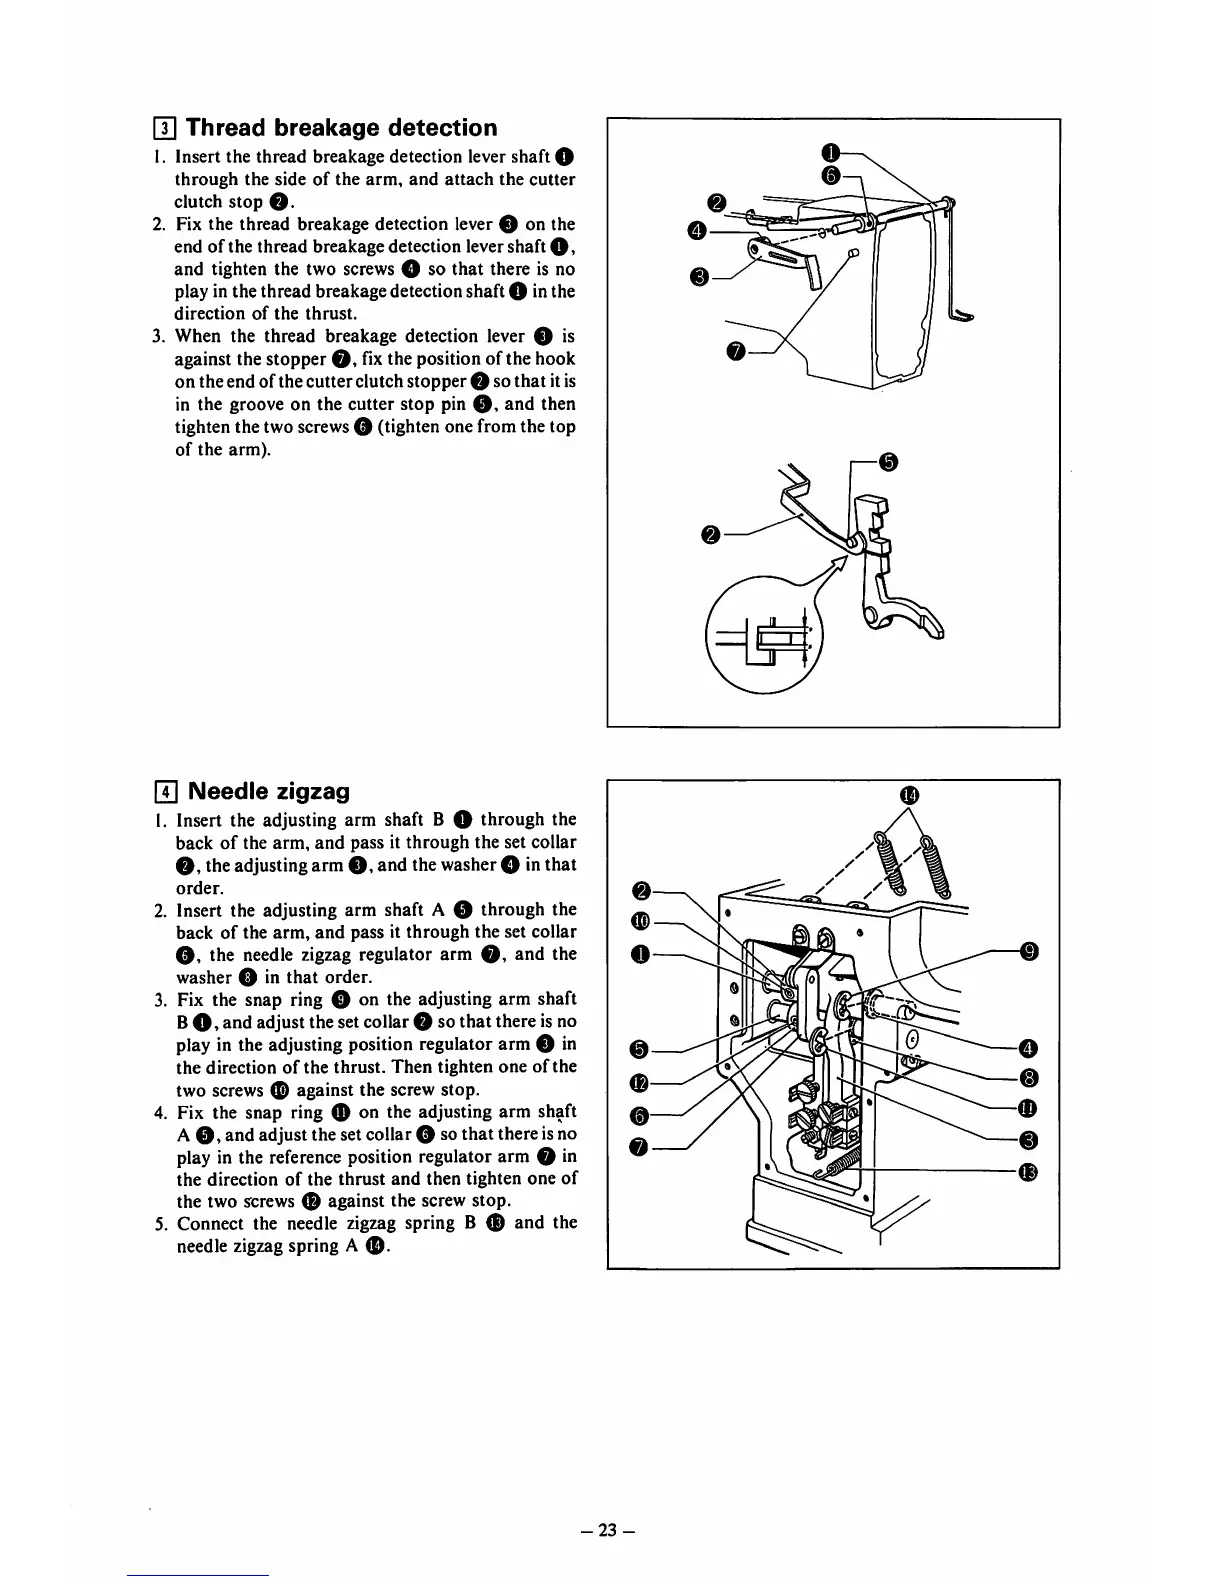
1. Insert the thread breakage detection lever shaft O
through
the side
of
the
arm,
and
attach
the
cutter
clutch stop
O.
2. Fix the thread breakage detection lever O on the
end
of
the
thread
breakage detection lever shaft
and tighten the two screws O so that there is no
play in the thread breakagedetectionshaft O inthe
direction
of
the
thrust.
3. When the thread breakage detection lever O is
against the stopper fix the position of the hook
on theend of the cutter clutch stopper O so that it is
in the groove on the cutter stop pin
0,
and then
tighten the two screwsO (tighten one from the top
of
the
arm).
[T|
Needle
zigzag
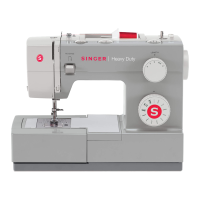
1.
Insert the adjusting arm shaft B O through the
back
of
the
arm,
and
pass it
through
the
set
collar
0,
the adjusting arm
0,
and the washer0 in that
order.
2. Insert the adjusting arm shaft A 0 through the
back
of
the
arm,
and
pass it
through
the
set collar
0,
the needle zigzag regulator arm
0,
and the
washer 0 in that order.
3. Fix the snap ring 0 on the adjusting arm shaft
B
0,
and adjustthe setcollar0 so that there isno
play in the adjusting position regulator arm 0 in
the direction
of
the thrust.
Then
tighten one of the
two screws 0 against the screw stop.
4. Fix the snap ring 0 on the adjusting arm shaft
A0,
and adjust the set collar 0 so that there isno
play in the
reference
position regulatorarm 0 in
the
direction
of
the
thrust
and
then
tighten
one
of
the two screws 0 against the screw stop.
5. Connect the needle zigzag spring B 0 and the
needle zigzagspring A
0.
0
-23-
0
0
0