[U
Upper
clamping
foot
lifter
adjustment
If these parts are not properly adjusted, the upper clamping foot may not be liftedand the material may slip
resulting in unsightly buttonholes.
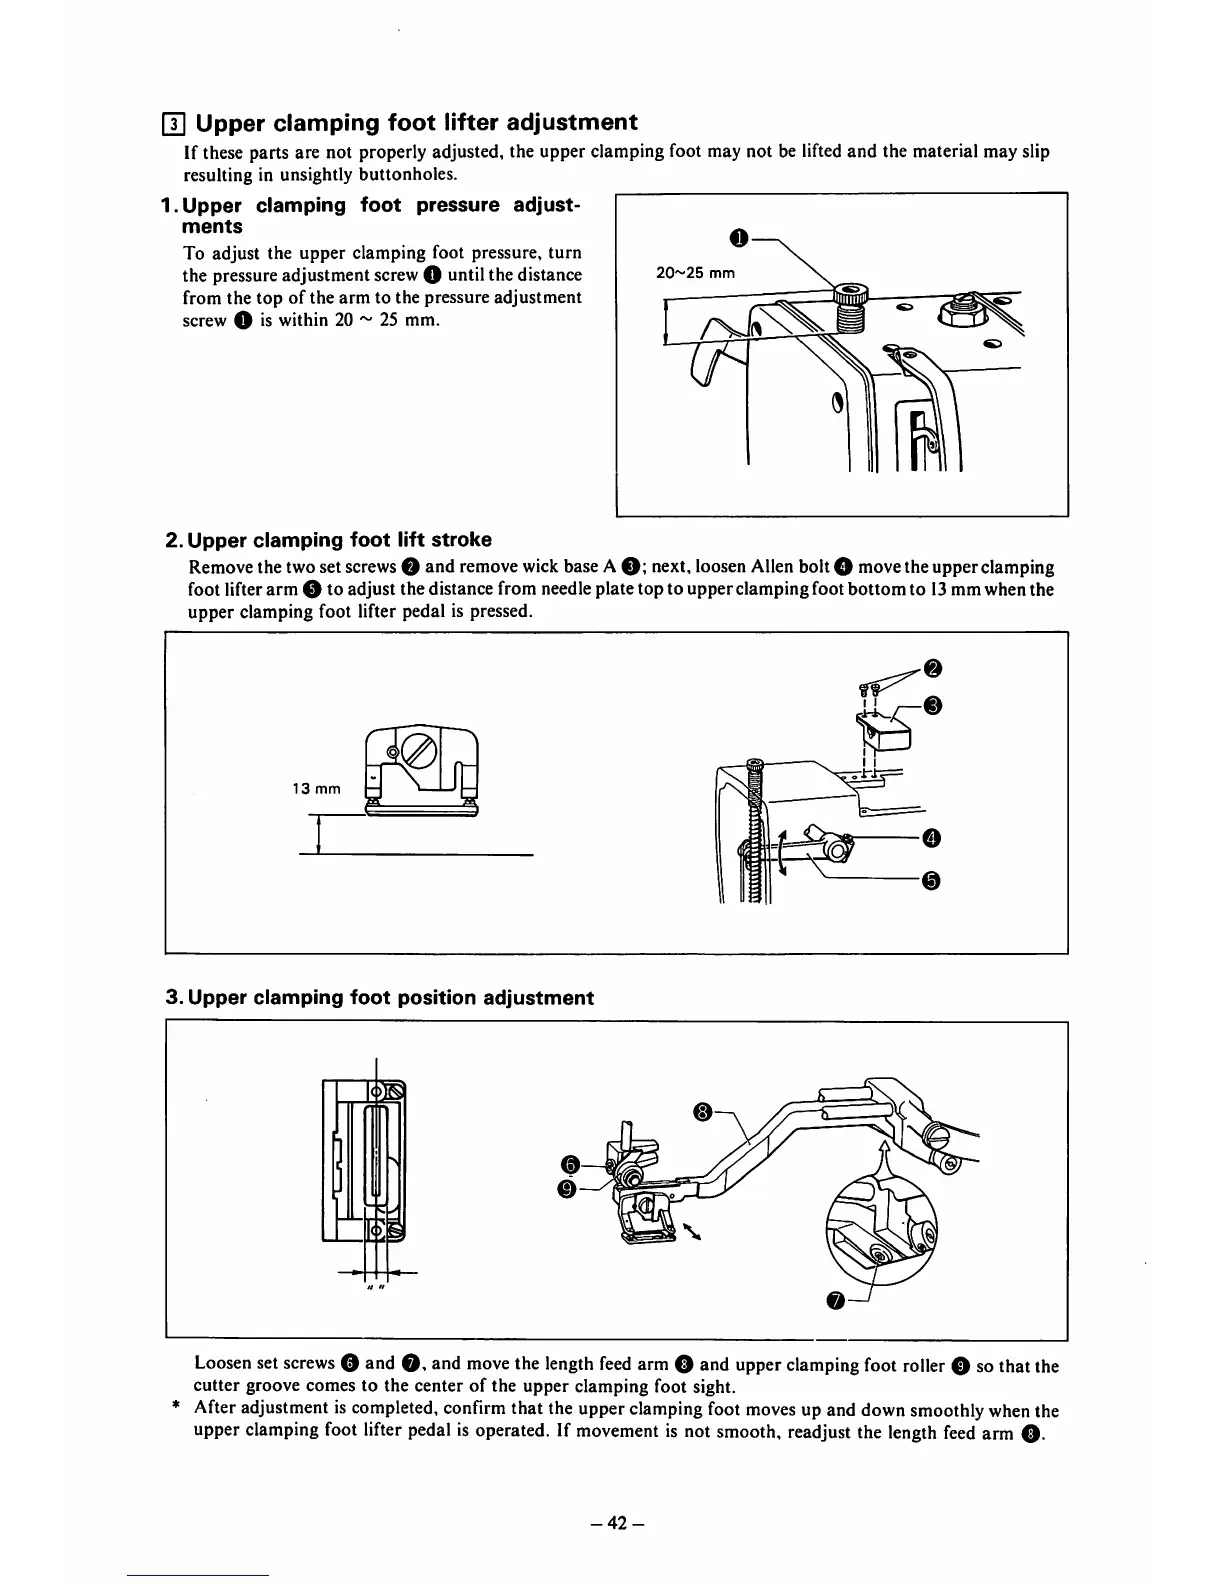
1.
Upper
clamping
foot
pressure
adjust
ments
To adjust the upper clamping foot pressure, turn
the pressureadjustment screwO until the distance
from the top of the arm to the pressure adjustment
screw O is within 20 ~ 25 mm.
20~25
mm
(T
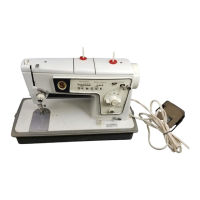
2.
Upper
clamping
foot
lift
stroke
Remove
the twoset
screws
O and
remove
wick
baseA
O;
next,
loosen
Allen
boltO
move
theupperclamping
foot lifter arm o to adjust the distance from needle plate top to upperclampingfoot bottomto 13mm when the
upper clamping foot lifter pedal is pressed.
13
mm
i
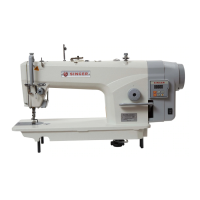
3.
Upper
clamping
foot
position
adjustment
Loosen
set
screws
O and O*and
move
the
length
feed
arm
O and
upper
clamping
foot
roller
O sothatthe
cutter groove comes to the center of the upper clamping foot sight.
Afteradjustment is
completed,
confirm
that the upper
clamping
foot
moves
up and
down
smoothly
when
the
upper
clamping
foot
lifter
pedal
is operated. If
movement
is not
smooth,
readjust
the
length
feed
arm O-
-42-