SiMUaA
®
Sew
Reach
P12
Introduction
(
3·
13. Setting a number
of
stitches
)
WARNING
:
To protect against possible personal
Injury
due
to
abNpt
start
of
the
machine, be sure to start
the
followlng work after
tum
Ing the power
ofl
and ascertaining that the mot
or
Is
at
rest.
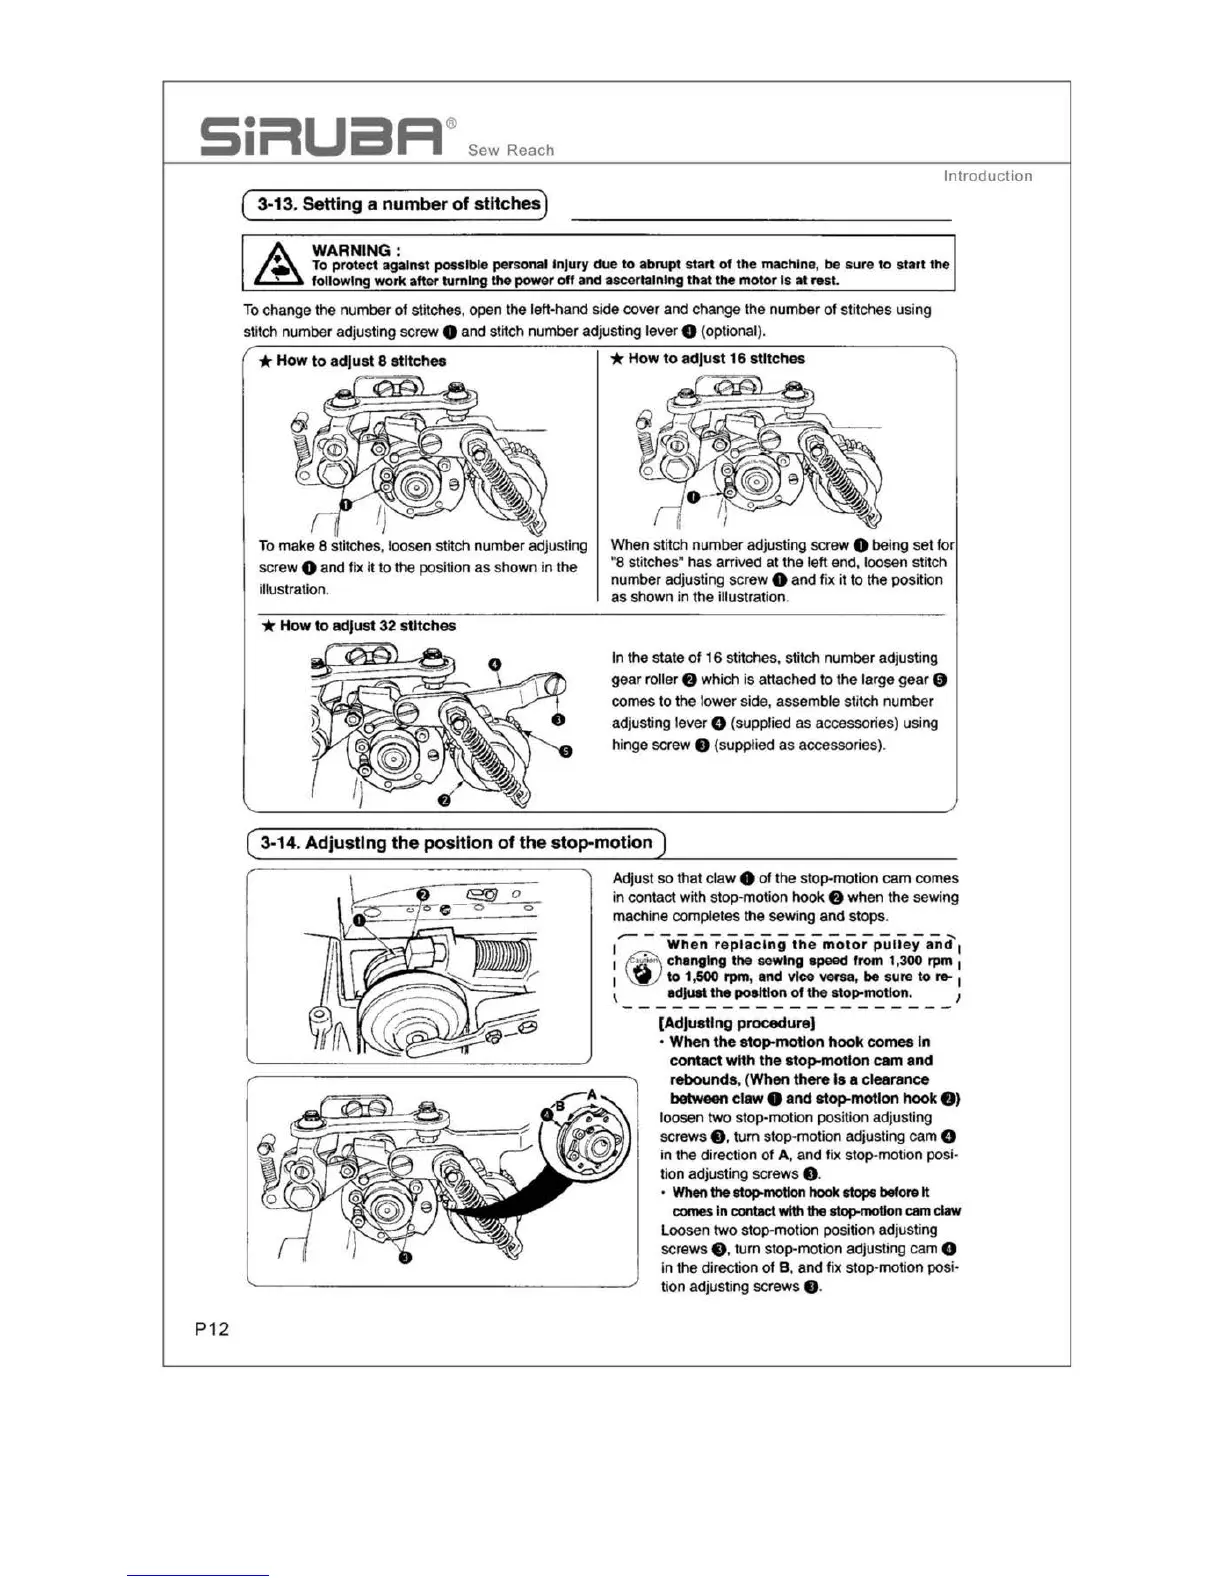
To
change
the
number of stitches, open the lelt•ha
nd
side
cover
and
change the number of stitches
us
ing
stitch number adjusting screw O and stitch number adjusting lever O (optional).
To
make 8 stitches, loosen stitch number adjusting
screw
O and fix
it
to the position
as
shown
in
the
illustration.
* How to adjust 32 stitches
When stitch nu
mber
adjusting screw O being
set
f
or
•a stitc
he
s•
ha
s arrived
at
the left end, loosen
st
it
ch
number adjusting screw e and f
ix
it
to
the position
as
shown
in
the illustration.
In
the
state
of
16
stitches. stitch number adjusting
gear roller
O which
is
attached
to
the
large
ge
ar
9
comes
to the
lo
wer
side, assemble stitch number
adjusting lever
O
(s
upplied
as
accessories) using
hinge screw
O (supplied
as
accessories).
Adjust
so
that cl
aw
e of the stop-moti
on
cam
com
es
in
contact with stop-motion hook O when the sewing
machine completes the sewing
and
stops
.
1
..--
When
re
placing
the
motor
pull
ey
anci'
1
1
~
c
hanging
the
sewi
ng
epeed from 1,300 rpm
1
1
~
to
1,500 rpm, e
nd
vice
vec-sa
,
be
sure
to
,...
1
\
edJuet
the poeltton of the
stop-motion.
1
[Adjusting procedur
e]
•
When
the
stop-motion
hook
comes In
contact with the atop-motion cam and
rebOund
s,
(When there Is a
clearance
between
claw
O and stop-motion
hook
8)
loosen
two
stop-moti
on
position adj
us
ting
screws
e,
tum
stop-motion adjusting
ca
m 0
in the direction of A, and fix
stop
-motion posi-
tion
ad
justing screws e.
•
When
the
atop-motion
hook
atope
before
tt
comes
in contact
with
the
~tlon
cam claw
Loosen two stop-moti
on
position adjusting
scr
ew
s e. turn stop-motion adjusting cam 8
in the
di
rection
of
B, and fix stop-motion posi•
lion adjusting screws e.