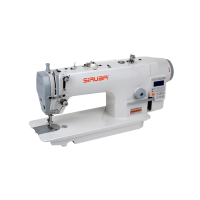
SiMUaA
®
Sew
Reach
P20
Introduction
(
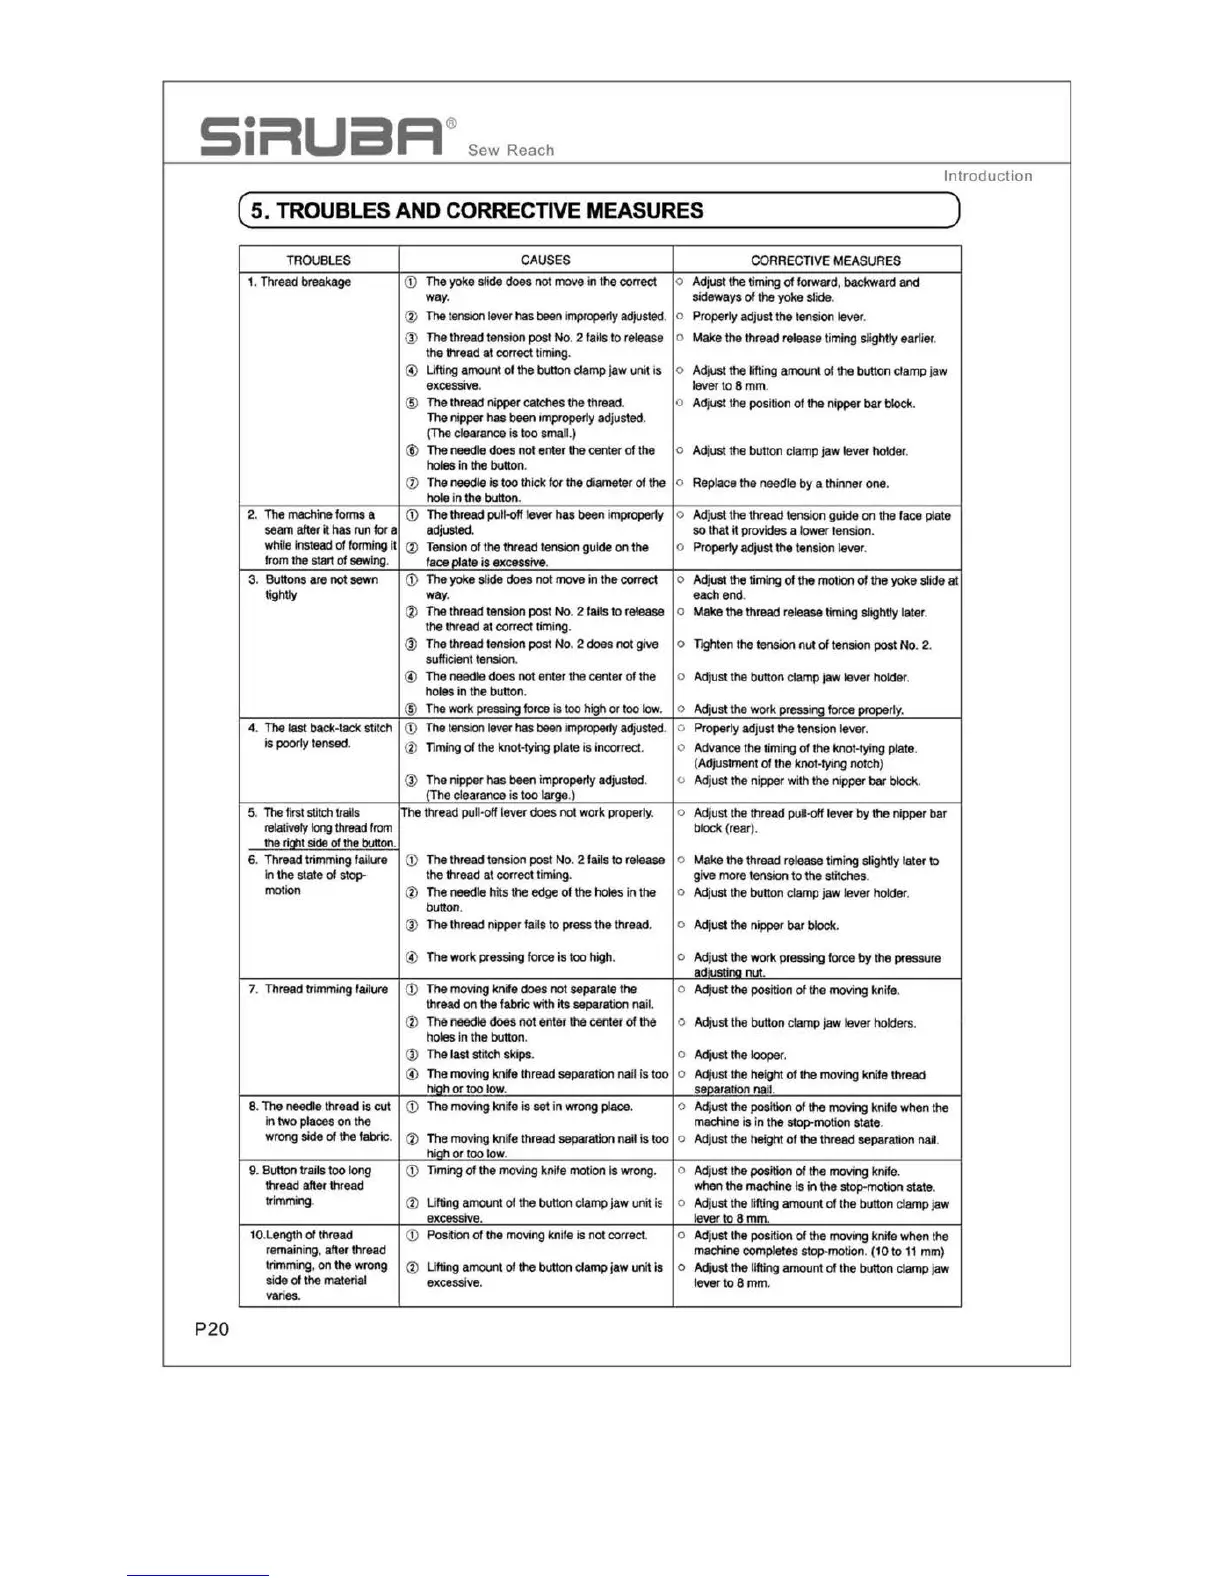
5.
TROUBLES
AND
CORRECTIVE MEASURES
)
TROUBLES
1.
Thread
breakage
2. The
machine
forms a
seam
alter
it
has run
fo<
a
while
instead of
forming
it
from
the
start of
sewing
.
3.
Bunons
are
not
sewn
tightly
CAUSES
CORRECTIVE
MEASURES
(j)
The
yoke
sl
icSe
does
not
move
in
the
correct o Adjust
the
timing of fo,ward. backward
and
way. sideways of
the
yoke
slide.
@
The
tension
lever has been
improperly
adjusted.
o
Properly
adjust the tension lever.
® The thread tension post
No
. 2 falls to release o
Make
the
thread release ti
ming
slightly earlier.
the
thread
at correct timing.
© Utting amount ol
the
bunon clamp
Jaw
unit is o Adjust
the
lifting amoont
ol
the
button clamp
jaw
excessive.
@
The
thread nipper catches the thread.
The nipper has
been
improperly adjusted.
(The
clearance is
too
small.)
@
The
needle does not enter
the
center of the
holes
in
the
button.
(l)
The
needle is too thick
for
the
diameter of
the
hole in
the
button.
(j) The thread pull-off lever has
been
i
mpropel1y
adjusted
.
®
Tension
of
the thread tension guide on the
lace ru1e
is
excessrve
.
© The
yoke
slide
does
not
move
in
the
correc:1
way
.
®
The
thread tension post No. 2 fails to release
the thread at correct timing.
@
The
thread
tension post No. 2 does not
give
sufficient tension.
lever
to
8 mm.
o Adjust
the
position of
the
nipper
bar
block
.
o Adjust
the
button clamp jaw lever
holder
.
o
Replace
the
needle by a thinner one.
o Adjust the thread tension guide on the lace plate
so
that
~
provides a tower tension.
o
Propel1y
adjust the tension lever.
o Adjufll
the
timing of
the
motion of the yoke slide
at
each end.
o Make the thread release timing slightly later.
o Tlghten the tension nut of tension
post
No. 2.
© The
needle
does not enter the center of the o Adjust
the
button clamp jaw lever holder.
holes in
the
button.
@
The
work
pressing
f
orce
is
too
high
or
too
low. o Adjust the work pressing force properly.
4. The
last
badl-
tack
stitch
Ci)
The
tension
leV8f
has
been
impropelfy
adjusted
. o Properly adjust
the
tension
lever.
is poorly tensed. @
Timing
ol
the
knot-tying plate is incorrect. o
Advance
the
tim
ing of
the
knot-tying plate.
® The nipper has
beer1
improper1y
adjus
ted
.
!The clearance is too lar!18.)
5.
The
first
stilch
trails
!The
thread pull-off lever does not work properly.
relatively
long
thread
from
the
ridlt side
ol
the
button
.
6.
Thread
trimming failure
1n
the
state
of
stop-
motion
(j)
The thread tension post
No.
2 fails
to
release
the thread at co,rect timing.
@
The
needle htts the
edge
of
the
holes in the
button.
(
Adjustment
of
the knot-tying notch)
o
Ad
just
the
nipper with the nipper
bar
block.
o Adjust
the
thread
puN-off
lev8f by the nipper bar
block
(rear).
o Make
the
thread release t
im
ing slightly lat8f
to
give
more
tension to
the
stitches.
o Adjust the
bunon
clamp jaw lever hold8f.
@ The thread nipper fails to p,ess
the
thread. o
AdjUSI
the nipper
bar
blod<
.
© The
worl<
pressing force is too high.
7. Thread trimming failure
(j)
The moving kntte does not separate
the
thread on the fabric with its
SSJ)alalion
nail.
(V
TM
n$$dle dOes
no
t
enter
t11e
center
of
the
holes
in the button.
® The last stttch skips.
o
Ad
just
the
worl<
pressing force
by
the pressure
ad••-nut
.
o Adjust
the
position of
the
moving kntte.
o Adjust
the
button clamp jaw lever holders.
0 Adjust
the
looper
.
©
The
moving
knHe
thread
separation
na
il
is too o Adjust
the
he
ight of the moving knife thread
=h
or
too
low.
s&earation
na
il.
8.
The needle thread
is
cut
Ci)
The moving
knHe
is
set in wrong place.
In two places on
the
wrong
side
ol
the
fabric. @ The moving
kn
ife thread separation nail
is
too
hillh or too low.
9.
Button
trails too long
thtead
alter
thread
trimming,
10
.
Length
of
thread
remaining,
alter thread
trimming
, on t
he
wrong
side
of
the material
varies.
(j)
Timing of the
moving
knife
mot
i
on
Is
wrong.
®
lilting
amount
of
the
bunon clamp jaw
untt
i~
excessive.
(j)
Position of the moving knife
is
not correct.
@ Lifting amount
of
the button
clamp
jaw
unit
is
excessive.
o
Ad
just
the
position
of
the moving knife
whe
n
the
machine is in the stop-motion
sta
te.
o
Ad
just the height of the thread separation
nai
.
o Adjust the
position
of
the
moving
knHe
.
when
the
machine
Is
in the stop-motion state.
o Adjust the lifting amount
of
the button clamp jaw
lever to 8 mm.
o
Ad
just
the
posttion of the
moving
knHe
when
the
machine completes stop-motion. (10 to
11
mm)
o Adjust the lifting amount
of
the
button clamp jaw
lever
to 8 mm.