SiMUaA
® Sew Reach
Introduction
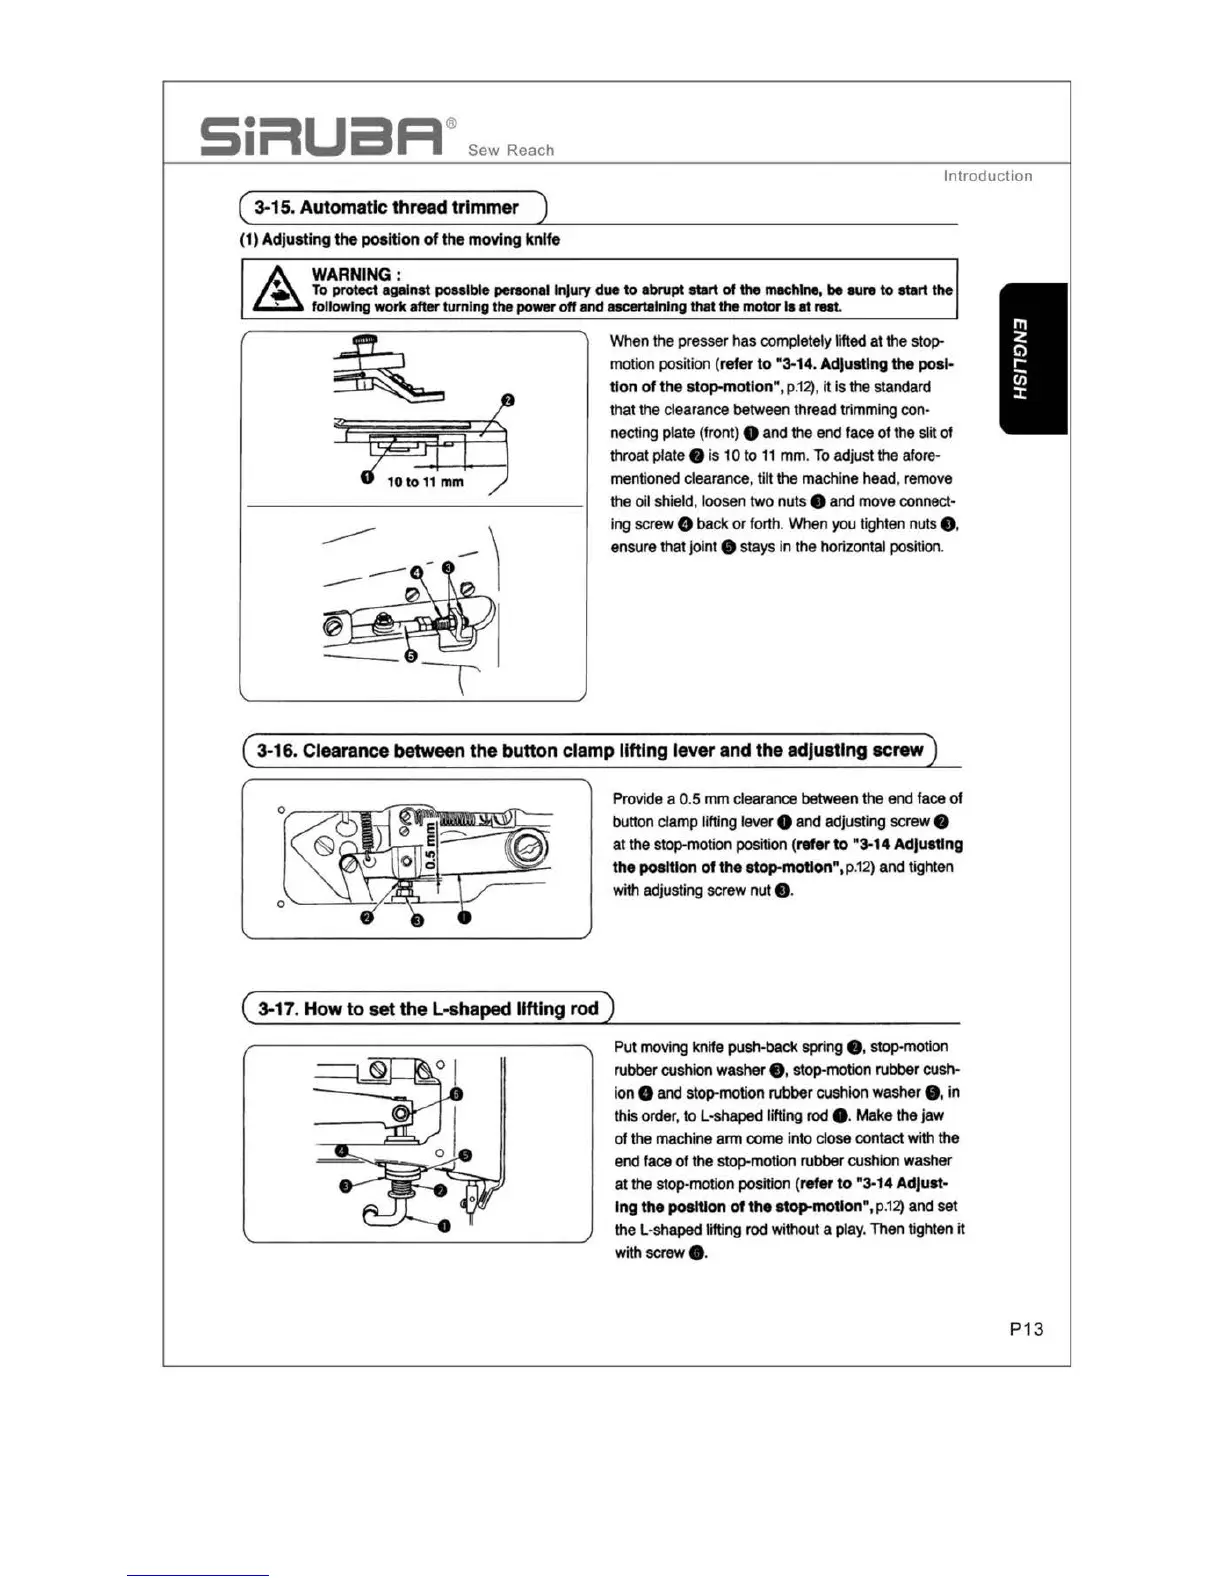
( 3-15. Automatic thread trimmer )
(1) Adjusti
ng
the
position
of
the moving knife
WARNING:
To
protect
against
poaalble personal Injury
due
to
abrupt
start
of
the
machine,
be
sure
to
start
the
following
work
after turning the
power
off
and atcertalnlng
that
the
motor la at
reel
----
When the presser has completely lifted at the stop-
motion position
(refer to "3-14.
AdJustlng
the
posi
-
tion
of
the
stop-motion",
p.
12)
,
it
is
the
standard
that the clearance between thread trimming
con-
necting plate (front) 8
and
the
end
face
of the slit of
throat plate 9 is 10 to
11
mm
.
To
adjust the afore-
mentioned clearance, tilt the machine h
ead
,
remove
the
oil shield, loosen two nuts 8
and
move
connect-
ing screw 8 back
or
forth.
When
you
tighten
nuts
9,
ensure that joint e stays in the horizontal position.
( 3-16. Clearance between the button clamp llftlng lever and
the
adjusting
screw
)
Provide a 0.5
mm
clearance between the
end
f
ace
of
button
clamp
lifting lever 8 and adjusting screw 9
at the stop-motion position (refer to "3-14
AdJustlng
the position of the atop-motion", p.
12)
and tighten
with adjusting screw nut • ·
( 3-17. How
to
set
the
L-shaped
fitting rod )
Put moving knife push-back spring 9 , stop-motion
rubber
cushion
washer
• • stop-motion rubber cush-
ion
e
and
stop-motion rubber cushion washer 8 , in
this order, to L-shaped lifting
rod
• ·
Mak
e the jaw
of
the machine
arm
come into close contact with the
end
face of the stop-motion rubber cushion washer
at the stop-motion position
(refer to "3-
14
AdJust-
lng the position
of
the stop-motion
",
p.
12)
and set
the L-shaped lifting rod without a play. Then tighten it
with
screw
8 .
P
13