SiMUaA
®
Sew
Reach
P14
Introduction
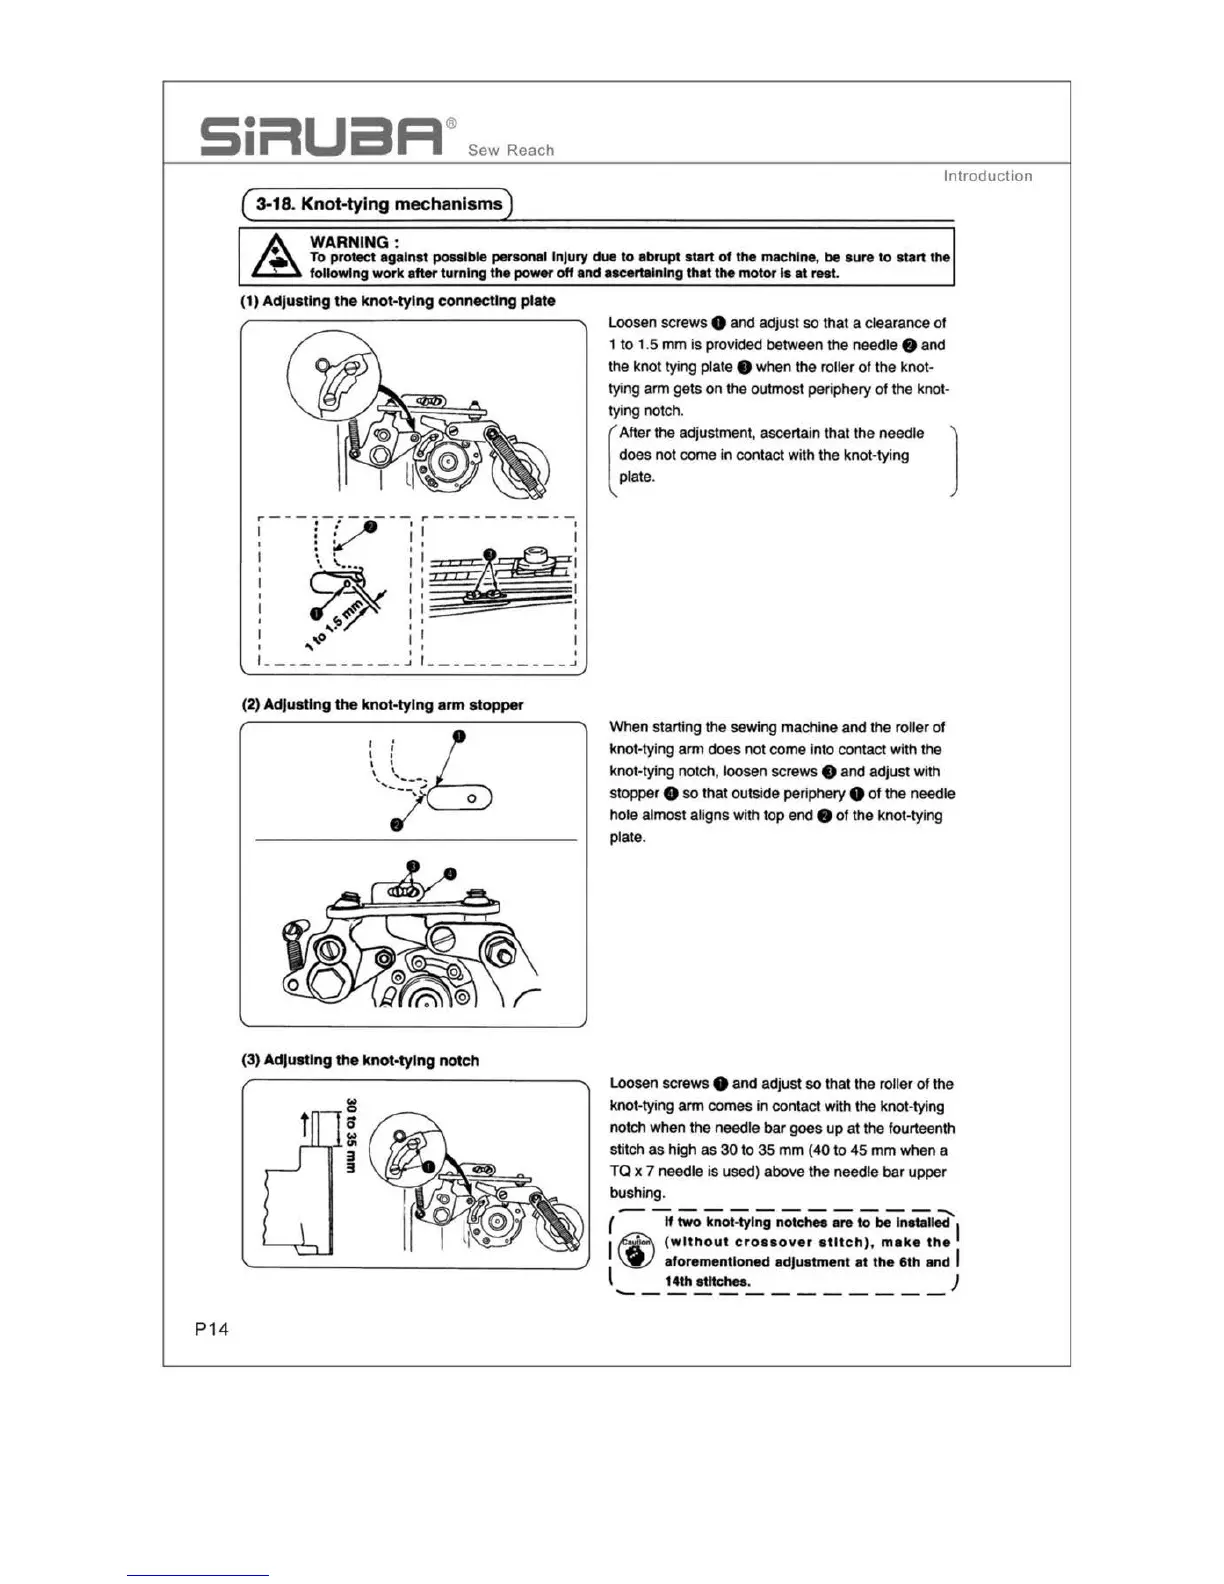
( 3-18. Knot-tying mechanisms)
WARNING :
To
protec
t
against
po
H
lble
pareonal
Injury
due
to
abrupt
start
of
the machi
ne
,
be
aura
to
start the
following
work
after
turning
the
po-
off
and aacertalnlng
that
the
mo
tor
la
at
rest.
(1) Adjusting
the
knot-tying connecting plate
,----
,-y
--
1 :
,'
I : I
I
' '
~
~~
,o
"
1
__________
_
I I
I
___________
_,
(2) Adjusting
the
knot-tyi
ng
arm stopper
·~
' :
I '
\.
\..,.
__
,
'---
..
.,,
0
(3) Adjusting
the
knot-tying
notch
Loosen screws 8
and
adjust so that a clearance of
1 to 1.5
mm
is
provided between the needle 8 and
the knot tying plate
• when the roller
of
the knot-
tying arm gets
on
the outmost
per
iphery
of
the knot-
tying notch.
(
After the adjustment, ascertain that the needle
does
not
come
in
contact with the knot-tying
plate.
]
When starting
the
sewing machine and t
he
roller of
knot-tying arm
does
not
come
i
nt
o contact with
th
e
kn
ot-tying notch, loosen screws • and adjust with
stopper
8 so
tha
t o
ut
side
per
ip
hery 8
of
t
he
needle
hole almost aligns with top
end
•
of
the
knot
-tying
plate.
Loosen screws
e
and
adjust so that the roller
of
the
knot-tying arm
comes
in
cont
act
with
the
knot-ty
in
g
notch when the needle
bar
goes
up
at
the fourteenth
stitch
as
high
as
30
to
35
mm
(40
to
45
mm
wh
en
a
TO
x 7 needle
is
used) above the needle
bar
upper
bushing.
-----
-------
-
(
If
two
knot-tyi
ng
notci-
are
to
be
In
sta
lled I
I ~.•
(without
c
roa
aove
r
stitc
h)
,
make
the
~
aforementioned
adJu
at
ment
at
the
6th
and
I
l
14
th
atltchN.
/
..._,
___
________ _