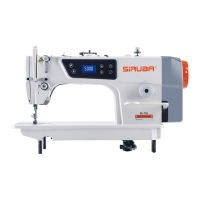
SiMUaA
®
Sew
Reach
Introduction
(
1)
Attachments
for
shank
buttons
(Pearl
buttons)
(Z033)
WARNING :
To protect against
po
ssi
ble
per
sonal Injury
due
to
abrupt
start of
the
machine,
be
sure
to s
tart
th
e
following work after turning
th
e power off
and
asce
rtaining
that
the
motor
11
at
rest.
(
ADJUSTMENT
AND
OPERATION)
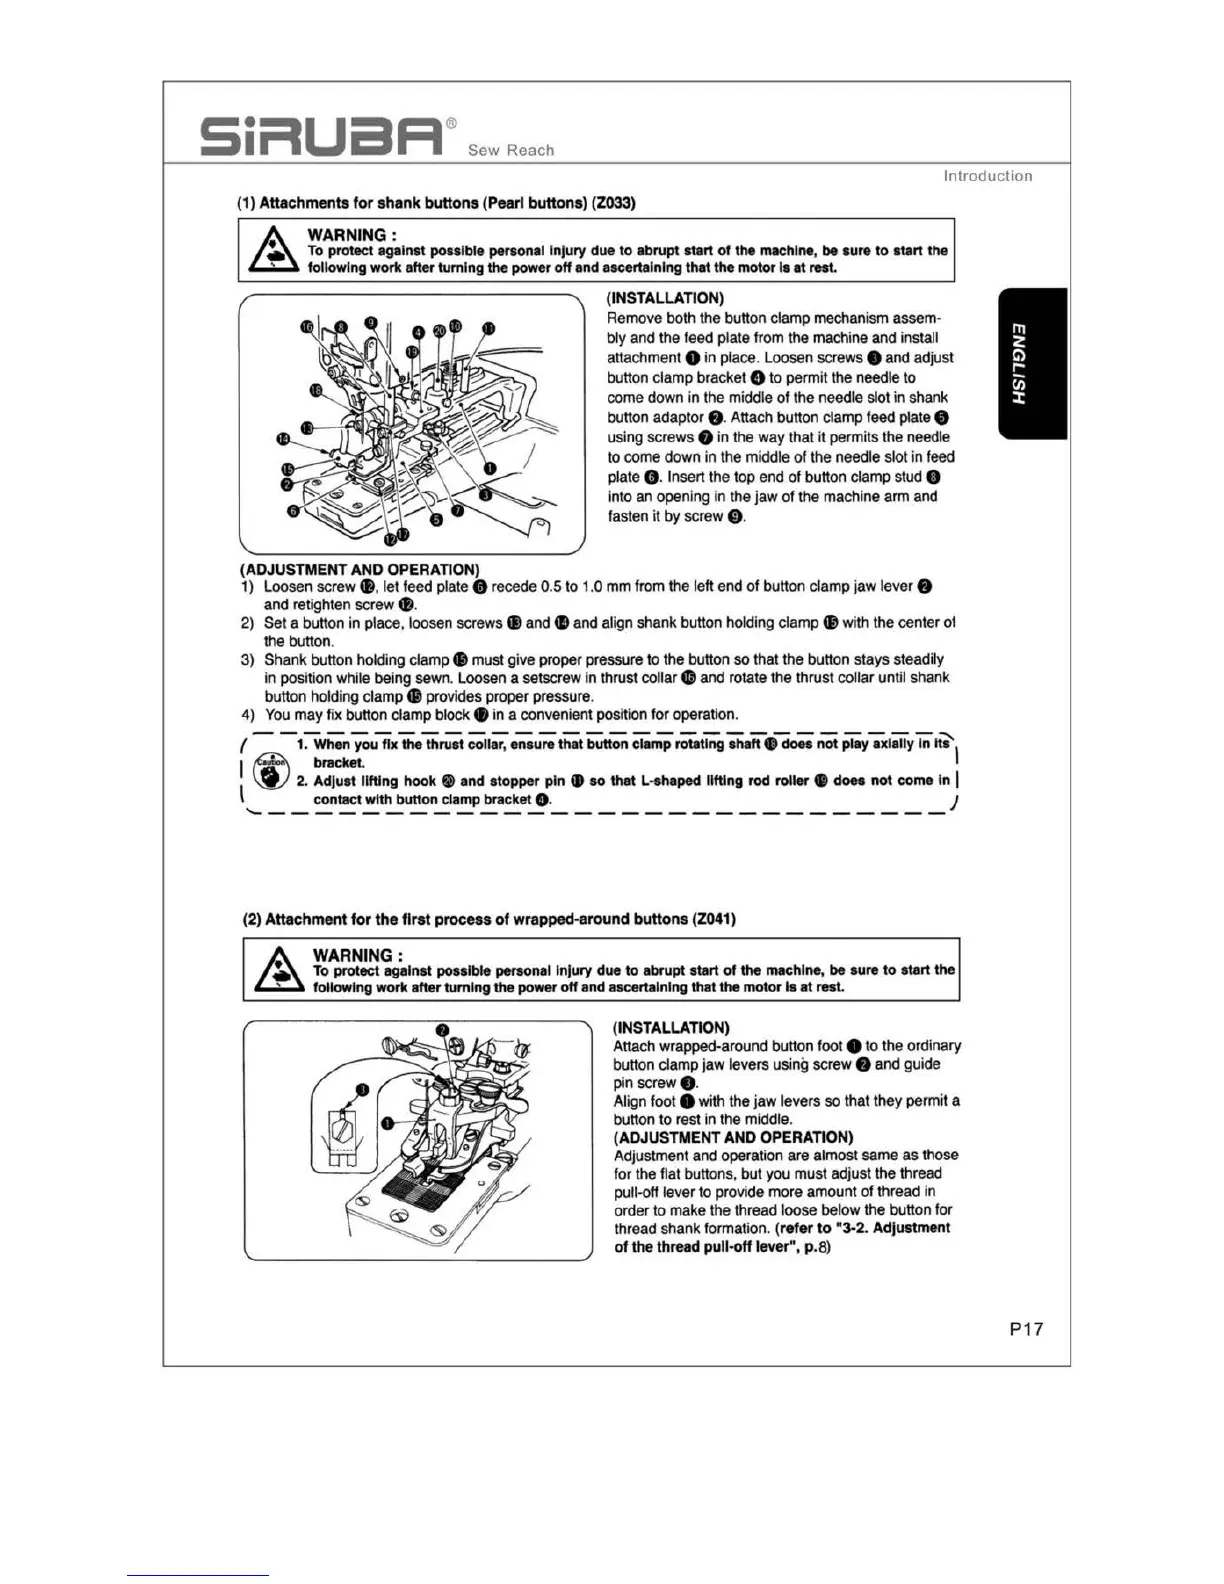
(INSTALLATION)
Remove both the button clamp mechanism assem-
bly and the feed plate from the machine and install
attachment
8
in
place. Loosen screws• and
ad
j
ust
button clamp bracket 8 to permit the needle
to
come down
in
the middle of the needle slot in shank
button adaptor
8 . Attach button clamp feed plate 8
using screws 8
in
the w
ay
that
it
permits the needle
to come
down
in the middle
of
the needle slot in feed
plate
ci,
. Insert the
top
end
of
button clamp stud O
into
an
opening in the jaw
of
the machi
ne
arm and
fasten it by screw
• ·
1) Loosen screw • • let feed plate
ci,
recede 0.5
to
1.0 mm
fr
om
the left end of button
clamp
jaw
leve
r 8
and retighten screw 9 .
2) Set a
bu
tt
on
in
place, loosen screws• and e and align shank button holding
clamp
49
with the center
ol
the button.
3) Shank button holding clam
p•
must give proper pressure
to
the button
so
that the button stays steadily
in
positi
on
while being sewn. Loosen a setscrew
in
thrust collar e and rotate the thr
ust
collar until shank
button holding cla
mp•
provides proper
pr
essure.
4)
You
may
fix bu
tt
on
c
la
mp block • in a convenient position
for
operation.
------------------------
-
----
~
/ 1. When
you
fix
the
thrust
c
ollar
,
ensu
re
that
button
clamp rotating s
haft
• does
no
t
pl
ay axially
In
Its
I
f:r\
bracket
1
1
\!I)
2.
Adju
st i1
ttlng
hook
• and stopper pin •
10
that
L-shaped
llfllng
rod
roller •
does
not come
In
I
contact
with
button
clamp bracket 8 , )
'-------------------------------
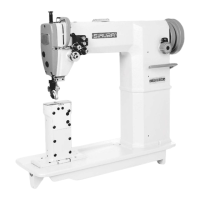
(2)
Attachment
for
the
first
process
of
wrapped-around
buttons
(Z041)
WARNING:
To
protect
against possible peraonal lnJury
due
to
abrupt
sta
rt
of
the
machine,
be
sure to s
tart
th
e
following
work
after turning the
power
off
and
ascertaini
ng
that the motor
11
at rest.
(INSTALLATION)
Att
ach
wrapped-around button foot 8
to
the ordinary
bu
tt
on
clamp
ja
w levers using screw 8
and
guide
pin
screw
e .
Align foot 8 with the
ja
w levers
so
that they permit a
button
to
rest in
the
middle.
(ADJUSTMENT
AND
OPERATION)
Adjustment and operat
ion
are almost same
as
those
for the flat butt
ons
, but you must ad
jus
t the thread
pull-off lever to provide more amount
of
thr
ead
in
order to make the thread loose below the button for
th
read shank formation. (refer
to
"3-2. Adjus
tment
of
th
e thread
pull-off
le
ver
",
p.
8)
P17