____________________________________________________________________________
PRINCIPLES
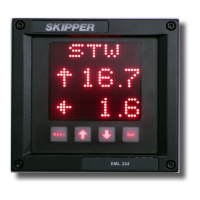
The CD401XX Compact display is a exible dot matrix LED display designed
to display navigation data. The display can be user programmed to show most
kinds of numerical data, from NMEA messages or self generated. It can also
be used as a primary sensor display for speed logs showing the speed values
produced by the sensor or as a simple repeater. The Compact speed log system
with its electronic unit (JB60CD) meets all the requirements of a primary device,
both functionally and electrically. On its own, it meets the requirements as a
repeater. The Compact display has three user denable alphanumeric displays,
each allowing up to 4 parameters to be displayed. When the device is used as
a primary device, some of these screens will be xed.
RUN SCREENS
The unit starts up in run mode. By pressing MENU button, the preset user
screens can be selected. Some of the menu screens (i.e alarms) are also
available in the run mode. The unit can be dimmed in any of the run screens
using the up (↑) and down (↓) buttons. If Trip/Total are selected as a displayed
parameter, they can be toggled using the SET button.
SETUP SCREENS
To change the setup of the Compact display, the user must simultaneously
press MENU and SET. This will give access to a menu system allowing the
user to scroll up and down the sub-menus and functions using up (↑) and down
(↓), and SET to select. To move to the previous menu, the MENU button must
be pressed. The middle underlined line is the selected line, the other lines are
dimmed.
The menu structure is shown in the diagram “Menu diagram” on page 28.
The menus are product dependant, only the relevant menus are accessible.
However, some menus are always available. To leave the menu screens and
return to the runtime screens press and hold the MENU button.
ACTIVATING THE RUNTIME SCREENS
The system has three user denable screens. Screen 1 may be locked in
some congurations. In addition, the user can make the most common setup