SKS-Kinkel Elektronik GmbH
20002110 BS2012 Audio Hands-free
EN
Support Hotline: +49 (0) 2661 98088-112
Support E-Mail: support@sks-kinkel.de
Version No. 3.0
Document No. 97000104
28
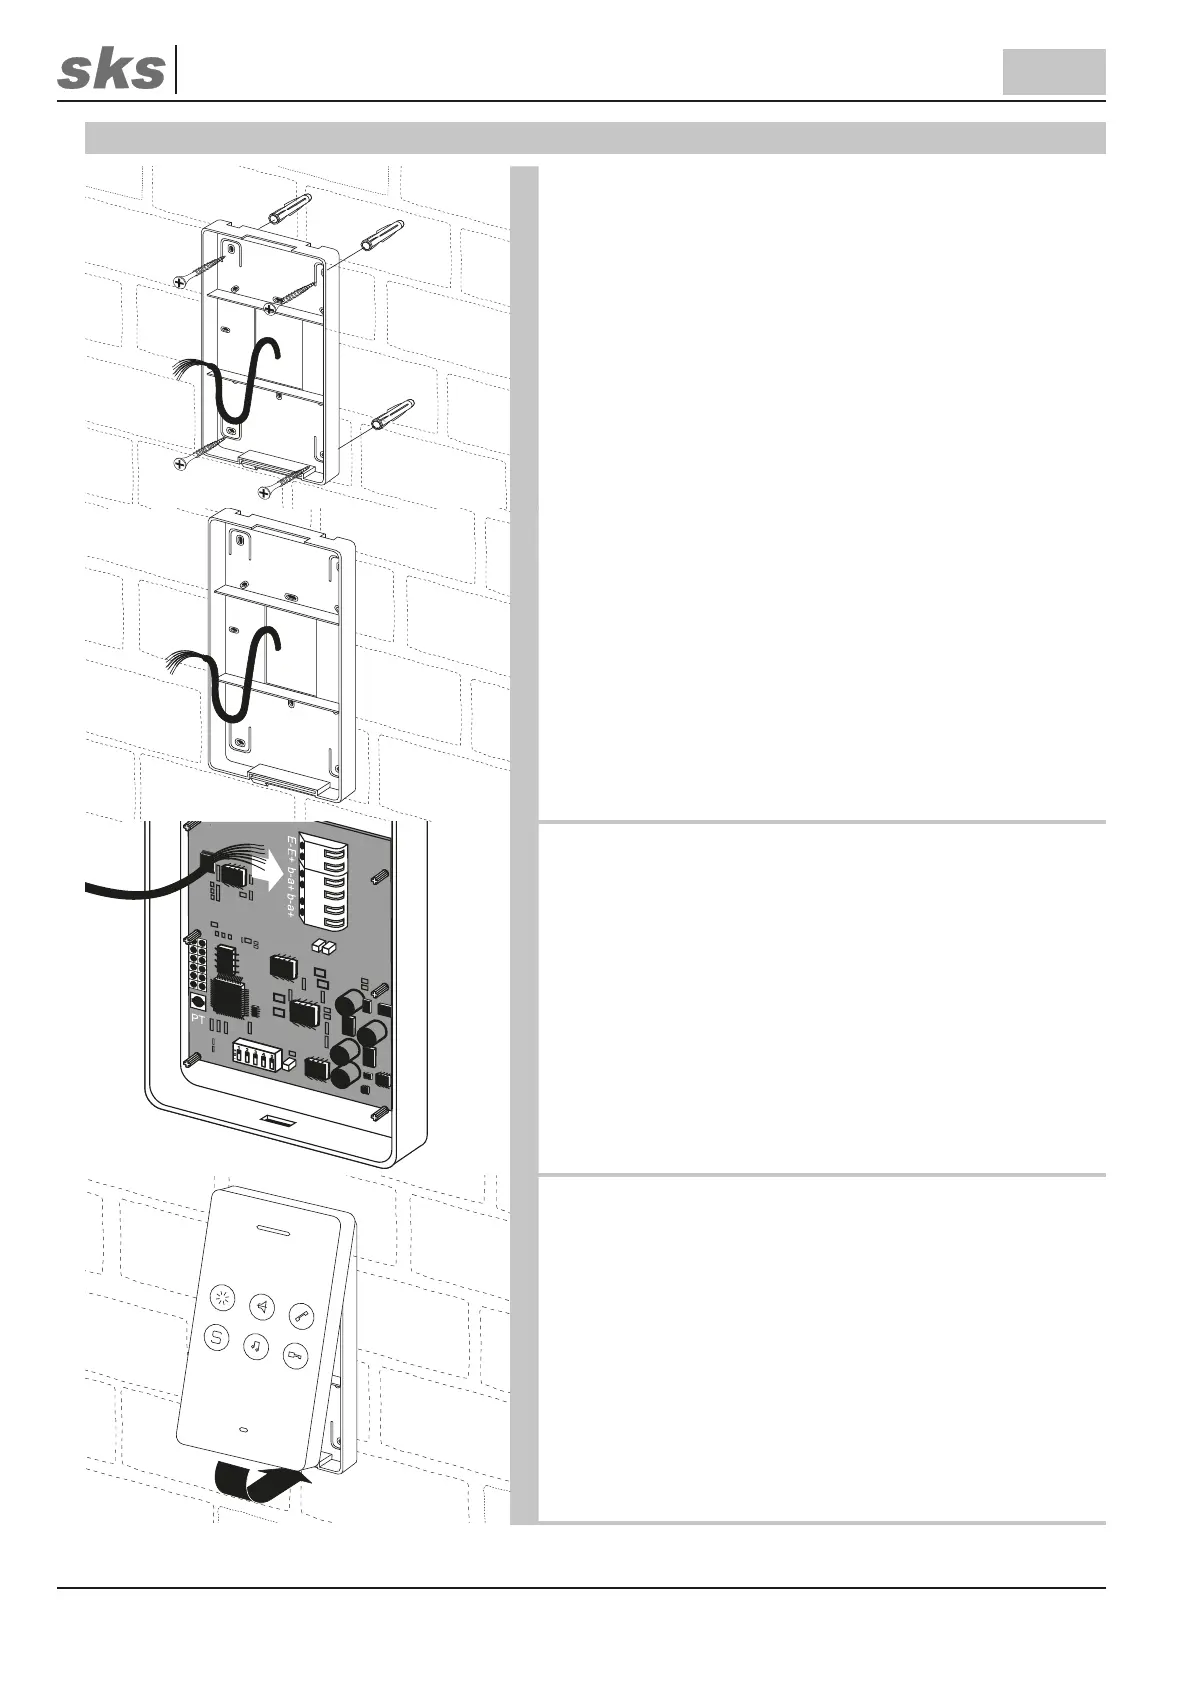
7.3 Surface mounting
Using the screws attach the supporting frame of the BS2012
Audio Hands-free Indoor station to the wall. Please use the
fastening holes provided on the supporting frame.
Pull the installation cable through one of the openings
of the supporting frame before screwing it onto the wall!
When doing so put only those wires into the device which are
actually needed. The cable mustn’t be squashed or bent sharp-
ly.
Set the SKS BUS call address at the DIP switch on the back
of the BS2012 Audio Hands-free Indoor station. Each address
is assigned to a bell button at the door station. The SKS BUS
table of call addresses can be found in the appendix.
Pay particular attention to the setting of the DIP switch
when the BS2012 Audio Hands-free Indoor station is re-
placed!
Remount the BS2012 Audio Hands-free Indoor station in the
upper part of the supporting frame. Please mind that no ex-
posed wires touch the circuit board at the back.
The push the BS2012 Audio Hands-free Indoor station onto the
frame until it clicks into place.
 Loading...