2. First Steps
Please fully charge the instrument before first use. This can be done with the
supplied USB cable and power supply. A loading on the PC is also possible. The
charging time with the included power supply is the quickest. The USB-C charging
socket is located on the left side of the device. The charging process stops
automatically when the battery is fully charged. The charging time is about 5 hours.
On the PC about 15 hours. An integrated charge / discharge protection protects the
battery from damage. The SKYTRAXX 2.1 has a lithium polymer battery installed. A
big advantage of these batteries is the low loss of charge during prolonged storage.
There is virtually no memory effect. The charged battery lasts for about 40 hours of
flight operation.
3. USB
When the USB cable is connected to the power supply and the device, the battery
begins to charge. A charge indicator is shown on the display. Pressing the menu
button will turn on the SKYTRAXX and continue charging. If you are on the screen
pages and insert the USB cable into the PC, the USB symbol appears on the
display. The device connects to your computer. A drive named SKYTRAXX appears
on the computer. Included there are all the data stored in different folders. In the
folder "flights" are e.g. all flights stored in IGC format and can be accessed. Before
the cable is pulled, the drive should be ejected from the computer.!
4. Switch on and off
By pressing the menu key the Skytraxx is switched on and a countdown is started.
This should be confirmed within 10 seconds with the OK button. The Vario is now
ready for use. To switch off, press and hold the menu button for 3 seconds. Again, a
countdown begins. If the switch-off is confirmed with the OK button within 10
seconds, the Vario switches off.!
5. Operation
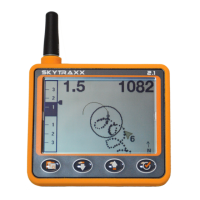
After switching on, the first screen is displayed. At delivery, this is the classic screen
page. With the OK button one changes to the next screen page. The middle buttons
are used to change the zoom factor on the Map and Thermal Assist pages. At the
fanet radar page the user can be changed. On the map side you can see the flight
symbol representing your own position. As long as no valid GPS signal is received,
this symbol is ➤ Gray. Only after a valid GPS signal the symbol ➤ Black is drawn.!
6. Main Menu
The menu key switches from the screen pages to the main menu. If you are in a
menu item, you can go back one level with the menu key until you are back at the
screen pages.!
If you remain on a menu item for more than 5 seconds, you will most likely receive a
tooltip (small pop-up window) that further describes the menu item.!
 Loading...