Configuration
3.21
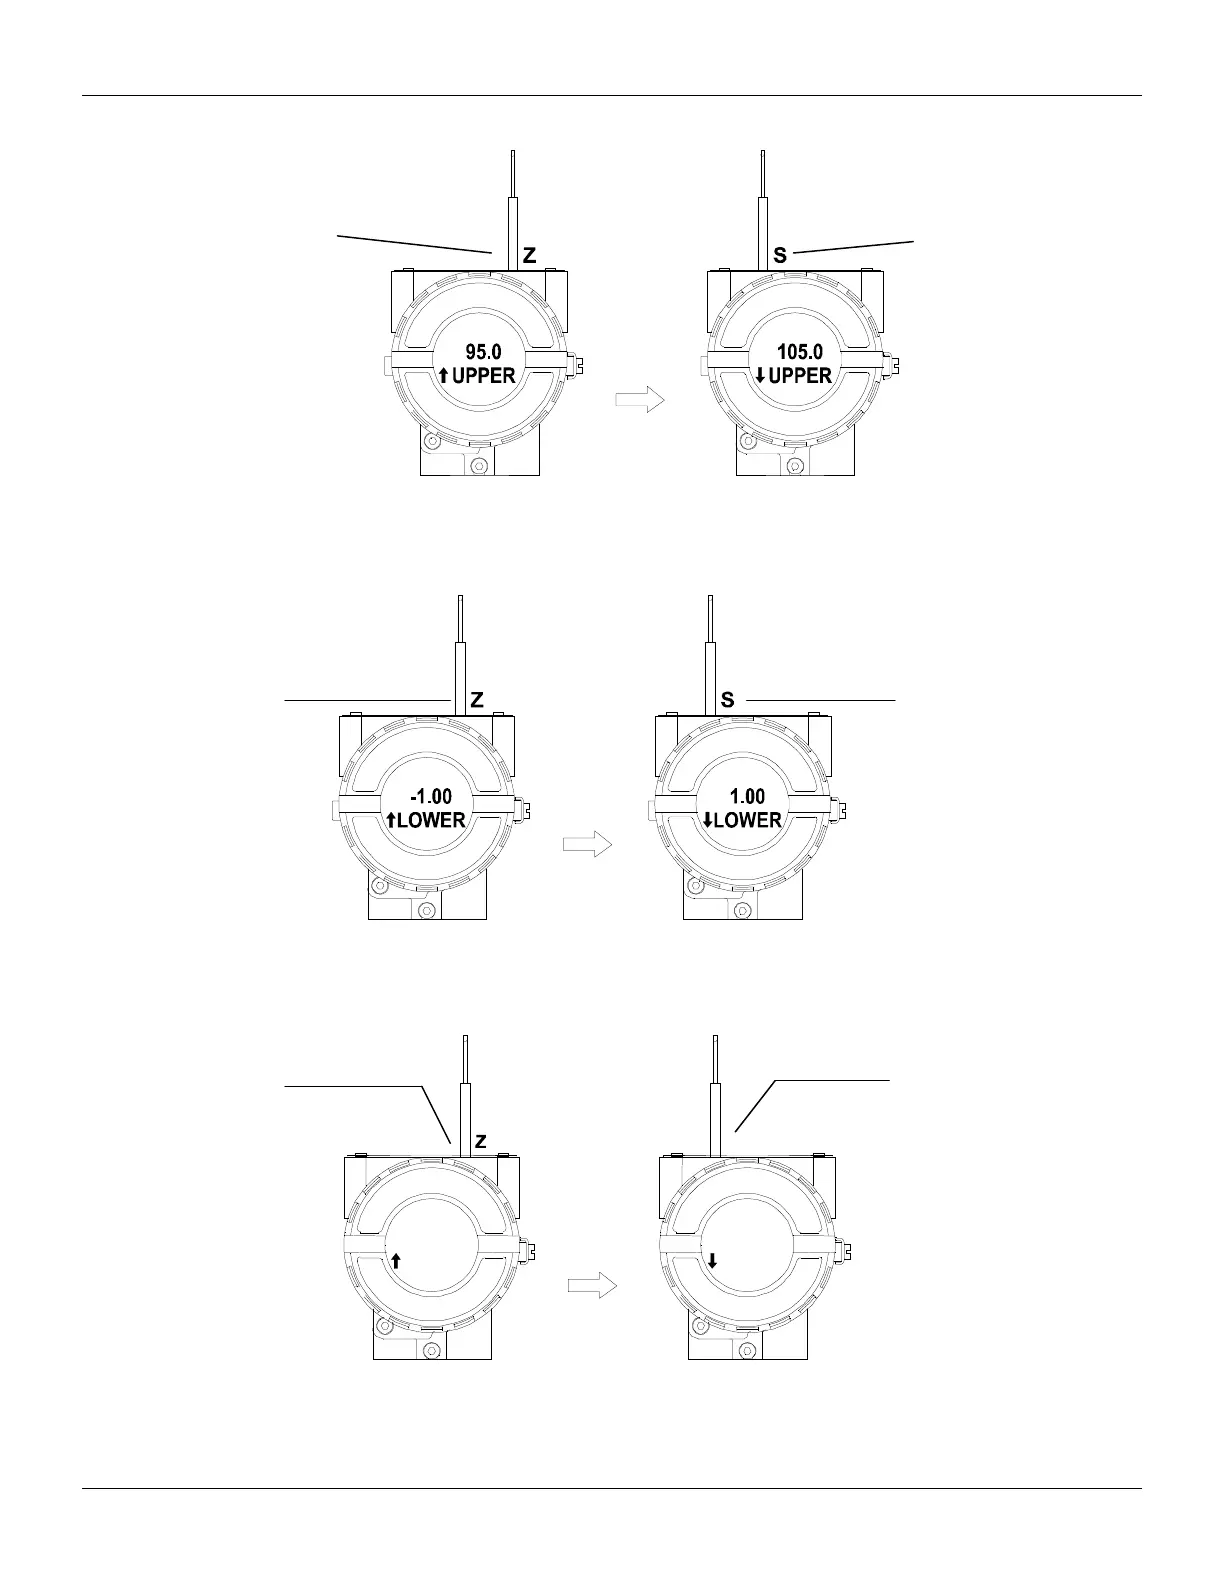
Figure 3.24 – Step 4 – TP303
Figure 3.25 – Step 5 – TP303
Figure 3.26 – Step 6 – TP303
In order to range the lower
value (lower); simply insert
the magnetic tool in orifice
S as soon as LOWER is
shown on display. An
arrow pointing upward (↑)
increments the value and
an arrow pointing
downward (↓) decrements
the value. In order to
increment the value, keep
the tool inserted in S up to
the lower value, place
the magnetic tool in
orifice Z to shift the
arrow to the downward
position an then, by
inserting and keeping
the tool in orifice S, it is
possible to decrement
the lower value.
S
ADDR ADDR
1 1
address value, simple
take off the magnetic tool
from orifice Z as soon as
ADDR is shown on
display. An arrow pointing
upward (↑) increments the
address and arrow
pointing downward (↓)
decrements the address.
In order to increment the
address; insert the tool in
S up to set the value
desired.
the address value,
place the magnetic
tool in orifice Z to
shift arrow to the
downward position
and then, by inserting
and keeping the tool
in orifice S, it is
possible to
decrement the
address value.
In order to range the upper
value (lower); simply insert
the magnetic tool in orifice S
as soon as UPPER is shown
on display. An arrow pointing
upward (↑) increments the
value and an arrow pointing
downward (↓) decrements
the value. In order to
increment the value, keep the
tool inserted in S up to set
the value desired.
In order to decrement the
upper value, place the
magnetic tool in orifice Z
to shift the arrow to the
downward position an
then, by inserting and
keeping the tool in orifice
S, it is possible to
decrement the upper
value.