HGM501 Genset Controller User Manual Page 13 of 17
7.2. PARAMETER CONFIGURATION
Before using controller for the first time, parameters must be configured: rated voltage,
rated frequency, rated power set values must comply with the used generator, set C.T. ratio
value should comply to the used current transformer.
1) When the controller is disconnected, press button, then change start key position
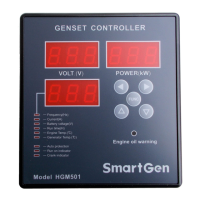
from OFF to ON; after the controller is powered on release button and all the three
windows (voltage window, frequency window and multifunctional window will show set
parameters; at the same time voltage window will start flashing showing four choices
(1P/2P/3P/4P) which mean 1P2W, 2P3W, 3P4W and Double Rated Volts respectively.
Use and to choose AC wire type and to confirm and automatically enter
the next menu item;
2) Rated voltage value settings: there are 7 possible variants of voltage
(110/115/120/130/220/230/240V), use and to switchover between them
(each pressing will increase/decrease the value for one step). When the screen shows
the needed value, press to confirm and enter the next menu item;
3) Rated power settings: power LED window first digit will start flashing; use and
to choose a value from 0 to 9, then press to confirm and enter next settings; power
window second digit will start flashing, use and to choose a value from 0 to 9
and to confirm; power window third digit will start flashing, use and to
choose a value from 0 to 9 and to confirm and enter the next menu item;
4) Rated frequency setting: frequency LED indicator illuminates, multifunctional window
starts flashing; press and to choose frequency value (there are 2 choices: 50
and 60Hz), every time you press the button the value will change; when the needed value
is displayed, press to confirm and automatically enter the next setting;
5) Auto protection setting: when auto protection light indicator is on, press to confirm
and auto protection will continue to be enabled; use or to make indicator
flashing and press to disable auto protection. When the light indicator is off, it
means that auto protection is disabled. Enabling this function is recommended;
6) C.T setting: current LED indicator illuminates; multifunctional window first digit will start
flashing; use and to choose a value from 0 to 9, then press to confirm
and enter next settings; multifunctional window second digit will start flashing, use
and to choose a value from 0 to 9 and to confirm; multifunctional window
third digit will start flashing, use and to choose a value from 0 to 9 and
to confirm and enter the next menu item;
7) Engine temperature sensor type setting: when engine temperature indicator is on,
 Loading...