Drive Startup Manual M1000
Page 10 © 2020 Smartrise Engineering, Inc. All Rights Reserved March 5, 2020
The table below lists the Parameters for U9 Autotune.
Table 7: Parameters for U9 Autotune
Parameter Description Default Units Suggested Adjustments
Mode
Sel
autotuning the
drive performs
Rotate1
Tune-No Rotate1
Term Resistance
recommended that the
Tune-No Rotate1 is
performed.
Closed Loop Permanent Magnet Quick Startup Guide
This quick startup guide outlines the general parameters that must be changed/verified when a
drive is installed with information that is readily available. The drive will not run if ONLY these
parameters are set. Because different elevator controller manufacturers have different
interfaces, it is recommended that the parameters in the drive be set to the settings
recommended by the elevator controller in the drive technical documentation.
The following are the startup steps
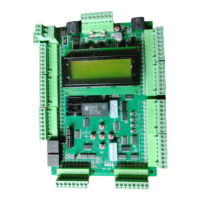
Set / verify that the drive is set up to run in PM ClosedLoopVCT for Control Method (U8).
Verify that the drive has an encoder board.
NOTE: The PG-X3 is the most common card used for closed-loop permanent magnet
motors. See the Magnetek M1000 AC Elevator Drive for the PG-X3 Option Card encoder
setup.
Set/verify that the hoistway parameters are set up properly:
• The Contract Car Speed (A1) should be set to the elevator contract speed in ft/min.
• The Contract Mtr Speed (A1) should be set to an RPM where the elevator contract
speed can be achieved (measured with a hand tachometer).
Set / verify that the Input Voltage (A4) is the same as the measured incoming voltage.
Perform the U9 Autotune.
• Perform the “Tune-No Rotate1” for Tuning Mode Sel (U9).
• Enter the motor nameplate HP
• Enter the motor nameplate voltage
• Enter the motor nameplate current
• Enter the motor nameplate frequency
• Enter the motor poles
• Enter the nameplate rated speed (where slip is incorporated in)
• Enter the encoder PPR
• BEGIN ALIGNMENT to Yes but DON’T PRESS THE ENTER BUTTON.
• Turn on DIP 6A. The M contactor automatically engages, and the screen displays
TUNE command. Press the Enter Button on the drive to start the alignment.