14
echochange
14
Echochange - Manual / echochange
Use of 2 x RJ45
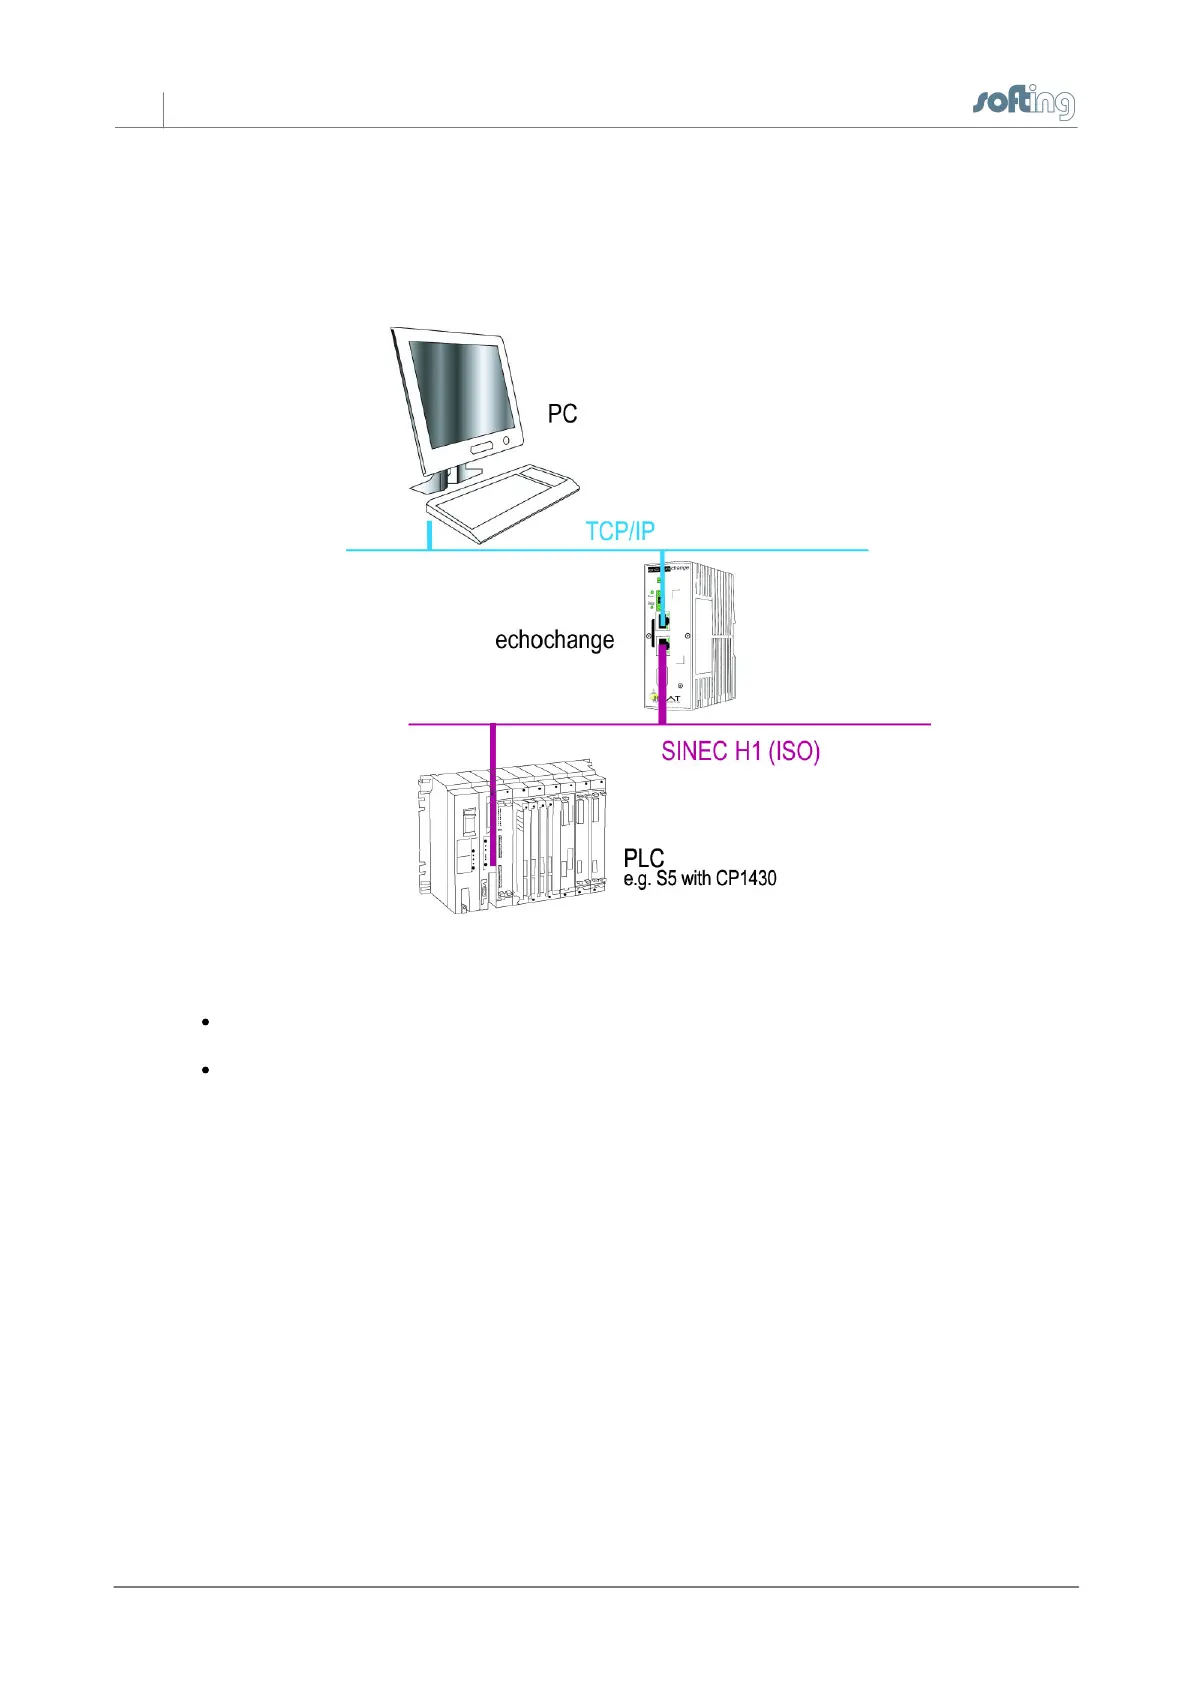
If you are using the echochange as a bridge between two separate networks (i.e. the protocols are
running on different media), you will need both Ethernet connectors.
Connect one end of a TP cable with the TP socket (RJ45 socket) on the front panel of the device.
Plug the other end into an Ethernet hub/switch connected to your network.
The LEDs Eth 1 and/or Eth 2 should blink now. If they don't, please check the network connection
and cabling.
Installation of the configuration software
Using the NetCon echo configuration software, you define the basic configuration of the device and
set the parameters for your connections. The defined parameter settings are either transferred
directly to the device or stored locally for later transmission. The configuration software allows you to
monitor and diagnose configured connections. To configure the device, you will need a PC on which
the NetCon echo configuration software is installed. PC and device have to be connected either
directly or indirectly (see chapter 2.5). To install the configuration software, do the following:
1. Insert the CD-ROM in your CD drive.
2. Select the “echochange” installation.
3. You will be automatically guided through the installation process.