Configuration Overview
58
Configuration Overview
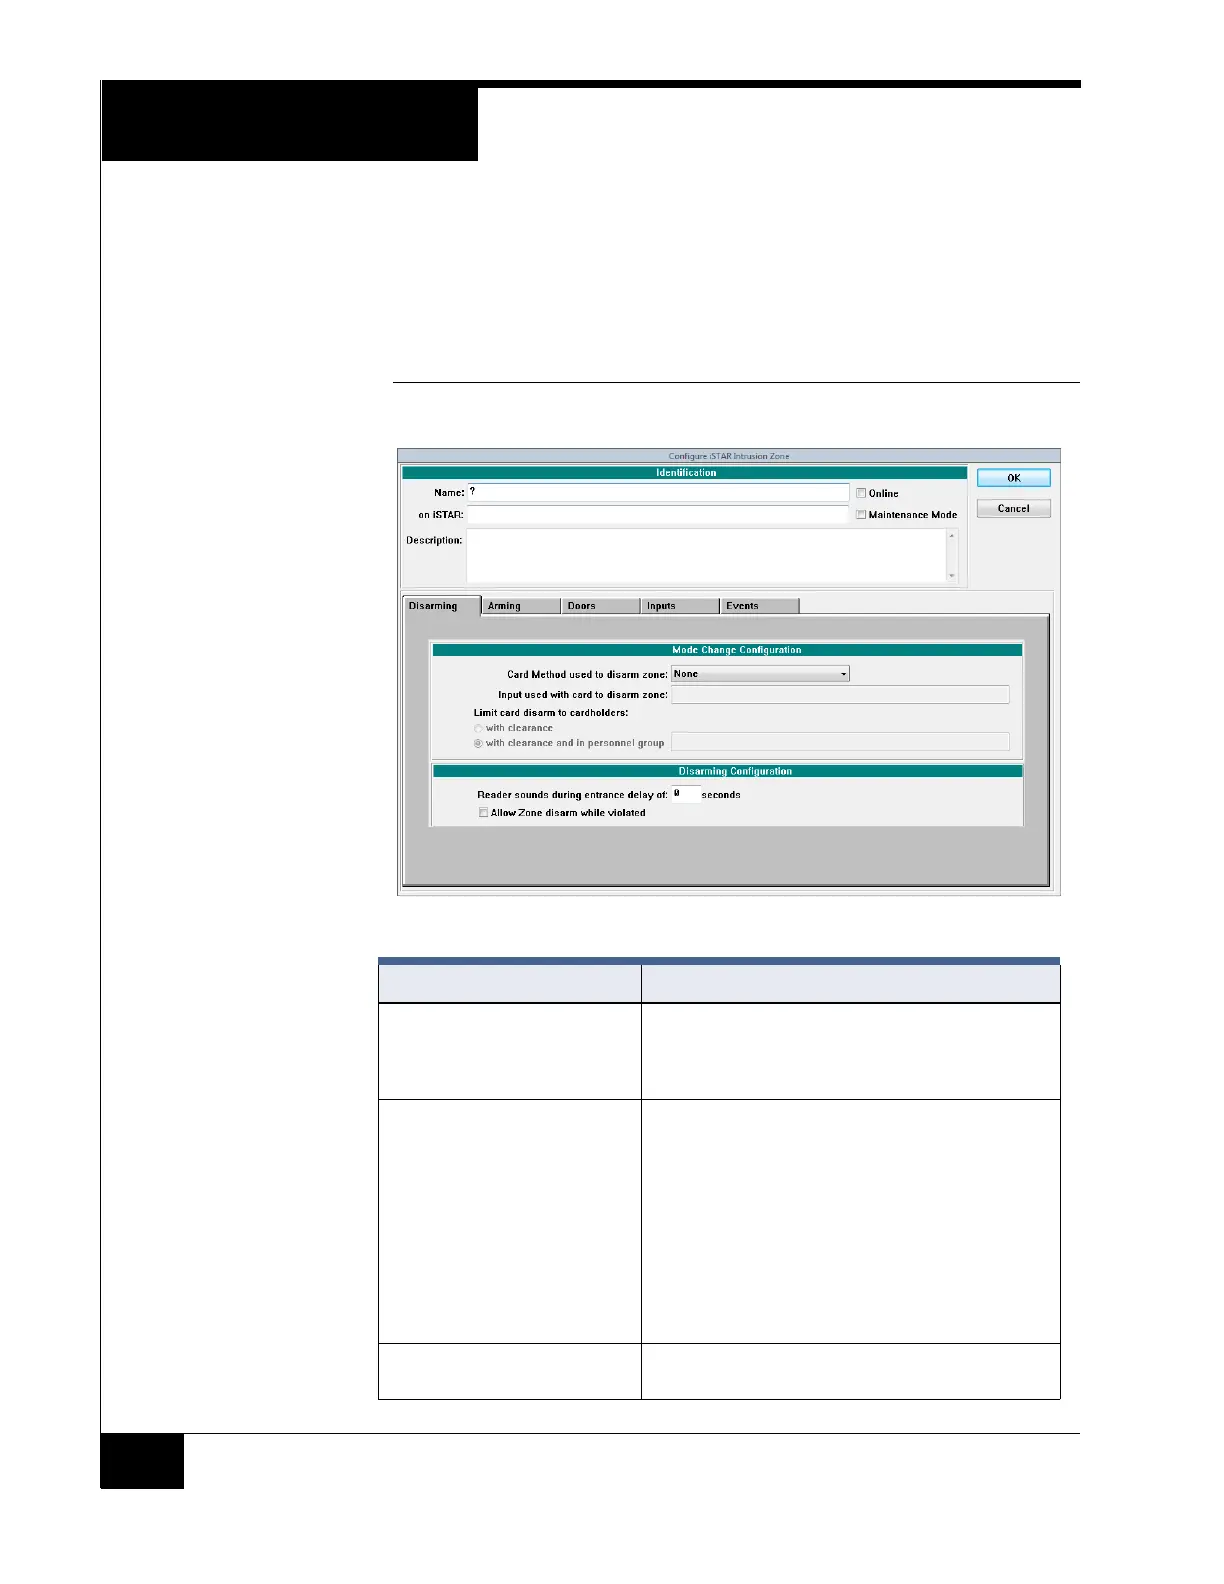
Use the Intrusion Zone dialog box to configure intrusion zones.
For iSTAR intrusion zones, select Configure>Intrusion Zone>iSTAR
Intrusion Zone>New or Edit.
FIGURE 34. iSTAR Configure Intrusion Zone Dialog Box
TABLE 22. Configure Intrusion Zone Dialog Box Field and Tab Descriptions
Field/Tab Description
Name Enter a unique name up to 50 characters long to identify
the intrusion zone. If you enter the name of an existing
intrusion zone (or other security object), the system
returns an error message indicating there is a conflict.
on iSTAR Enter the name of the controller to which this intrusion
zone’s doors and inputs are attached. Double-click in
this field to open the iSTAR Controllers Selection
browser where you can select a controller. Use the
Controller dialog box to configure or edit controllers.
NOTE: This field becomes read-only once you enter a
valid controller. To change the iSTAR controller
for an existing intrusion zone
1. Delete the zone.
2. Re-configure the zone with the new controller.
Description Enter a description of the intrusion zone. This field is for
user information only.