April 21, 2021 28
o Placed on the grid side of your home breaker panel and are required to enable limited To Home mode
(see diagrams). CT winding default ratio: 2000 : 1 but this ratio is programmable.
• Battery Temperature Sensor
o Placed on the battery bank and used to adjust charging voltage and capacity calculations
• PV Shutdown signal
o Used to accommodate Rapid Shutdown of PV components and discharge onboard capacitors
• CanBus / RS485
i. Used to communicate with Lithium batteries
ii. RS485 is SunSpec draft 4 (will not work with draft 3)
Batteries:
Supported Battery Chemistries (48V configuration required for all chemistries)
• Lead Acid
o AGM, Gel, Wet
• Lithium
o NMC, LiPo4
• NiFe (Note: must use a 37 series cell configuration, 44.4V Nominal)
o Set Absorb and Equalization to 61.0V, 3 hours, and days = 1 (every day). Float = 53.7V
Programming Battery Settings
g. Battery Capacity
i. This allows Sol-Ark to know the size of the battery bank
ii. Main Menu → System Settings → Battery Setup → Batt → Batt Capacity
h. Battery Type
i. Navigate to the charge menu and set the values appropriate to your battery chemistry. The chart on
page (36) is good reference for lead acid batteries.
ii. Main Menu → System Settings → Battery Setup → Charge
i. Battery Discharge percentage
i. Allows the user to define the depth of discharge the system will allow before using the grid/generator to
the charge the battery bank. Solar is always the priority in charging the battery bank.
ii. Main Menu → System Settings → Battery Setup → Discharge
Limiter Sensor Automatic Setup (Requires Batteries, AC coupled panels must be off while detecting, and does NOT
work for 208V installs) If you do not have batteries or are in 208V mode: verify CT sensor placement manually.
1) Install limiter sensors as described on page 27 (shown in all diagrams as well). Battery and grid connections also
required before starting auto-setup.
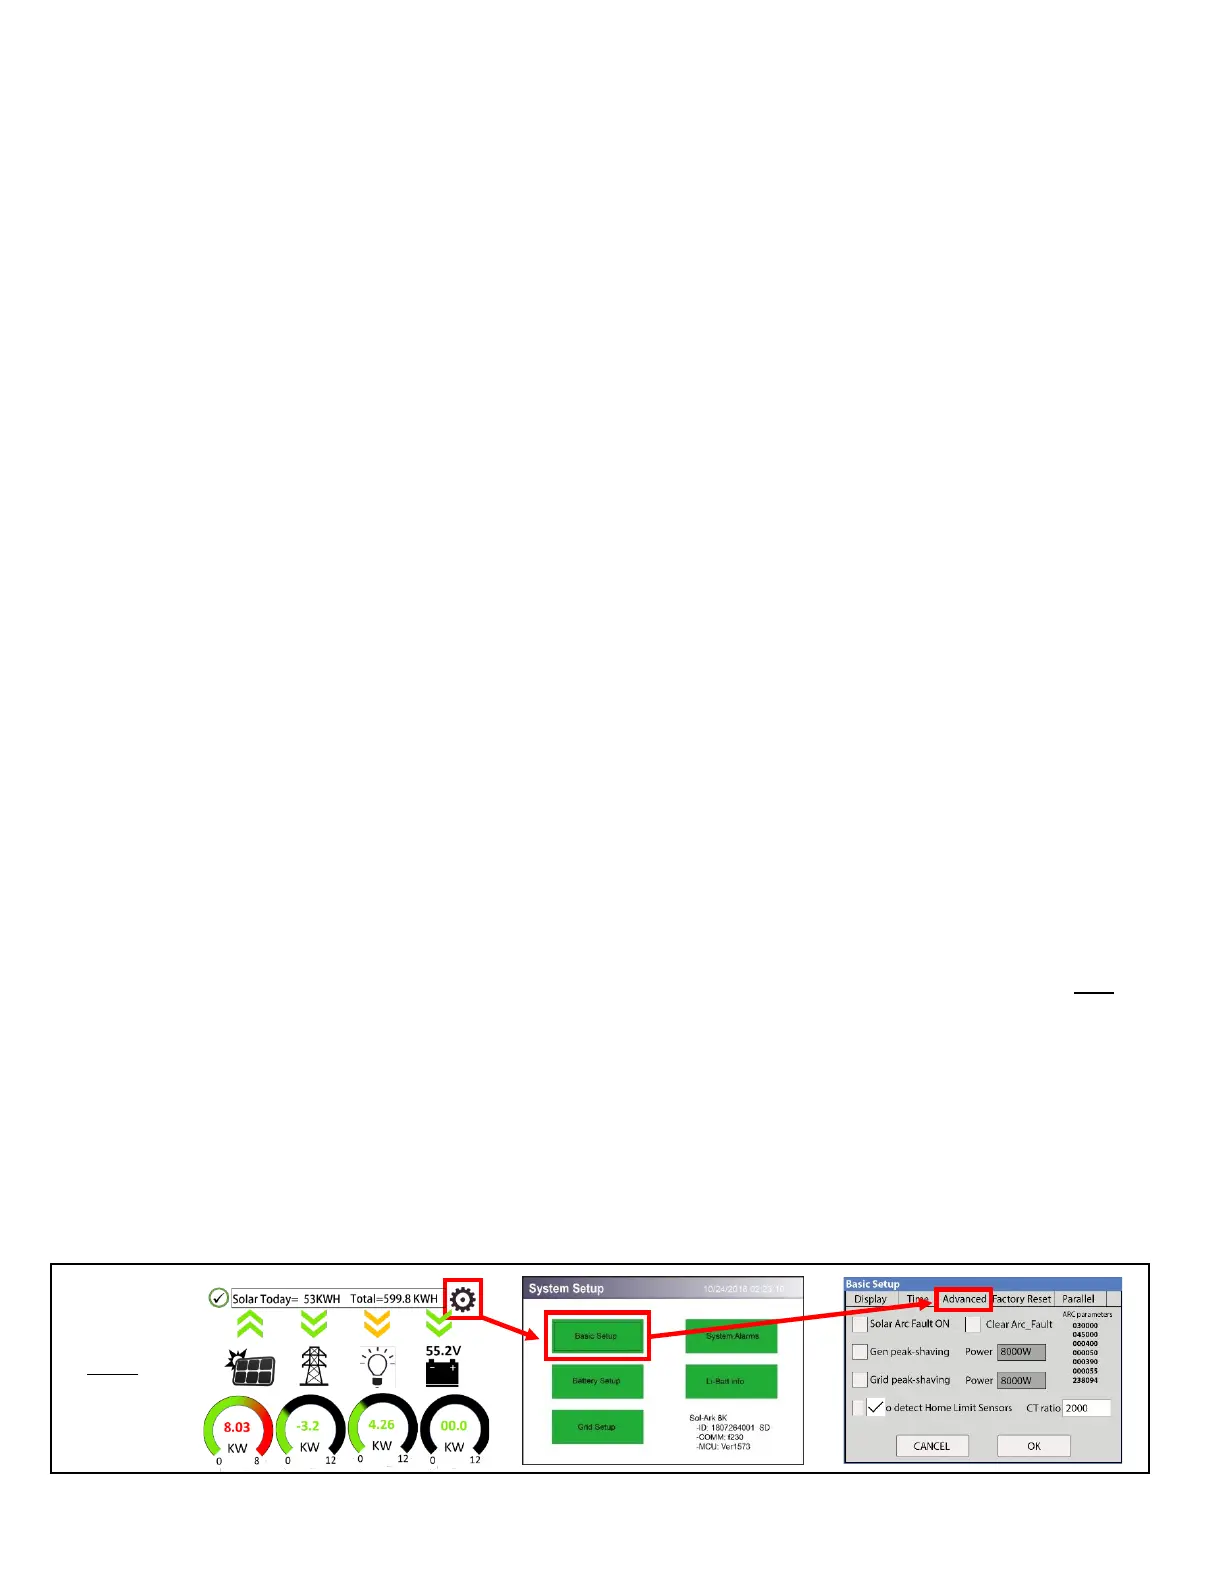
2) Navigate to the “Advanced” Tab of the Basic Setup screen (follow the directions below to get there).
a) Touch the gear icon → Touch the Basic Setup button → Select the Advanced tab (see Fig. G).
3) Select “Auto detect Home Limit Sensors” and press ok.
4) Wait for the Sol-Ark to finish its learning process (Sol-Ark will alternate sell back between legs and magnitude
automatically determining the correct settings for the sensors).
5) Verify sensors were correctly configured (see Fig. H) if they are not correct, repeat the learn function.