4. Installation
4. Installation
28
29
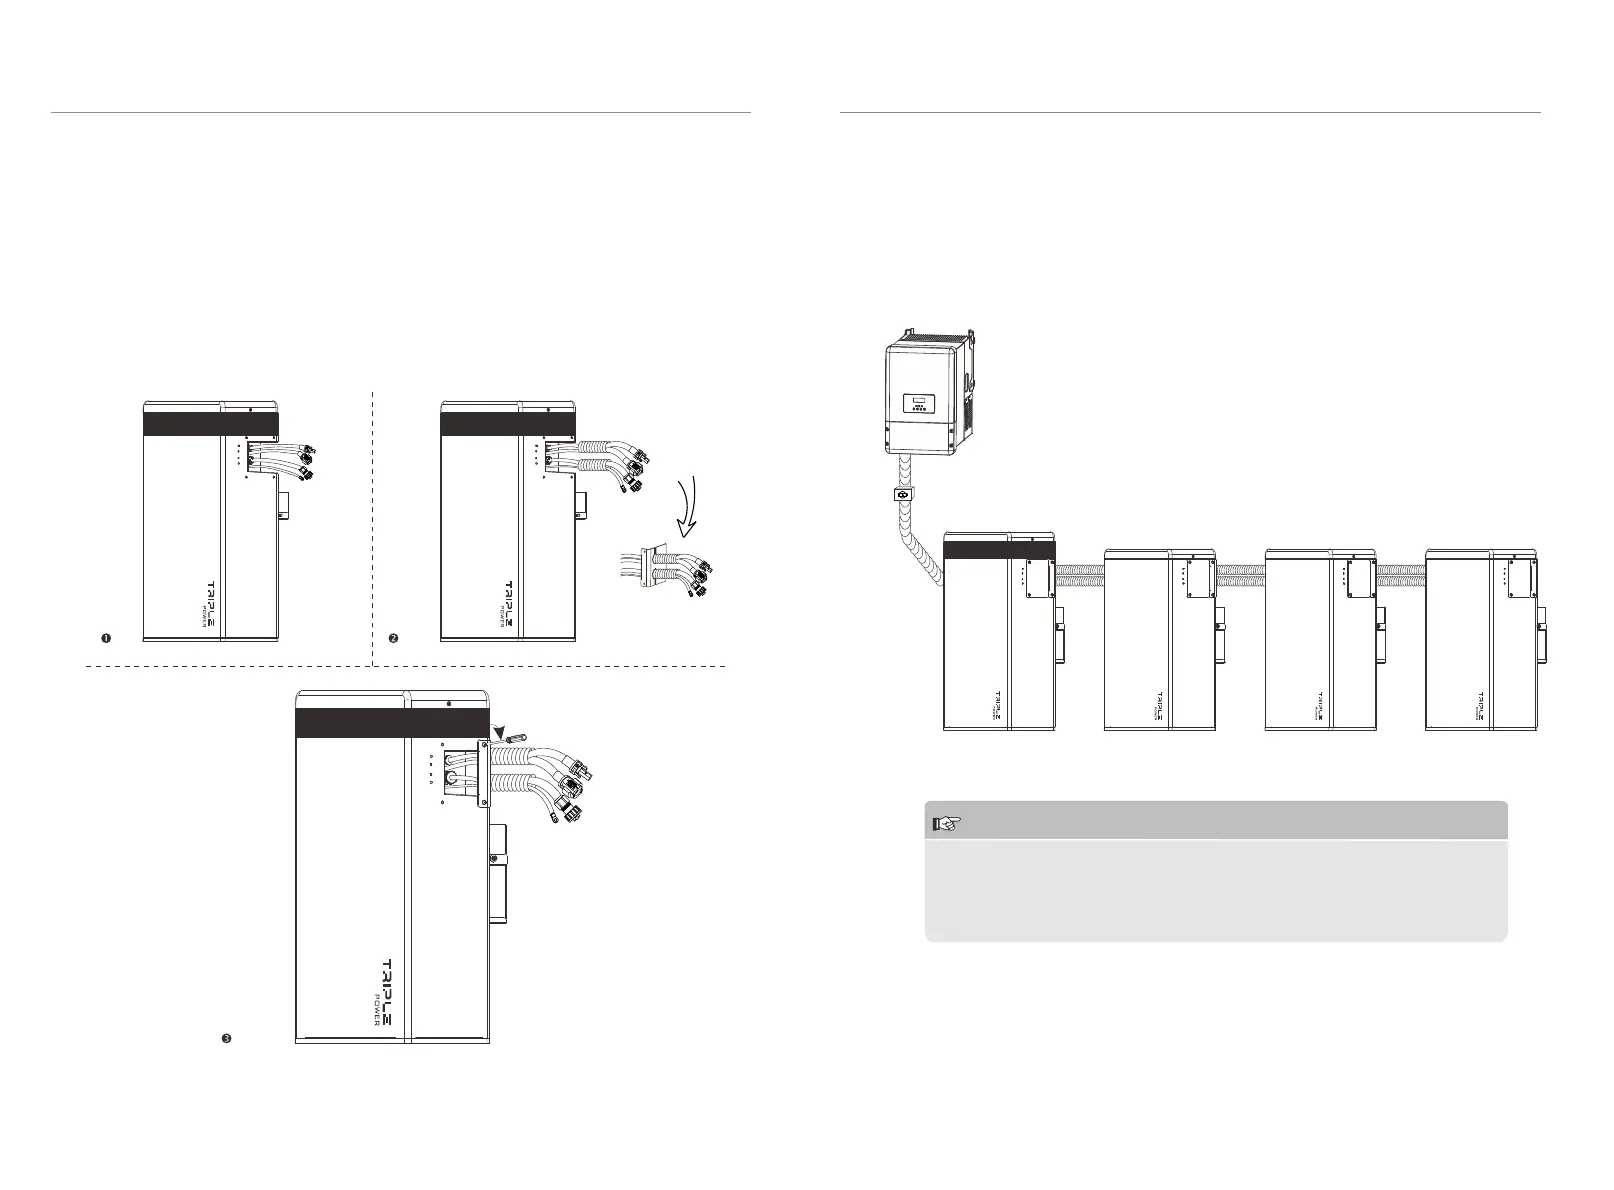
For T-BAT H 5.8 + 1~3 battery packs:
1. Connect the cables at one end of the T-BAT H 5.8/HV11550.
2. Run the cables through the corrugated pipe.
3. Set the cables into the groove of metal plates and screw them back to the
battery packs on both sides.
4. Do remember to insert the series-connected cable at “-” and “YPLUG” on the
right side of the last battery pack to complete the internal circuit.
CAUTION!
One T-BAT system is allowed to install one T-BAT H 5.8 with three
battery packs at most. Connecting more than three battery packs to
the T-BAT system will blow the fuse, and the batteries will be damaged.
Please keep in mind and follow this instruction.
4.6 Overview of Installation
The following diagram is a completed T-BAT system installation with T-BAT H 5.8
+ three battery packs.
 Loading...