Product Guide
2
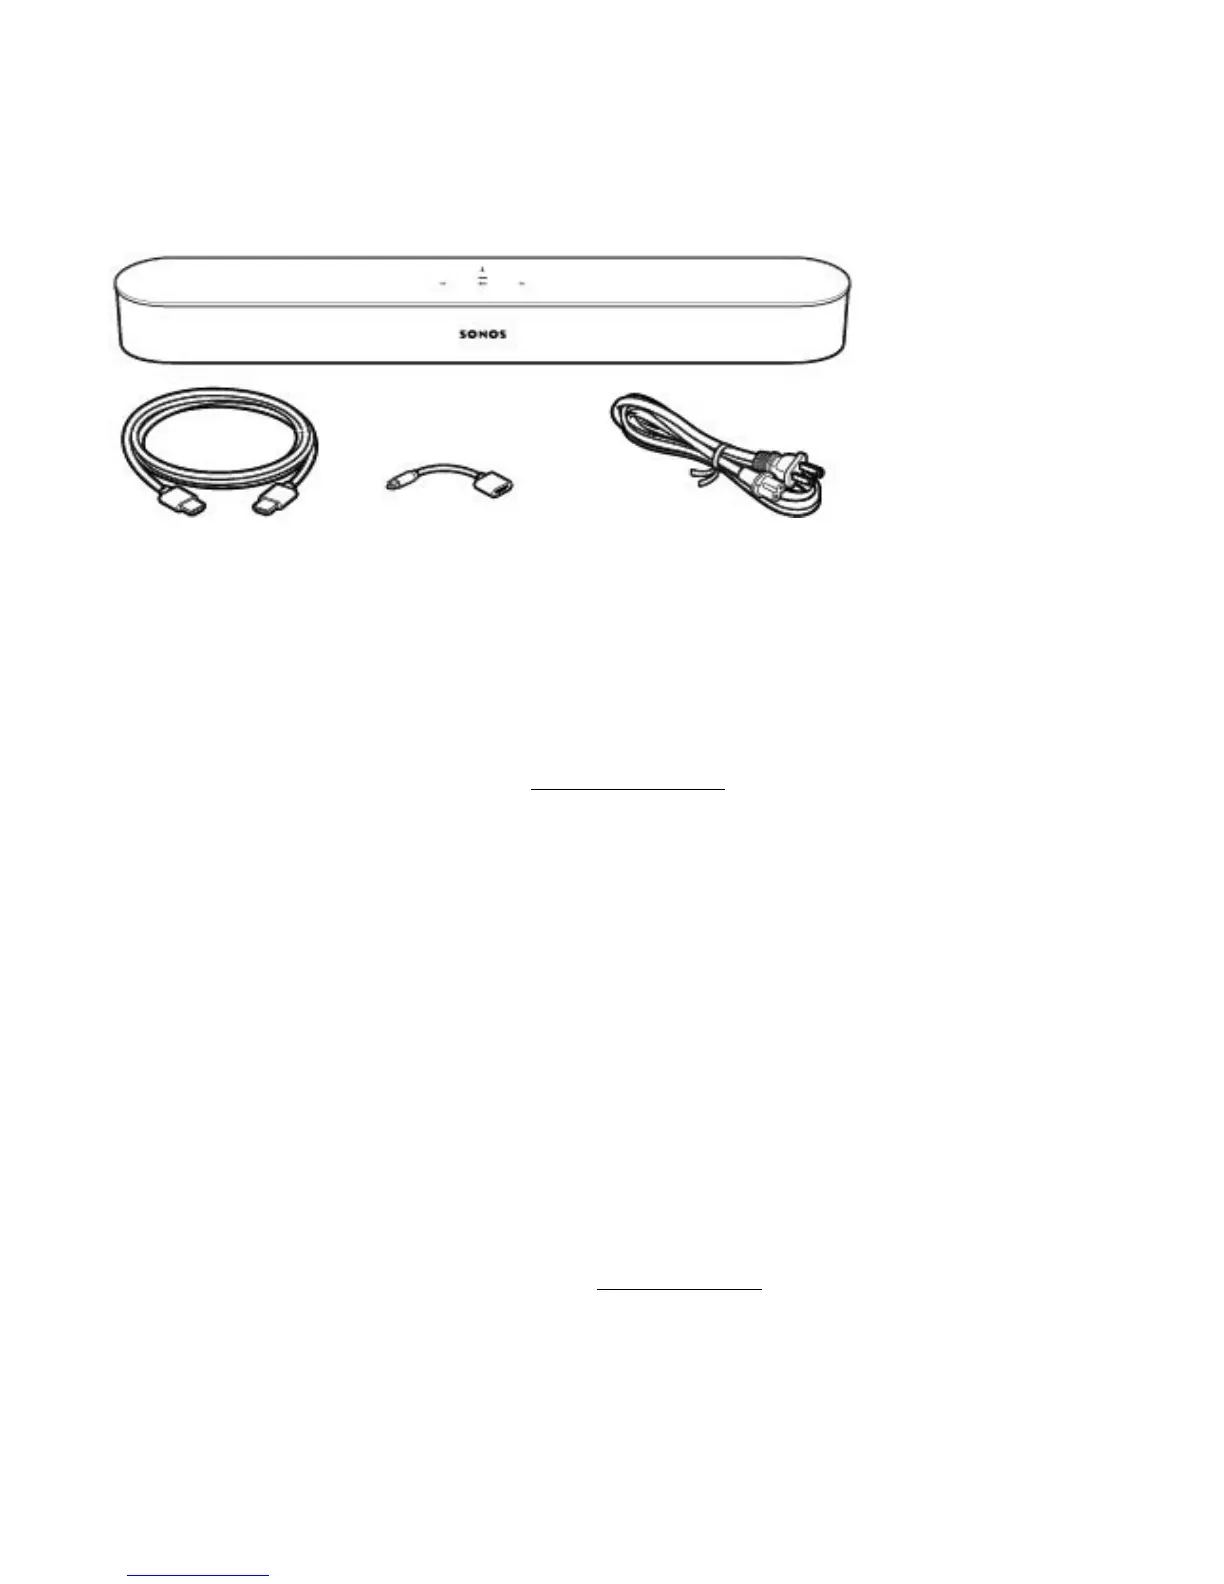
What’s in the box
Carefully unpack the box. There are a few audio cables inside. You’ll use the HDMI cable—during setup, we’ll
see if you need the optical adapter too.
*The optical adapter will only be used if your TV doesn’t have an HDMI ARC port.
What you need
• TV with an HDMI ARC port (preferred) or optical digital audio OUT port.
• Mobile device (it’s easier) or computer connected to your Wi-Fi. You’ll need this for setup. Have your
network name and password ready. See
Your home network for more detail.
•The Sonos app to guide you through setup (install it on the device you’re using for setup).
Choose a location
You can mount Beam to a wall above or below your TV or place it on a credenza.
Placed on a credenza
• Place horizontally on a stable and level surface at least 2" (50mm) from TV.
• Don’t place vertically or on its side.
• Don’t block the TV’s IR sensor.
• If put on a shelf, place at the front and keep 2" (minimum) clearance on both sides for best sound quality.
• Keep 1" (25mm) space (minimum) above Beam so you can reach the touch controls.
• For best sound quality, keep both ends of Beam at least 1' (30cm) from a wall or other obstruction.
Wall mounted
• Use the Beam wall mount kit. You can buy it on www.sonos.com. Follow the instructions in the kit.
• Keep 1" (25mm) space (minimum) above Beam so you can reach the touch controls.
• If you’re mounting above the TV, make sure you can reach the touch controls.
• For best sound quality, keep both ends of Beam at least 1' (30cm) from a wall or other obstruction.
HDMI cable *Optical adapter Power cord