A6T/A6/A5 Portable Ultrasonic Diagnostic System
4701-0040-01A
3-22
The instruction for performing Burning Files is described below:
Test Insert a CD, click Test, and it displays the CD
information and the capacity available.
>/>> To add a file; Select the target file, click’>’, to add one
file to Burning Files buffer area; click’>>’, to add all the
files in the current directory to the Burning Files buffer
area. The percentage of the Burning Files buffer area
capacity to the whole CD capacity is prompted in Used
and Available display area. The total size of the
selected files shall not exceed the capacity of the CD.
</<< To delete a file. Select one file from the Burning Files
buffer area, click’<’, and the selected file is deleted
from the Burning Files buffer area; click’<<’, and all the
content in the Burning Files buffer area sis deleted.
Burning Files Click it to start Burning Files operation. After
Burning Files is finished, the system will prompt
“Success”. For the user, Burning Files enables auto
continuing burning without inserting a new CD every
time.
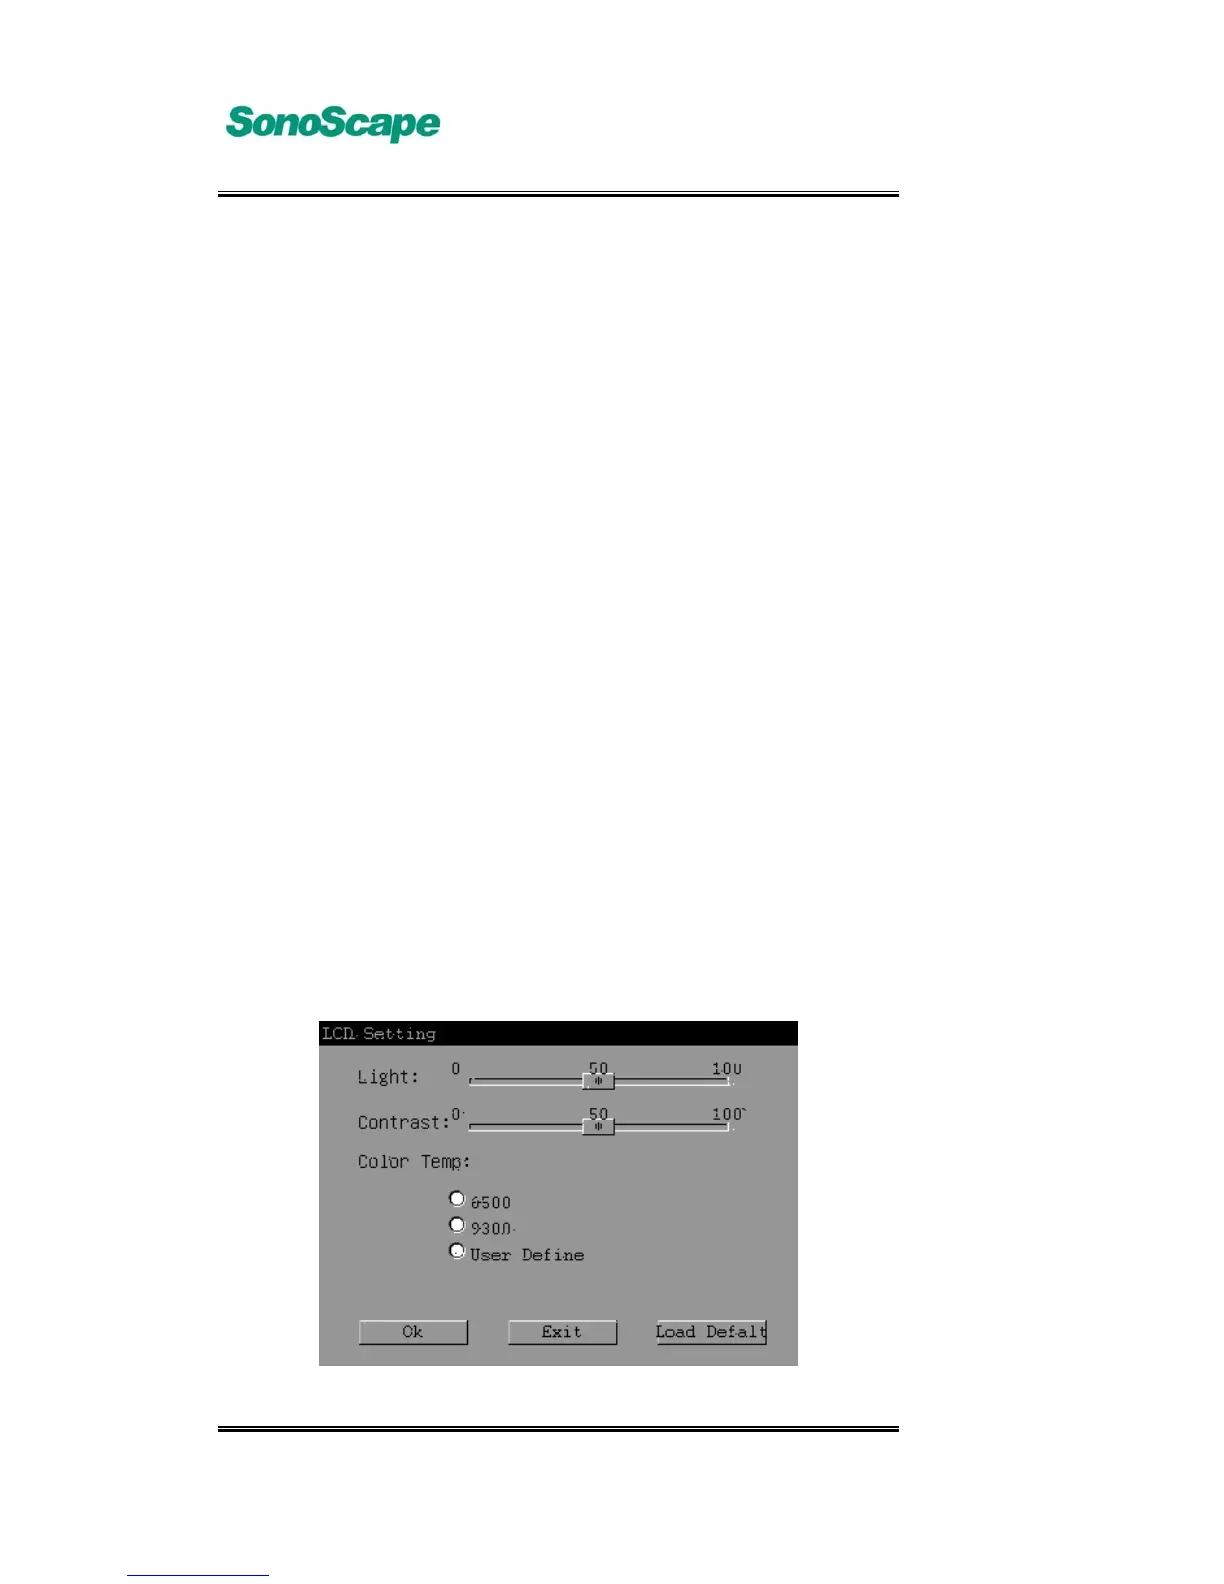
3.4.3.7 LCD Setting
In System Setting page, click [LCD Setting] to LCD Setting page. Click [Ok],it
will exit and save the current setting; click [Cancel], it will exit without saving
the setting info. LCD Setting page is shown below:
Fig. 3.4.3.3-a LCD Setting page