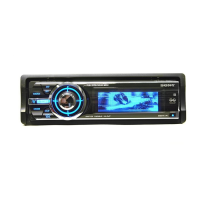
1 Press
(ZAP)
during
playback.
After "ZAPPIN" appears in the display,
playback starts from a passage
of
the next
track.
The passage
is
played for the set time, then a
click sounds and the next passage starts.
Track
--~
-----rr=-
__
---rr=--
__
--;
L.....---t------l
The
part
of
each
track
to
playback
in
ZAPPIN mode.
2 Press
the
multi
way
encoder
or
(ZAP)
when a
track
you
want
to
listen
is
played back.
The track that you select returns to normal
play mode from the beginning.
To
search a track
by
ZAPPIN mode again,
repeat steps I and
2.
Tips
•
You
can select the playback time from
about
6
seconds/9 seconds/3D seconds (page 20).
You
cannot select the passage
of
the track to playback.
• Push the multi way encoder left/right in
ZAPPIN
mode to skip a track.
• Push the multi way encoder up/down in
ZAPPIN
mode to skip album.
• Pressing
~
(BACK) also confirms a track to
playback.
Radio
Storing
and
receiving
stations
Caution
When tuning in stations while driving, use Best
Tuning Memory (BTM) to prevent an accident.
Storing
automatically
- BTM
1 Press
(SOURCE)
repeatedly
until
"TUNER" appears.
To
change the band, press
(MODE)
repeatedly.
You
can select from FM I, FM2,
FM3,
AMI
or
AM2.
2 Press and
hold
the
multi
way encoder.
3 Rotate
the
multi
way
encoder
until
"B1M"
appears,
then
press it.
The unit stores stations
in
order
of
frequency
in the preset list.
A beep sounds when the setting
is
stored.
Storing
manually
1 While receiving
the
station
that
you
want
to
store,
push
Q (BROWSE)/CA1.
The preset list appears.
2 Rotate
the
multi
way
encoder
to
select
the
preset number.
3 Push and
hold
the
multi
way
encoder
until
"MEM"
appears.
(with
the
card remote commander)
1 While receiving
the
station
that
you
want
to
store,
press
and
hold
a
number
button
(CD
to
®)
until
"MEM"
appears.
Note
If
you
try
to store
another
station
on
the same
number
button, the previously stored station will
be
replaced.
ReceiVing
the
stored
stations
1 Select
the
band, then
push
the multi
way
encoder
up/down.
(with
the
card remote commander)
1 Select the band, then
press
a
number
button
(CD
to
®).
-
13