1-9 (E)
HDVF-C950W
B2.6 x 5
LCD unit
Bezel assembly
Harness (BL)
Harness (LVDS)
CN1
P1
LCD bracket (L)
Shield cushion
LCD module
LCD bracket (R)
B2.6 x 5
B2.6 x 5
LCD bracket (L)
LCD unit
B2.6 x 5
B2.6 x 5
EMC cover
EMC cover
GND terminal
Dustproof cushions (V)
Dustproof
cushions (H)
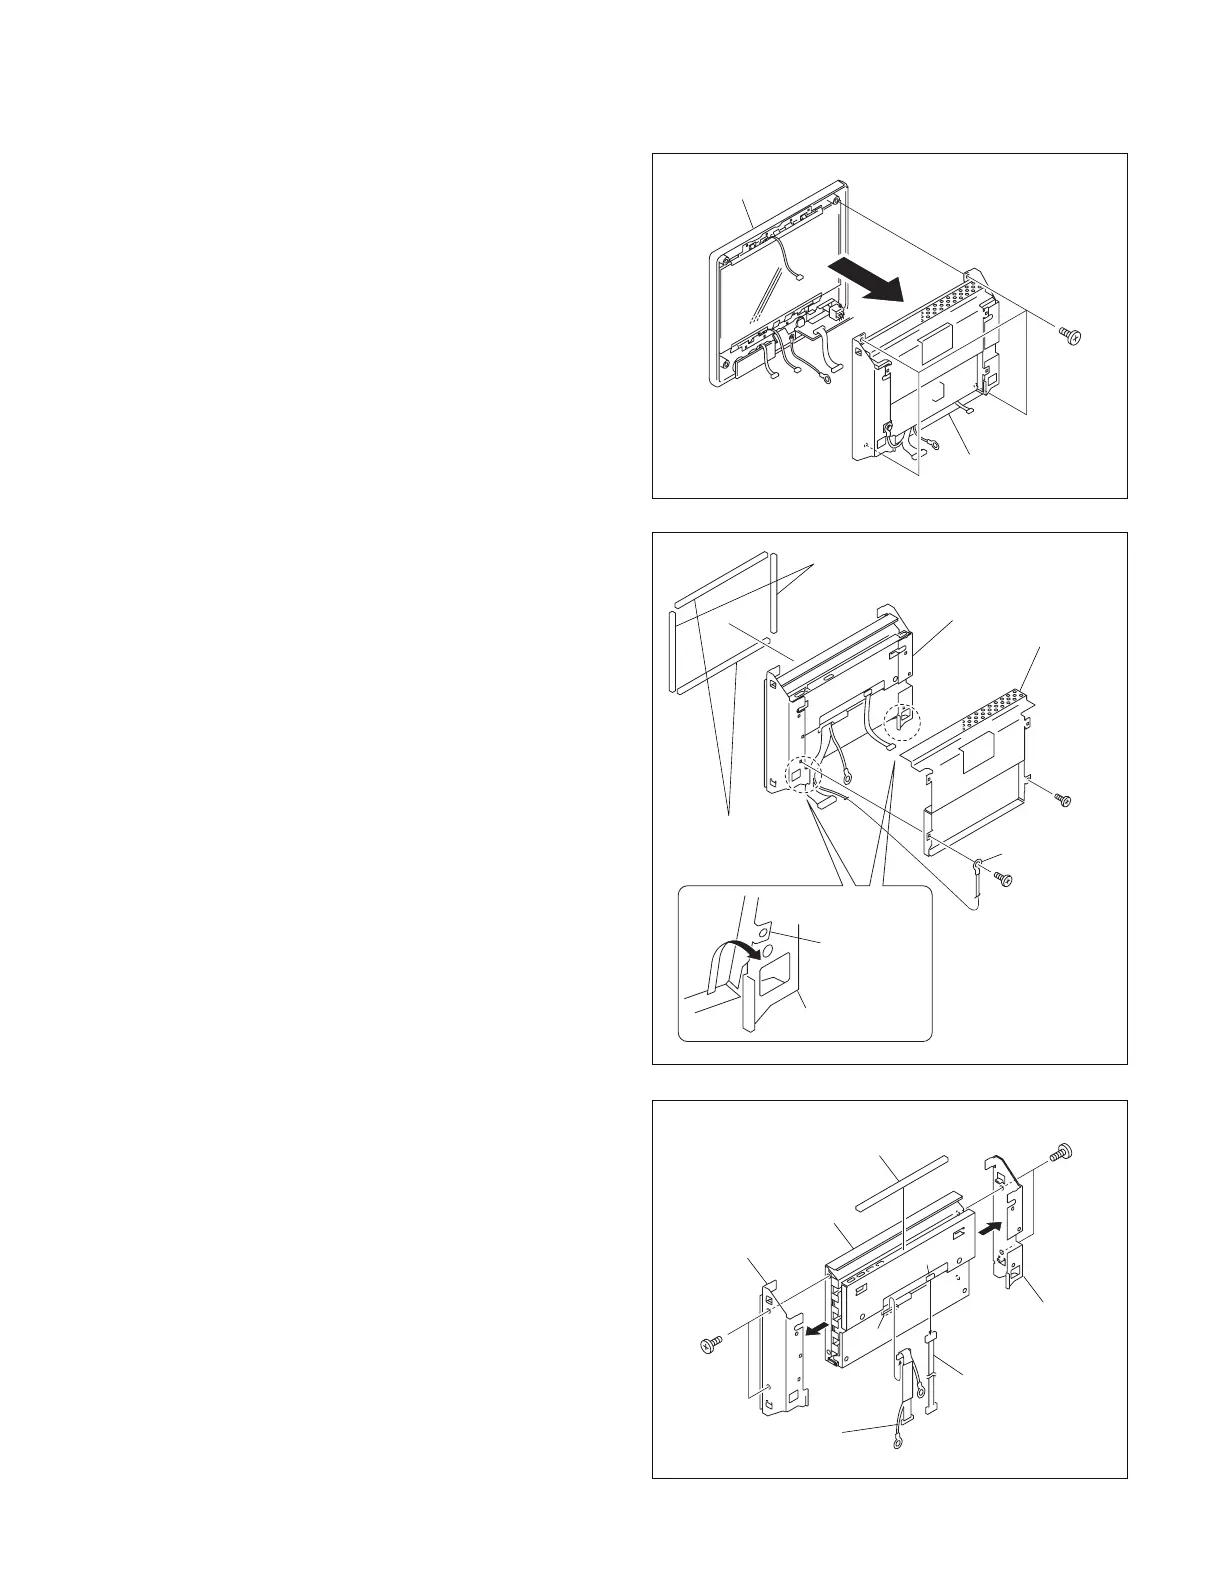
7. Remove the four screws and remove the LCD unit.
n
Standard tightening torque :
25 x 10
_2
N.m (2.5 kg.cm)
8. Remove the two screws and remove the GND terminal
and the EMC cover in the direction of arrow.
9. Remove the two dustproof cushions (V) and the two
dustproof cushions (H) from the front of the LCD
panel.
10. Remove the four screws and remove the LCD brackets
(L) / (R).
11. Disconnect the harnesses from the two connectors
(CN1, P1) of the LCD module, and remove the shield
cushion.
12. Reinstall it by reversing the steps 1 to 11 of disassem-
bling.
n
When the LCD module is replaced, the adjustment is
required. Refer to “Section 3. Electrical Adjustment”.



 To Next Page