1-10 (E)
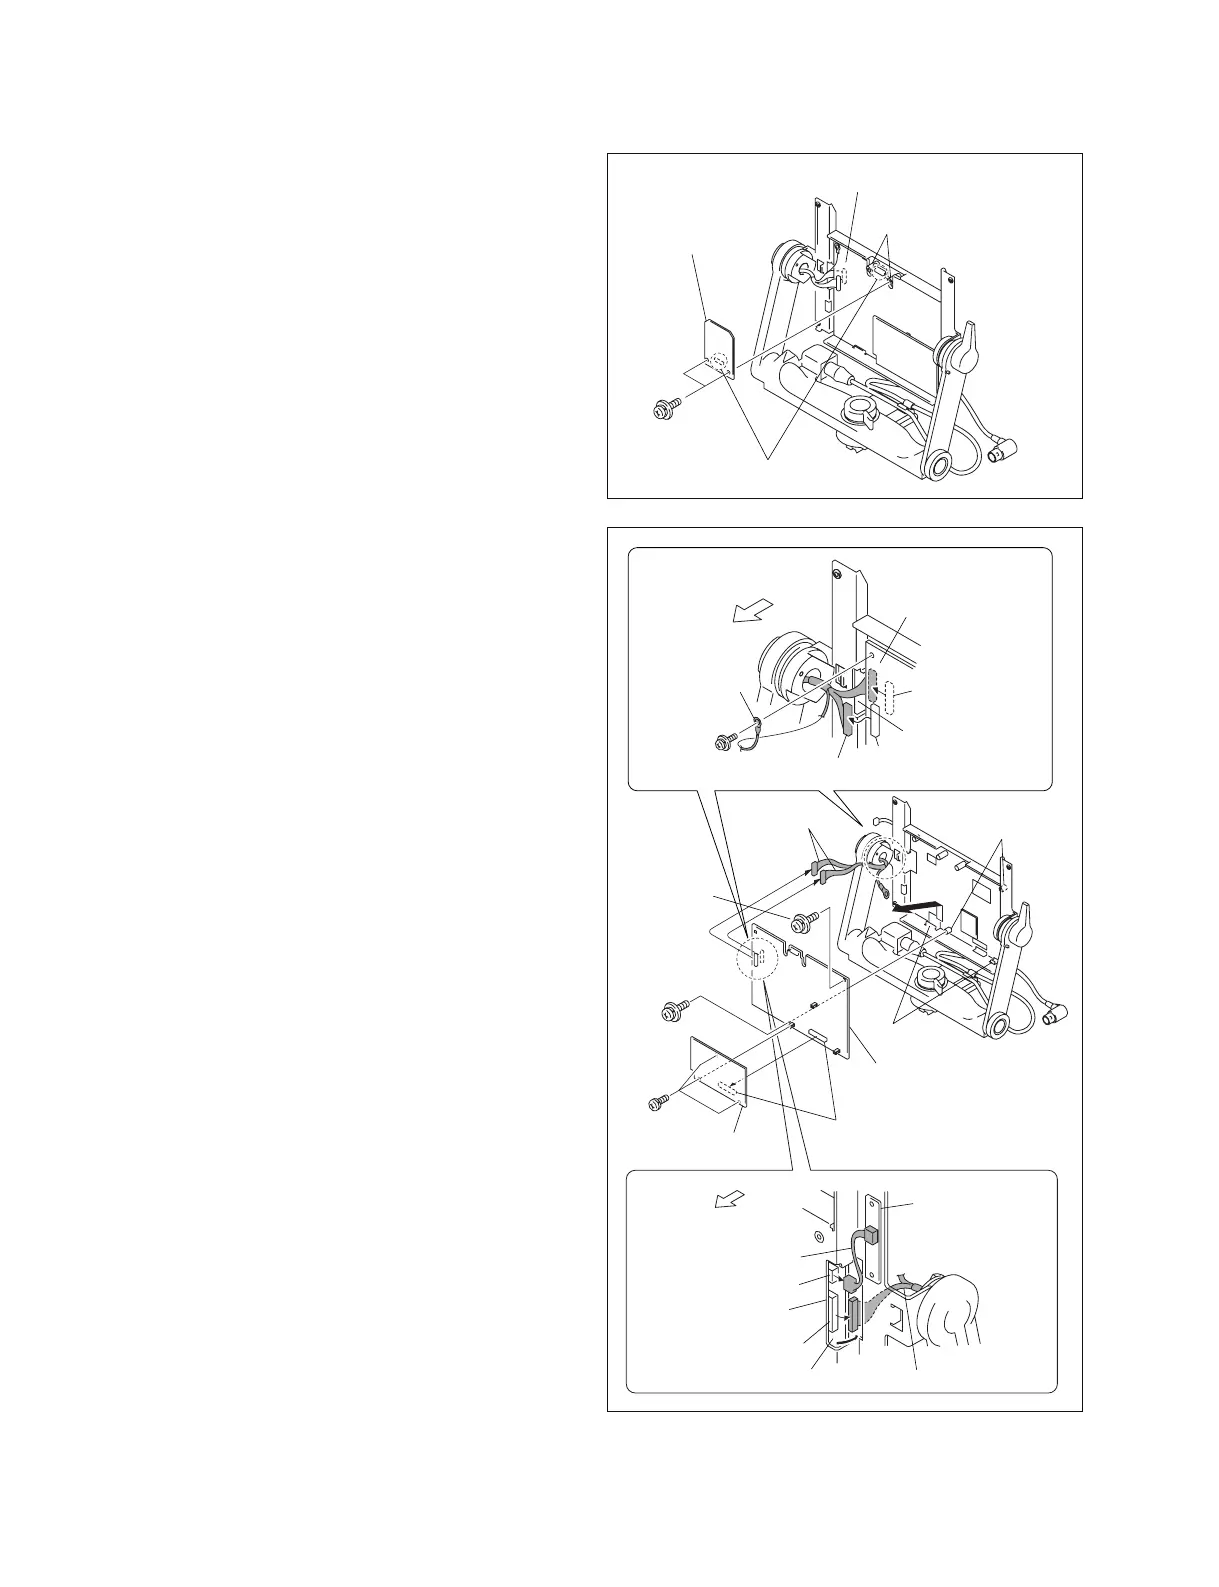
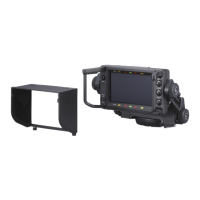
HDVF-C950W
Board-to-board
RE-237 board
PS2.5 x 5
PSW3 x 6
CN2
PSW3 x 6
PSW3 x 6
PR-292 board
Claws
Dowel for
PR-292 board
SW-1299 board
PR-292 board
CN10
CN2
To the rear of
the main unit
To the front of
the main unit
Harness (VF)
CN box bracket
A hole
CN box bracket
A hole
Harness (SW1)
PR-292 board
Harness (VF)
Harness (VF)
CN1
GND terminal
1-7-2. Removing the LE-317 Board
1. Remove the rear cover assembly.
(Refer to Section 1-7-1 step 1.)
2. Remove the bezel assembly.
(Refer to Section 1-7-1 steps 2 to 5.)
3. Remove the two screws and remove the LE-317 board
from the board-to-board connector of the PR-292
board.
4. Reinstall it by reversing the steps 1 to 3 of disassem-
bling.
1-7-3. Removing the PR-292 Board
1. Remove the rear cover assembly.
(Refer to Section 1-7-1 step 1.)
2. Remove the bezel assembly.
(Refer to Section 1-7-1 steps 2 to 5.)
3. Remove the LE-317 board.
(Refer to Section 1-7-2 step 3.)
4. Remove the screw and remove the GND terminal.
5. Disconnect the harness from the connector (CN1) of
the PR-292 board.
6. Disconnect the two harnesses from the connectors
(CN2, CN10) of the PR-292 board.
n
Disconnect the harness (VF) on the connector (CN2)
side of the PR-292 board toward the front side of the
main unit through the CN box bracket A hole.
7. Remove the two screws and remove the PR-292 board.
8. Remove the three screws (PS2.5 x 5), and remove the
RE-237 board.
n
When installing the RE-237 board, apply the screw
locking compound.
9. Reinstall it by reversing the steps 1 to 8 of disassem-
bling.
LE-317 board
PR-292 board
Dowel for LE-317 board
Board-to-board
PSW3 x 6