129
Side Flags
Chapter 9 Special Functions
Creating an image with side flags
For example, to create an image with side flags in the
background B row of the M/E-1 bank, use the following
procedure.
1
In the 1st row of the cross-point control block of the
M/E-1 bank, hold down the [UTIL] button, and in the
2nd row, select the signal (utility bus signal) you want
to insert in the side flag areas.
2
In the background B row, press the cross-point button
corresponding to the 4:3 video material.
At this point, if auto side flags are on, this
automatically adds side flags to the 4:3 video material.
For details, 1 “Setting the Side Flag Video Material
and Operation” (p. 241).
3
Use either of the following methods to turn the side
flags on.
• Use the Misc >Enable >Side Flags menu (3213)
(1 p. 128).
• Use a cross-point button operation (1 p. 128).
This adds side flags to the 4:3 video material.
Wipe Action on Images with Side
Flags
When a wipe is carried out on an image with side flags, all
wipe patterns can be used.
The following show the action in a wipe.
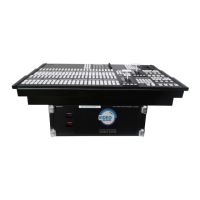
Wipe from a 4:3 image to a 16:9 image
Wipe from a 4:3 image to another 4:3
image (when side flags are on for both
images)
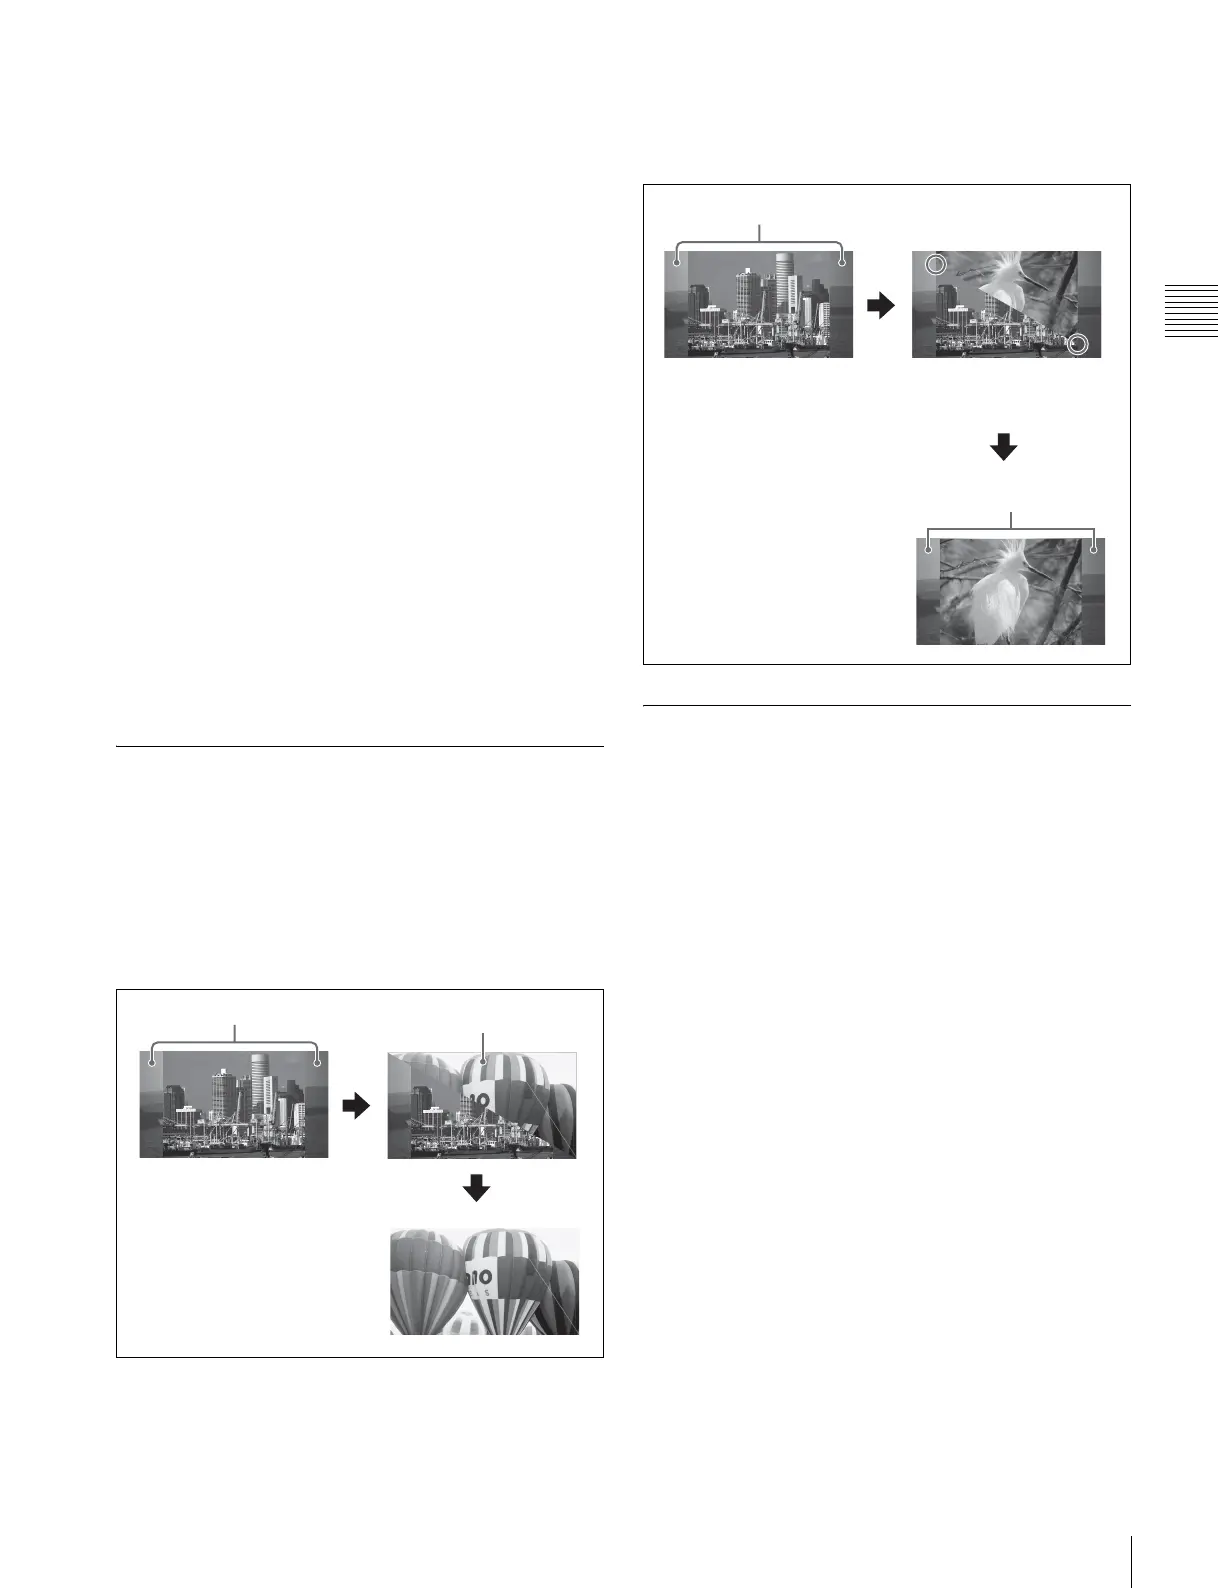
DME Wipe Action for an Image with
Side Flags
When a DME wipe is carried out on an image with side
flags, all wipe patterns can be used.
Depending on the on/off setting of [Auto Crop] in the
Engineering Setup >Switcher >Config menu (7331), the
appearance of the 4:3 image changes.
The following show the action in a DME wipe.
4:3 image
(side flags on)
Side flag area
16:9 image
4:3 image
(side flags on)
Side flag area
Side flag area
The circles indicate the position
of the wipe pattern edge when
the transition is half finished.
 Loading...