26
Using Multi Viewer
Preparation
2
Set the multi viewer outputs.
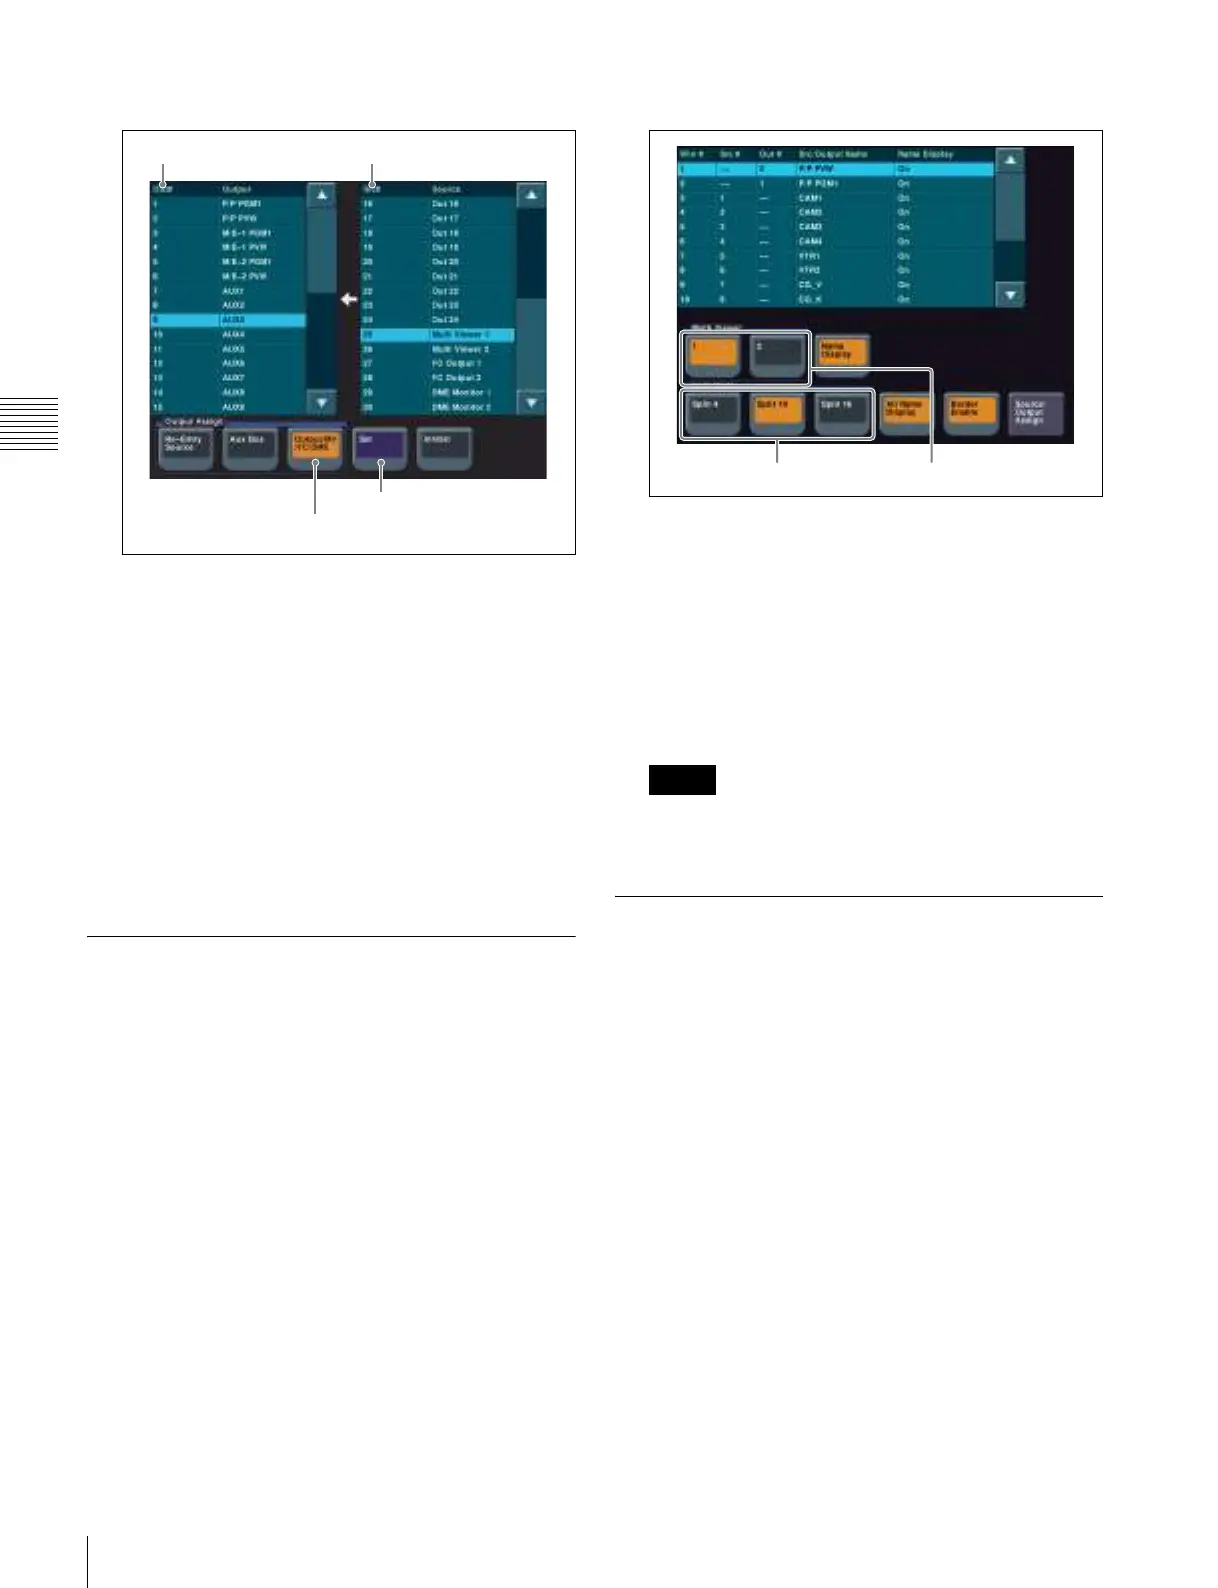
Output Assign menu
a In the <Output Assign> group, select [Output/MV/
FC/DME].
b In the [Out#] column in the list on the left, select the
number for the OUTPUTS connector connected to
the monitor.
In this example, select “9”.
c In the [Src#] column in the list on the right, select
the multi viewer output.
In this example, select “Multi Viewer 1”.
d Press [Set].
The output signal is assigned, and “Multi Viewer 1”
is displayed for output 9 in the [Out#] column.
Configuring Multi Viewer
1
Display the menu.
a Open the Engineering Setup >Switcher >Output
menu (7333).
b Press [Multi Viewer].
The Multi Viewer menu (7333.9) appears.
2
Set the display method of the screen.
Multi Viewer menu
a In the <Multi Viewer> group, select the target multi
viewer.
In this example, select [1].
b In the <Split Mode> group, select the number of
split windows.
Split 4: Splits the screen into four windows.
Split 10: Splits the screen into ten windows.
Split 16: Splits the screen into sixteen windows.
You can specify names and borders for subscreens
using [Name Display] and [Border Enable].
Assigning Signals to Subscreens
1
Display the menu.
a Open the Engineering Setup >Switcher >Output
menu (7333).
b Press [Multi Viewer].
c Press [Source/Output Assign].
The Source/Output Assign menu (7333.10)
appears.
Output/MV/FC/DME
Set
Src#Out#
Memo
Split Mode Multi Viewer