– 4 –
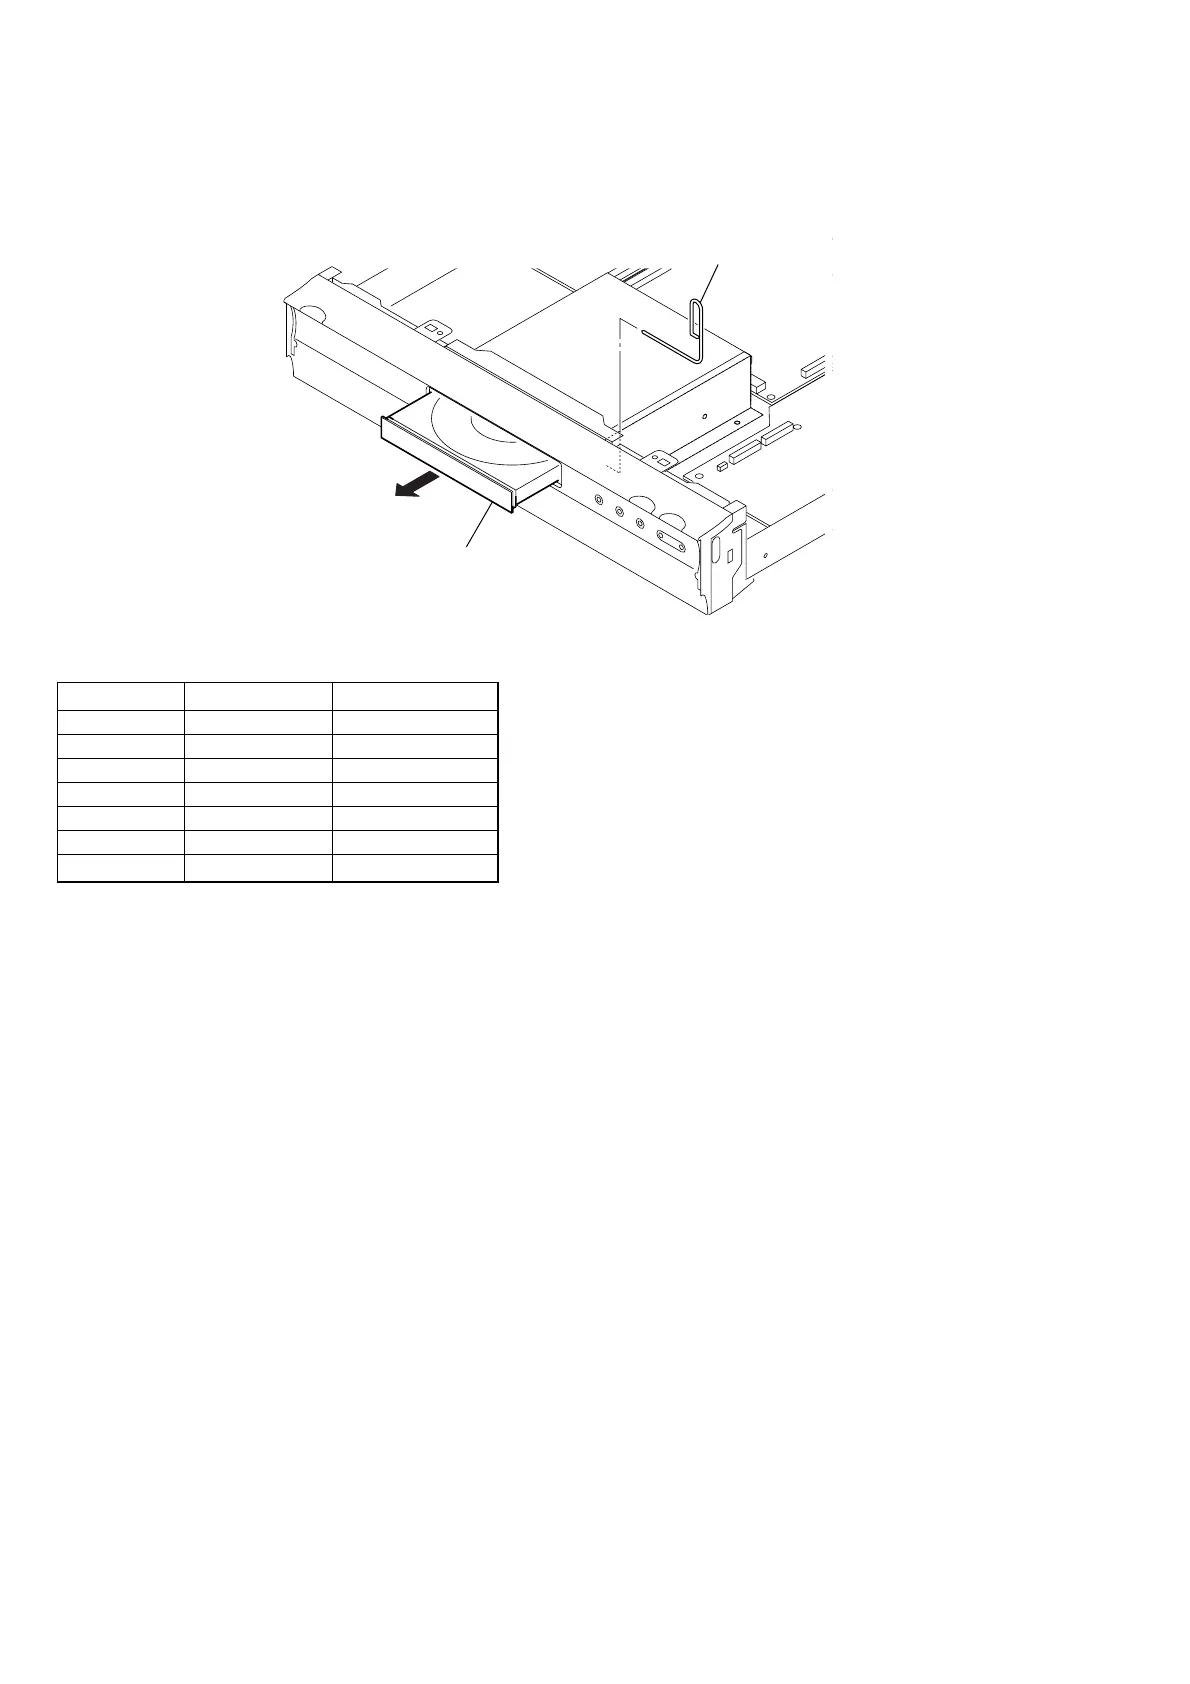
clip
tray
2. TEST DISC
Part No. Description Layer
J-6090-199-A BLX-104 Single Layer
J-6090-200-A BLX-204 Dual Layer
3-702-101-01 CD (YEDS-18)
J-6090-088-A HLX-504 Single Layer (NTSC)
J-6090-089-A HLX-505 Dual Layer (NTSC)
J-6090-077-A HLX-506 Single Layer (PAL)
J-6090-078-A HLX-507 Dual Layer (PAL)
2-1. Operation and Display
Check Items
1) BLX-104
1. Select 23.976Hz 1080p
2. Play “4.Motion pictures”
3. Check whether player can play back or not
4. Check each outputs
Video:
Composite/S Video/ component/HDMI
Audio:
Digital out(Coaxial/Optical)/Audio out/5.1Ch output
* When 1080/24p monitor is nothing, 1080i(59.94Hz or 50Hz) can use instead of 1080/24p.
However this is temporary correspondence.
2) BLX-204
1. Select 1080i(59.94Hz or 50Hz)
2. Play “4.Motion pictures”
3. Check whether player can play back or not
(Check the picture and sound output)
3) CD (YEDS-18)
Check whether player can play back or not
(Check the sound output)
4) HLX-504/505(NTSC) HLX506/507(PAL)
1. After displayed Main Menu, select “1.Video”
2. Play “1.Color Bar 100%”
(Check the picture and sound output)
3. Return to Menu
4. Play “Demonstration 4:3” or “5.Demonstration 16:9”
(Check the picture and sound output)
SERVICE NOTE
1. DISC REMOVAL PROCEDURE IF THE TRAY CANNOT BE EJECTED (FORCED EJECTION)
1. Remove the upper case. (Refer to page 2-1)
2. Remove the front display block assy. (Refer to page 2-2)
3. Insert a clip in the hole of a drive and open a tray.