21
Installation of the 4:3 Mask / Connections
Chapter 1 Overview
Installation of the 4:3
Mask
When the aspect ratio is switched from 16:9 to 4:3, replace
the 16:9 mask with the supplied 4:3 mask.
Installing the 4:3 mask
1
Remove the 16:9 mask by pulling the top side out and
then lifting up from the bottom side.
2
Install the 4:3 mask (supplied) by inserting the bottom
side and then pressing the top in.
Replacing the 16:9 mask
Remove the 4:3 mask and replace the 16:9 mask using the
same procedures as those for installing the 4:3 mask.
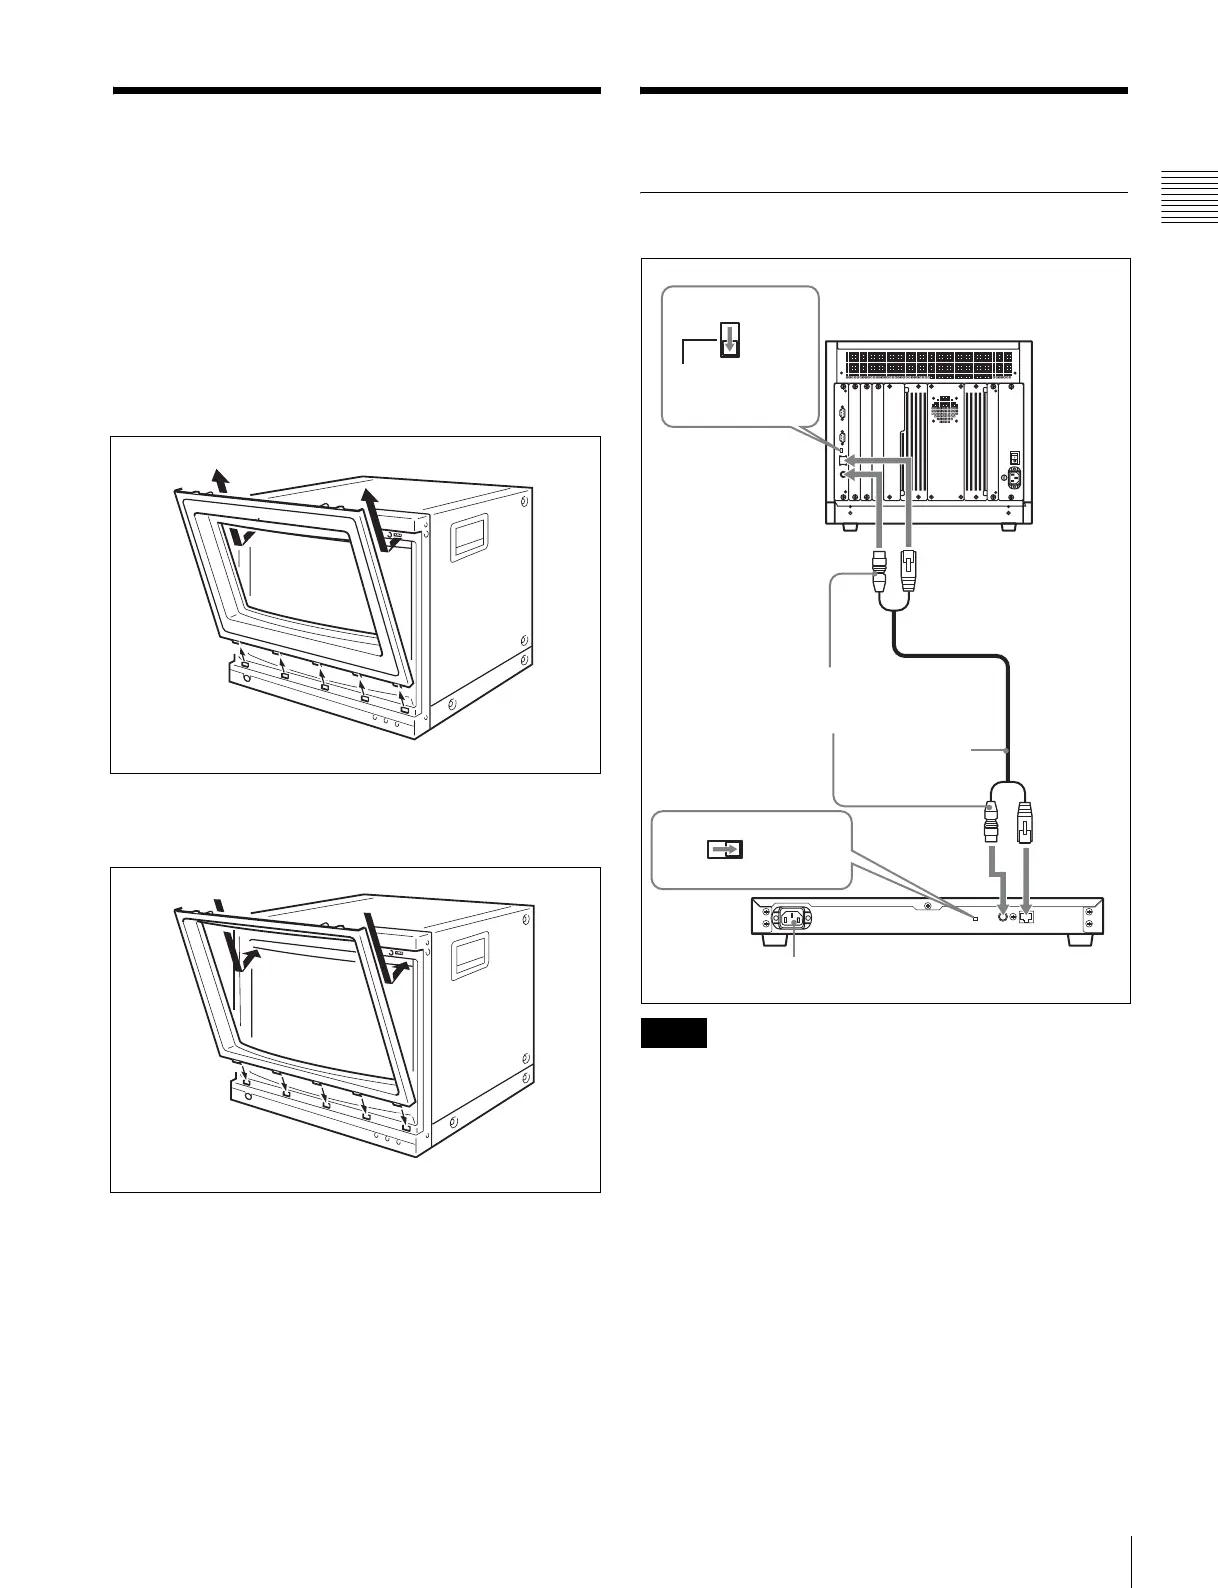
Connections
Connecting to the BKM-15R
• Turn off the MAIN POWER switch of the monitor
before connecting the units.
• Set the NETWORK switch of the monitor and the BKM-
15R to PEER TO PEER.
• Connect the LAN (10/100) connector of the monitor and
the LAN (10/100) connector of the BKM-15R by using
a 10BASE-T/100BASE-TX straight LAN cable (shield
type, optional), the SMF-700 or the cable supplied with
the BKM-35H.
• When an optional LAN cable is connected, use a shield
type cable to prevent miss-operation due to noises.
• Connect the DC 5V OUT connector of the monitor and
the DC 5V IN connector of the BKM-15R by using the
SMF-700 or the cable supplied with the BKM-35H.
The power is supplied from the monitor via this cable.
The connection to the AC IN socket is not necessary.
Notes
LAN
NETWORK
PEER TO PEER
LAN
PEER TO PEER
NETWORK
BKM-15R
Monitor
LAN (10/100) connector
DC 5V OUT connector
DC 5V IN
connector
AC IN socket
LAN (10/100)
connector
When the AC power cord is
connected to the BKM-15R, do
not connect this cable.
Set to PEER TO
PEER.
SMF-700, etc.
Set to PEER TO PEER.