32
1 Turn on the camera.
b Note
• Connect the AC adapter to the camera if one is supplied with the camera.
2 Set the camera to playback mode.
• Playback operation differs among cameras. For most cameras, switch the power/mode button to
playback, PLAY/EDIT or VTR mode to play video. For details, refer to the operating instructions of
your camera.
• When you copy HD (High Definition) video taken in HDV format on a tape by connecting
Handycam
®
with DV (i.LINK) cable, set the [i.LINK CONV] setting on the Handycam
®
to [ON].
This will down-convert videos recorded in HD (High Definition) to SD (Standard Definition) quality.
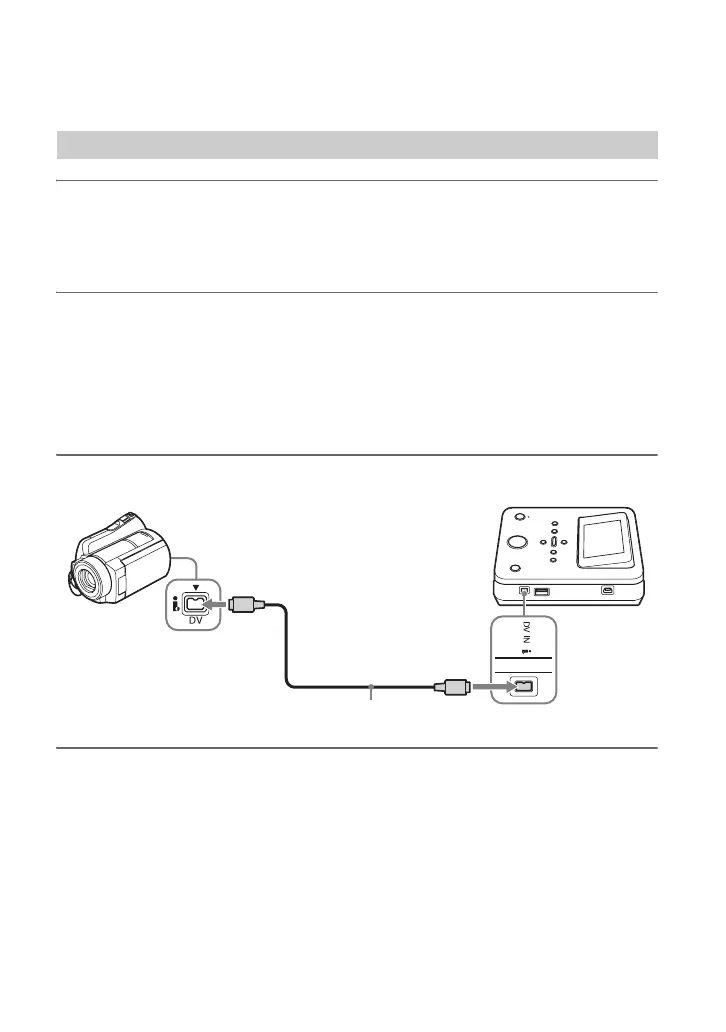
3 Connect the camera to this unit.
b Notes
• You cannot copy videos by connecting a MICROMV or HDV format camera via DV (i.LINK) cable.
• The following models do not support for recording with a DV (i.LINK) cable. Use an audio/video cable.
– DCR-VX700/VX1000, HDR-FX1/FX7/FX1000
DV (i.LINK) cable
DV connector
DV IN connector
DV (i.LINK) cable (not supplied)