49
Using Presentation Function via Network
Presentation Function via Network
b) Wireless direct connection
Select or directory input the SSID of the
projector that the computer is connected
to. If the
“WLAN settings” is set to
“Access Pt.(Auto)” and “Auto” has been
checked, you can skip inputting the
wireless password.
3 Click “Connect”.
If other users are projecting an image,
the controller appears on the screen.
Click the to start projecting an
image (page 49).
If no users are projecting an image, the
controller appears on the screen and
starts projecting an image.
Display related settings (such as your
computer’s resolution) change when the
application is started.
For Windows:
For Mac:
Note
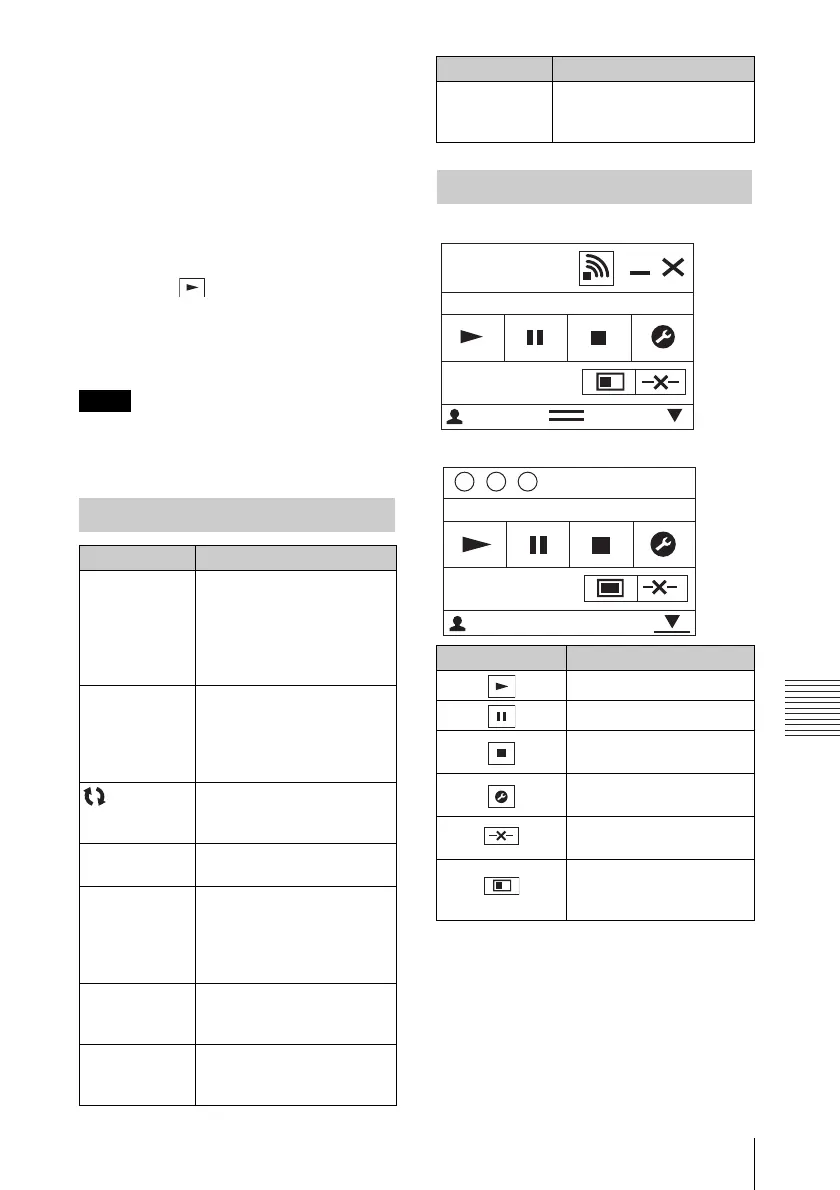
Connection Settings
Item Item descriptions
IP Address Input the IP Address.
List the IP addresses of the
projectors on the network
and IP addresses of
projectors connected so far,
as candidates.
SSID Input SSID.
List the peripheral SSIDs
and SSIDs of projectors
connected to the computer
so far, as candidates.
Update
button
Search the network again
and update the candidate list
of the projectors.
Security
Method
Displays the security method
of the input SSID.
Wireless
Password
Input the wireless password
of the SSID. If open system
Authentication is used, input
of the wireless password is
unnecessary.
Auto
(checkbox)
Check this item when the
“WLAN settings
” is set to
“Access Pt.(Auto)
”.
CODE Input the Connection CODE
displayed on the screen of
the projector.
Connect Connect to the projector that
is set in the items above and
start to project an image.
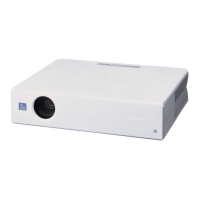
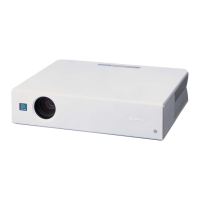
Using the Controller
Items Functions
Start projecting an image.
Pause projecting an image.
Stop projecting an image
(screen turns black).
Change the application
settings.
Disconnect from the
projector.
Select a projection method
then start projecting an
image.
Item Item descriptions
Network
Presentation
User 000001
CODE: 1234
8
User64
1
CODE: 1234