1-16
VPL-HS60/HS51A
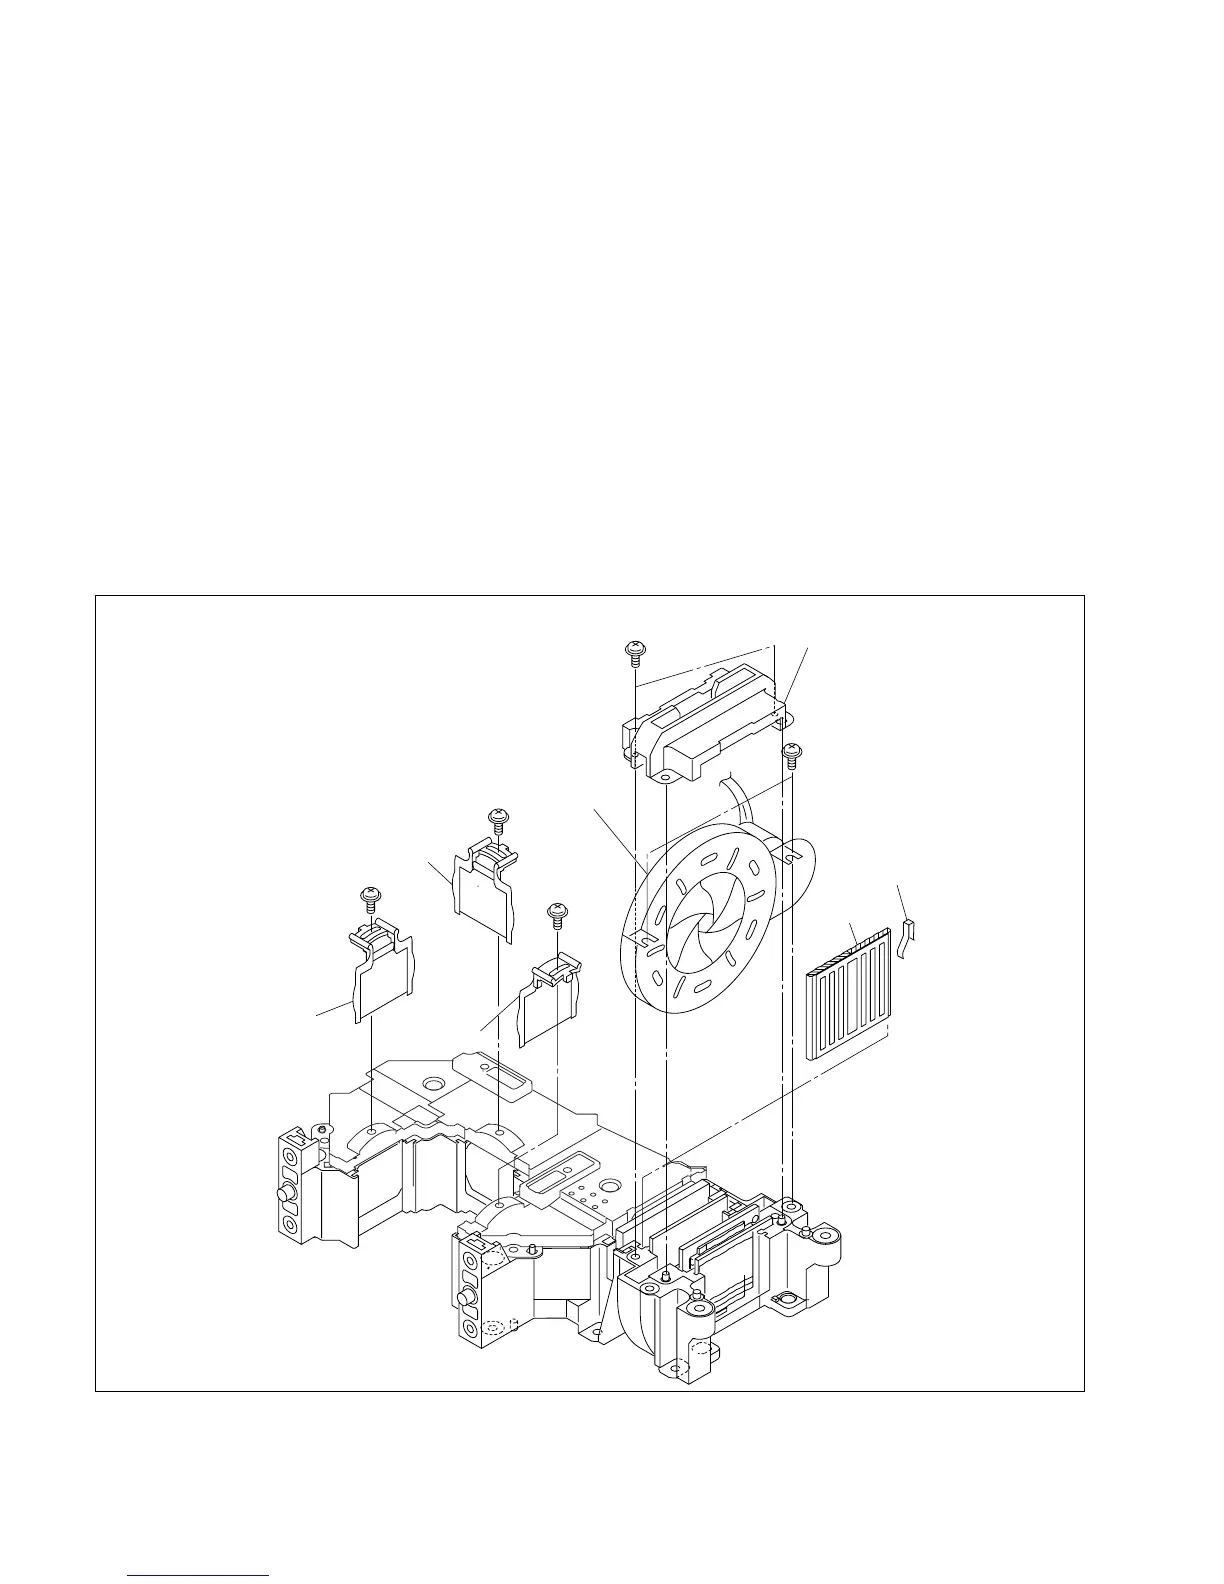
1-5-8. Unit Assembly
Removal
1. Remove the cabinet. (Refer to Section 1-3.)
2. Remove the C board.
(Refer to steps 3 to 7 of Section 1-4-1.)
3. Remove the lamp assembly.
(Refer to steps 2 and 3 of Section 1-5-2.)
4. Remove the optical block assembly.
(Refer to step 5 of Section 1-5-3.)
5. Remove the prism block.
(Refer to step 5 of Section 1-5-6.)
6. Remove the screw (PWH M2 x 5), then remove the
in-polarizer plate (R) assembly on the incoming
radiation side.
7. Remove the screw (PWH M2 x 5), then remove the
in-polarizer plate (G) assembly on the incoming
radiation side.
8. Remove the screw (PWH M2 x 5), then remove the
in-polarizer plate (B) assembly on the incoming
radiation side.
9. Remove the two screws (PWH M2 x 5) from the iris
unit.
10. Remove the two screws (PWH M2 x 5), then remove
the unit cover (BF).
11. Remove the iris unit.
12. Remove the spring (FE), then remove the P/S
conversion device.
In-polarizer
plate (B)
assembly
In-polarizer
plate (R)
assembly
In-polarizer plate (G)
assembly
Iris unit
Unit cover (BF)
P/S converter
Spring (FE)
PWH
M2 x 5
PWH
M2 x 5
PWH
M2 x 5
PWH
M2 x 5
PWH
M2 x 5
14. Assemble this unit in the reverse order of steps 1 to 5.
Installation
13. Attach the unit assembly in the reverse order of steps 6
to 12.