GB
78
Ceiling Installation
To calculate the installation measurements (SS: Screen Size)
a (minimum) = 38.551 (1
9
/16) × SS + 214.8 (8
1
/2)
a (maximum) = 65.842 (2
5
/8) × SS + 216.1 (8
5
/8)
x (minimum) = 7.62 (
5
/16) × SS
x (maximum) = 9.8979 (
13
/32) × SS + 266 (10
1
/2)
Attaching the PSS-H10 projector suspension support
For details on installation on a ceiling, refer to the Installation manual for
Dealers of the PSS-H10. Make sure to consult with a qualified Sony personnel
for installation.
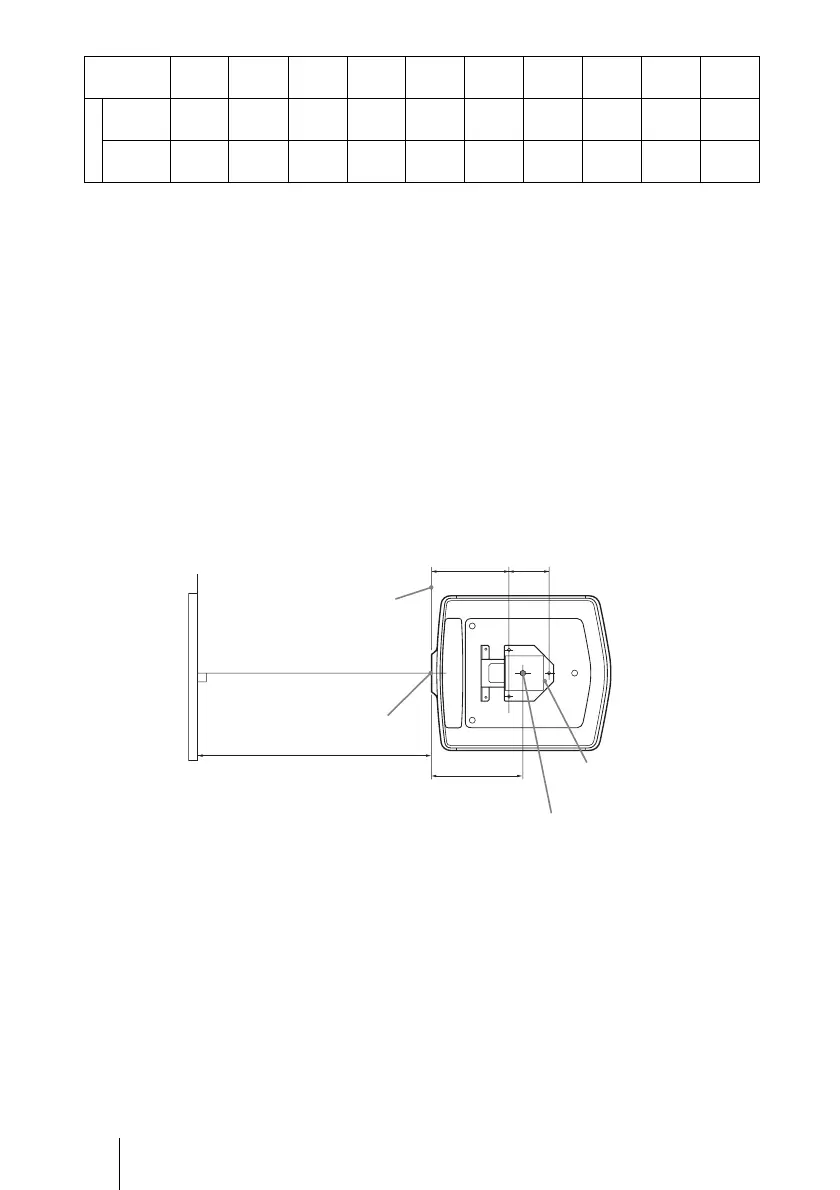
The installation measurements are shown below when installing the projector
on a ceiling using the PSS-H10.
Top view
Install the projector so that the center of the lens is parallel to the center of the
screen.
xMinimum
Distance
305
(12
1
/
8
)
457
(18)
610
(24
1
/
8
)
762
(30)
914
(36)
1143
(45)
1372
(54
1
/
8
)
1524
(60)
1905
(75
1
/
8
)
2286
(90
1
/
8
)
Maximum
Distance
662
(26
1
/
8
)
860
(33
7
/
8
)
1058
(41
3
/
4
)
1256
(49
1
/
2
)
1454
(57
1
/
4
)
1751
(69)
2048
(80
1
/
16
)
2246
(88
1
/
2
)
2740
(108)
3235
(127
1
/
2
)
Screen Size
(inches)
40 60 80 100 120 150 180 200 250 300
130
(
5
1
/
8
)
252.7
(
10
)
303
(
12
)
Front of the cabinet
Center of the lens
Upper ceiling
mount bracket
Center of the supporting pole
(The center of the supporting pole
is different from that of the unit.)
Distance between the screen
and the center of the lens



 To Next Page