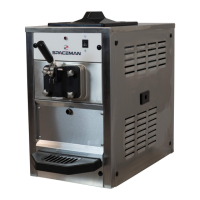
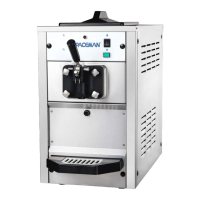
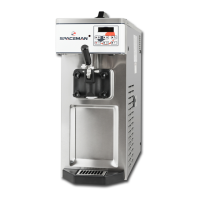
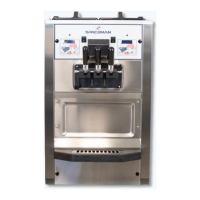
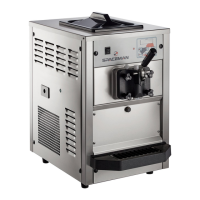
This document is a machine manual for the Spaceman Soft Serve Model 6218, a countertop commercial ice cream and frozen beverage equipment.
Function Description
The Spaceman Soft Serve Model 6218 is engineered to provide dependable operation and consistent quality product. It is approved for both dairy and non-dairy products. The machine features a hopper refrigeration function to maintain product temperature below 4°C (40°F) and a viscosity control system to adjust and maintain product consistency. This allows for the production of soft serve ice cream or frozen beverages with desired firmness.
Important Technical Specifications
Power Connection:
The machine operates on a 1PH, 50/60HZ power supply. Users must connect all wires to a Circuit Breaker (including neutral & ground bus terminals) or a Local Plug according to the supply voltage and wire codes on the machine power cable. It is crucial to verify that the incoming supply cable is wired correctly before switching on or plugging in the machine.
Refrigerant Requirements:
Spaceman specifies that only the designated refrigerant should be used. The model number label indicates the refrigerant type and quantity. For example, it might use R404a (700g) for compressor A and R134a (100g) for compressor B. Using alternative refrigerants may damage the cooling system or prevent optimal performance. If an alternative refrigerant is required, Spaceman Technical Support should be contacted for a list of compatible alternatives.
Machine Placement Requirements:
- Level Surface: The machine must be placed on a flat, level, and solid surface that fits its dimensions. Failure to comply can damage the machine and refrigeration components, voiding warranties.
- Clearance: A minimum of 152mm (6 inches) clearance is required on the exhaust side (side or back) to ensure proper ventilation.
- Environment: The area should be completely clear of dust, grease, and airborne particles. The machine should be placed away from hot equipment such as stoves, frying baskets, and ovens.
- Ambient Temperature: The machine is designed to operate in normal ambient temperatures ranging from 16°C to 24°C (60°F to 75°F). Operating in higher ambient temperatures will result in degraded performance.
Included Parts:
The machine comes with essential accessories for operation and maintenance, including:
- Hopper Cover
- Front Drip Tray + Splash Shield
- Dispensing Handle
- Start-Up Kit (contains wearable parts like O-rings and gaskets, excluding scraper blades)
- Operator's Manual
- Brush Kit (optional, but recommended for efficient cleaning)
Usage Features
Quick Operation Guide:
The manual provides a step-by-step guide for initial setup and operation:
- Unpalletize Machine: Requires two or more personnel for safe lifting and placement. Inspect for hidden damage before signing for delivery.
- Check for Shipping Damage: Contact Spaceman Technical Service immediately if any damage is found.
- Unpack and Inspect Parts: Organize and inspect all packaged parts and accessories.
- Installation and Setup: Place the machine in an appropriate food preparation area, complying with all installation requirements. Read and understand all safety and standard operating procedures.
- Cleaning and Preparation:
- Fully disassemble the machine.
- Thoroughly clean and scrub hoppers, cylinders, and all parts.
- Lubricate and re-assemble all machine parts.
- Fully sanitize the machine.
- Operation:
- Prepare product in a separate container, ensuring it is thoroughly mixed.
- Add product to hoppers and prime the cylinder using the prime plug.
- Turn the machine to FREEZE mode and wait for the product to reach frozen consistency.
- Adjust viscosity settings as necessary to achieve desired product firmness.
Frozen Product Operation:
- Add Product to Machine:
- Verify the machine has been recently sanitized (within 1 hour).
- Prepare at least 7.57 liters (2 gallons) of cool, smooth product.
- Pour 1.2 liters (0.32 gallons) into the hopper.
- Open the draw handle to allow sanitizer to flow out, then pour the remaining product.
- Wash and install the air tube, then replace the hopper lid.
- Mix-low lights illuminate RED when the hopper is low on product mix and de-illuminate when filled.
- Freeze Product:
- Verify the cylinder is full and primed.
- Turn to FREEZE position.
- The motor agitates, and the cooling system freezes the product (approx. 10 minutes).
- Product is ready to dispense when it reaches the set viscosity.
- Dispense Product:
- Open the draw handle (DOWN) until the desired amount is dispensed.
- Close the draw handle (UP) when finished.
Machine Power Reset:
The machine automatically shuts down if the cylinder experiences freeze-up (usually due to high viscosity settings) to prevent motor damage.
- Switch power OFF.
- Press the green reset button (side or back of machine).
- Wait 15-20 minutes, then switch power ON.
- Press RESET, then WASH button on front.
- Observe machine performance. If abnormal noise occurs during reset, immediately switch power OFF and contact service.
Adjust Product Consistency:
Viscosity is adjusted on the Electronic Control Board by unscrewing the faceplate cover.
- Move the switch UP for the desired viscosity level (1-6, harder to softer).
- Allow 10-15 minutes between adjustments to evaluate product firmness. A setting of 3 is a good starting point.
Maintain Product Consistency (for machines without air pumps):
If unused for extended periods, product may become icy or dense.
- In FREEZE mode, remove the air tube.
- Clean the air tube and insert it upside-down (inlet hole at the top).
- Confirm product is above the low-mix line.
- Draw 170-227g (6-8 oz.) of product and discard.
- Wait for the machine to finish the freeze cycle.
- Remove and clean the air tube.
- Insert the air tube with the correct orientation (inlet hole at the bottom).
- Machine is ready for normal operation.
Maintenance Features
Routine Maintenance Operations:
- Disassemble, Clean, and Lubricate: Daily.
- Replace Wearable Parts: Every 1 to 3 months (based on usage and cleaning intervals). A Tune-Up Kit is available with all wearable parts (O-rings, gaskets, etc.) except scraper blades.
- Preventative Maintenance: Quarterly (based on cleanliness of location and proximity to powder-based machines). Includes cleaning condensers, checking belt tensions, and cleaning the interior of the machine frame.
Safety Instructions for Maintenance:
- WARNING: If this is the first time operating, ALL parts MUST be cleaned and sanitized before running.
- IMPORTANT: Cleaning and sanitizing schedules are governed by state or local regulatory agencies and MUST be followed. Routine maintenance MUST be performed a minimum of once every three days.
- CAUTION:
- Do NOT run the machine without properly lubricating required parts.
- Do NOT clean with abrasive or toxic chemicals; this can damage stainless steel.
- ONLY use Spaceman-included cleaning brushes and lubrication.
- NEVER use metal objects to clean or operate.
- ALWAYS replace wearable parts a minimum of every 3 months.
- ALWAYS prime the machine prior to operating.
- ALWAYS inspect parts for excess wear and damage.
- NOTE: Additional brushes, lubrication, wearable parts, and tools can be purchased from Spaceman.
Drain Product:
- Turn off the machine 30 minutes prior to softening product to expedite draining.
- Remove the hopper lid and air tube.
- Place a bucket below the dispensing assembly.
- Turn the power switch to WASH.
- Move the draw handle to OPEN (DOWN) and close (UP) when product flow slows.
- Turn power switch to OFF.
- Dispose of or refrigerate the product.
- Fill the hopper with 3.79 liters (1 gallon) of COOL water.
- Use a large brush and cool water to scrub the hopper, being careful not to damage the low-mix sensor.
- Use a small brush kit to clean the feed tube.
- Place a bucket below the dispensing assembly.
- Turn the power switch to WASH.
- Open the draw handle to drain water and remaining product, then close.
- Turn the power switch to OFF.
- Repeat steps 7-13 until the water exiting the draw valve is clear.
Disassemble Parts:
- Prepare a dishwashing area with a bucket for large parts and a small container for O-rings.
- CAUTION: ALWAYS separate O-rings and gaskets from metal parts to prevent damage during washing.
- Turn power switch OFF.
- Remove the dispensing door by unscrewing hand-screws and pulling the assembly from the cylinder.
- Disassemble the dispensing door: remove the beater guide, gasket (using O-ring removal tool), draw handle, star cap, and all O-rings.
- Disassemble the beater assembly: remove the beater assembly from the cylinder and separate the seal from the beater.
- Remove the internal drip tray and front drip tray + splash shield.
Wash Parts:
- Verify the power switch is OFF.
- Use a large brush and cool water to thoroughly clean inside the cylinder, ensuring it is free of all product.
- Clean and dry the rear of the cylinder with supplied black brushes and a towel.
- Gently clean and wipe down the outside of the machine.
- Thoroughly wash all removed parts with supplied brushes, sponges, and towels.
- Verify all parts are clean and free of food product before re-assembly.
- CAUTION: NEVER wash parts in a dishwasher. ALWAYS hand-wash components with non-toxic, food-safe cleaners.
Assemble Parts:
- CAUTION: NEVER force the installation of any parts. All parts fit correctly without force. If parts don't fit, remove all and repeat assembly.
- Verify the power switch is OFF.
- Install the beater assembly: lubricate the beater seal, insert the beater assembly into the cylinder, and rotate to lock it in place.
- Install the dispensing door:
- Place O-rings on the draw valve and coat with Spaceman lubricant.
- Insert the draw valve into the dispensing door.
- Install the dispensing handle (left part first).
- Snap the star cap onto the bottom of the dispensing door.
- Install door gaskets and the beater guide.
- Install the dispensing door assembly.
- Install the dispensing door screws.
- Install the hopper lid and drip trays:
- Install internal and front drip trays.
- If the machine will be unused, install the air tube and hopper lid. Otherwise, set the air tube aside until after priming.
Sanitize:
- IMPORTANT: After sanitizing, DO NOT rinse or touch sanitized areas. Product must be added immediately. If not, rinse with clean water, loosen door hand-screws to air-dry, and sanitize again before use.
- CAUTION: ALWAYS use food-grade, no-rinse sanitizer. If warm water is needed to dissolve sanitizer, allow the solution to cool before adding to the machine.
- Verify assembly is complete.
- If installed, remove the hopper lid and air tube.
- Verify the draw valve is in the CLOSED (UP) position.
- Mix a minimum of 7.57 liters (2 gallons) of food-grade sanitizer in a bucket.
- Pour half the solution into the hopper.
- Turn the power switch to WASH.
- Allow the solution to agitate for 5-10 minutes (NEVER leave on WASH for more than 10 minutes).
- While agitating, gently use a clean brush to scrub and distribute the sanitizer solution along the hopper walls.
- Open the draw valve (DOWN) and drain the solution.
- Turn to OFF to stop the cycle.
Troubleshooting:
The manual includes a troubleshooting section for common issues:
- Hopper isn't cold enough:
- Probable Cause: Warm product added, high hopper temperature setting, temperature offsets need adjustment.
- Remedy: Allow 1 hour for temperatures to stabilize, call Spaceman Technical Support.
- Hopper is freezing:
- Probable Cause: Inadequate mix in hopper, low hopper temperature setting.
- Remedy: Ensure hopper is at least half full.
- Product is too soft:
- Probable Cause: Inadequate cleaning/lubrication, inadequate mix, improper mixing, inadequate ventilation, incorrect viscosity setting.
- Remedy: Clean/lubricate daily, ensure hopper is half full, follow mix ratios, ensure 152mm (6'') clearance on exhaust sides, raise viscosity setting.
- Machine is making noise:
- Probable Cause: Improper assembly, wearable parts need replacement, internal cleaning/maintenance required, damaged internal parts.
- Remedy: Stop use, drain product, clean/inspect parts, replace wearable parts every 3 months, contact Spaceman Technical Support.
- Product leaks excessively into internal drip tray:
- Probable Cause: Improper/inadequate lubrication of beater seal, damaged/missing/improperly installed beater.
- Remedy: Use sufficient lubricant during assembly, replace beater seal every 1-3 months.
- Product leaks excessively from dispensing door spout:
- Probable Cause: Improper/inadequate lubrication of draw valve and O-rings, cracked/broken/worn draw valve O-rings.
- Remedy: Use sufficient lubricant during assembly, replace O-rings every 1-3 months.
- Machine shuts down automatically:
- Probable Cause: Cylinders experiencing freeze-up due to high viscosity, low mix in hopper, cylinder starved by fast dispensing, plugged feed hole.
- Remedy: Reset machine (Page 12) and resolve the cause of freeze-up.