4
2. GETTING STARTED
than three seconds, enters the menu for the basic settings.
Press the button again for more than 3 seconds to leave the
menu.
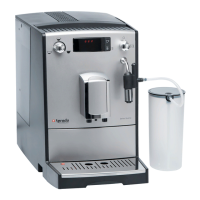
(Fig. 1/F): Pushing up or down
accomodates the height of dierent cups or glasses.
Open the cover on the left (Fig. 1/G) and remove the water tank
(Fig. 3). Clean it with clear, cold tap water.
Rell the water tank to maximum and insert it back into the
appliance. Make sure the tank is safely locked in place.
Open the bean container cover on the right (Fig. 1/S). Fill with
untreated, roasted coee beans only (Fig. 4) and close again.
Tip: For production reasons, the internal pipes may be empty
pushed.
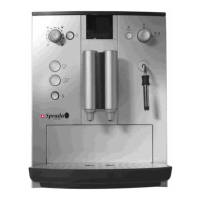
Connect the mains plug to a professionally installed socket.
Switch the machine on with the on/o switch (Fig. 1/I). Five
ashing bars appear on display.
After a short while the symbol S12
will be displayed.
Place a suciently large bowl (minimum contents 0.5 litres)
under the steam/hot water spout/frothing device (Fig. 1/K) and
turn the steam/hot water control (Fig. 1/C) fully clockwise until
water is dispensed.
The system is now lled with water and cleaned through the
steam/hot water spout/frothing device. This process will nish
automatically.
Turn the steam/hot water control (Fig. 1/C) anti-clockwise all
the way until closed. The symbol S10
will now appear on
the display.
!
!
i