Par ts Ma nual 6740 Har vest er
Part #: 290360
Revision: 5/24/2022
179
Section-X TBD Section-5 Miscellaneous Specifications & Reference
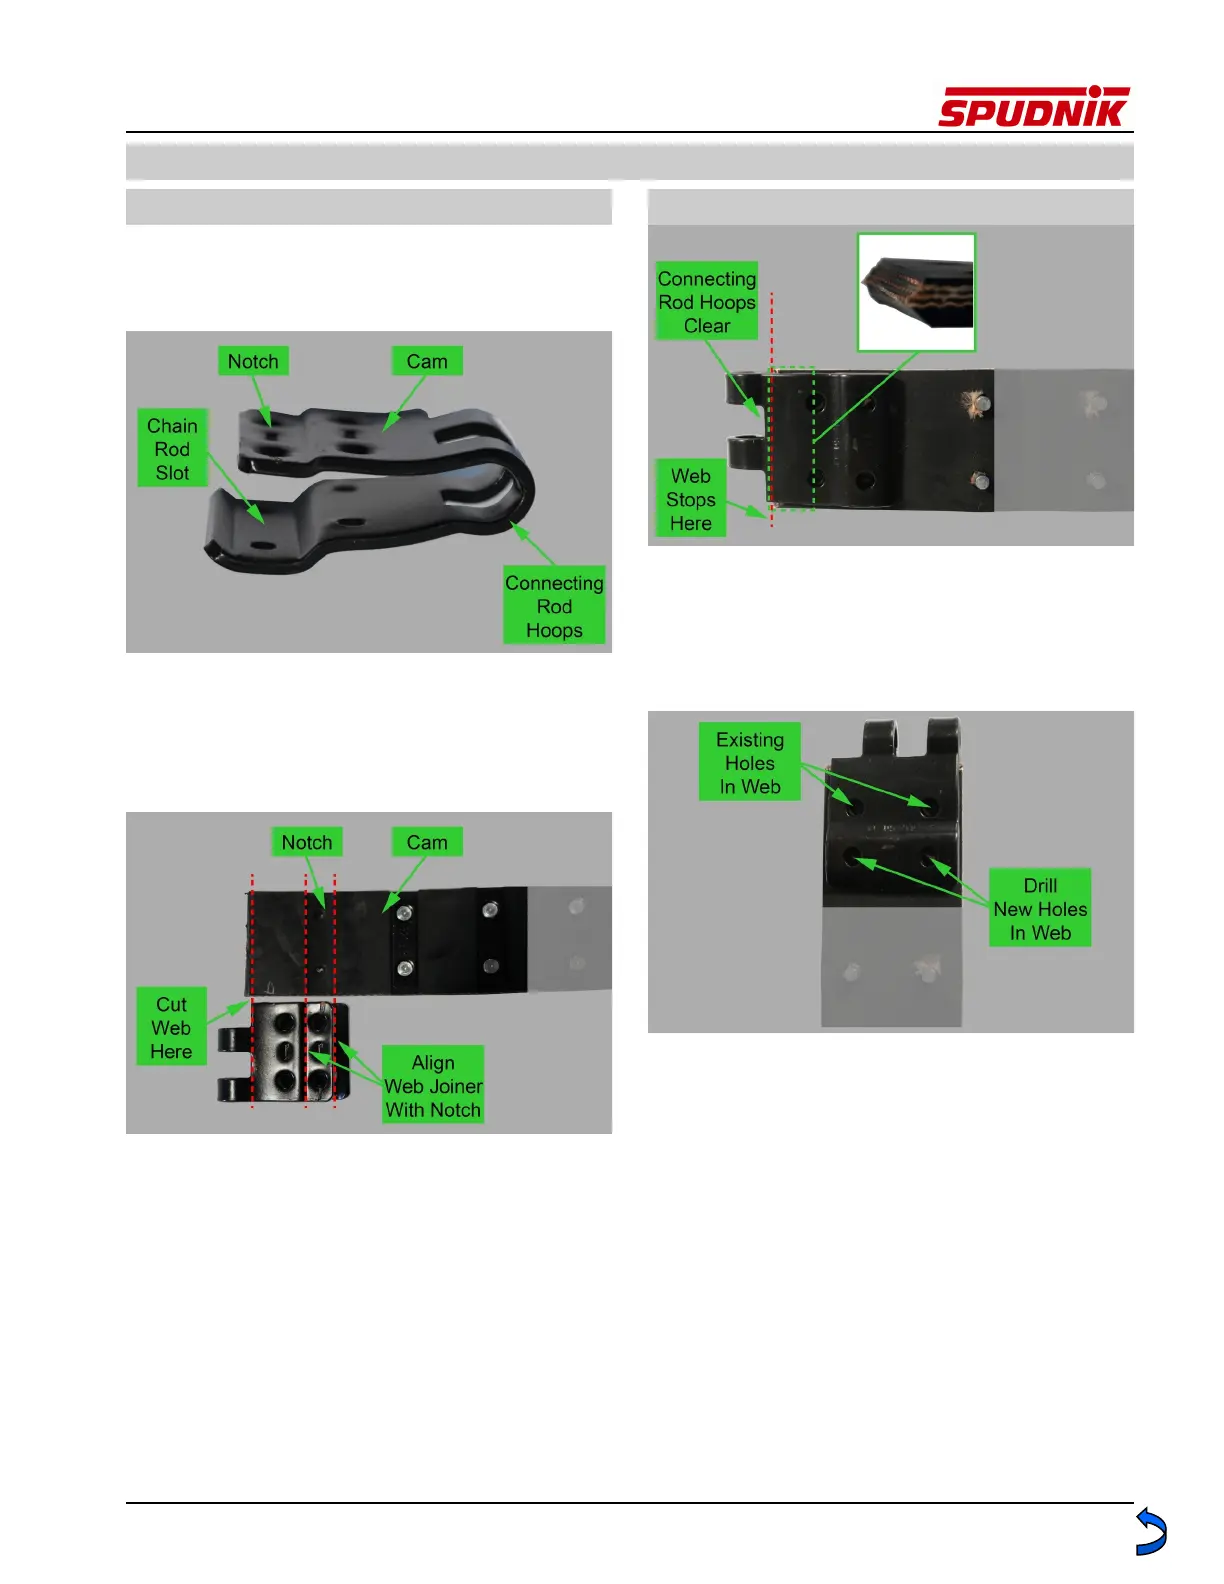
5.4. Belted Chain repair (Cont.) 5.4. Belted Chain repair (Cont.)
attached to the other end of the Belted Chain
web. (See Figure 11)
Cut the webbing to be joined, at the edge of
the notch where the Web Joiner is to be at-
tached. Use a Web Joiner to identify the cut
point. (See Figure 12)
Trim the top and bottom edges of the web-
bing to create a bevel. The bevel reduces
interference when the webbing is inserted in
the Web Joiner. Slide the Web Joiner over
the end of the webbing and check the fit. The
end of the webbing must not intrude into the
hoop area where the Connecting Rod seats.
Trim the webbing if necessary. (See Figure
13)
With the Web Joiner positioned on the web-
bing, use the Web Joiner as a template to drill
the holes for the fastening rivets/bolts. (See
Figure 14)
Slide the Chain Rod into position in the Chain
Rod Slot of the Web Joiner. Insert rivets/bolts
into the securing holes in the Web Joiner,
Web, and Chain Rod. (See Figure 15)
Figure 11
Figure 12
Figure 13
Figure 14