Par ts Ma nual 6740 Har vest er
Part #: 290360
Revision: 5/24/2022
180
Section-5 Miscellaneous Specifications & Reference
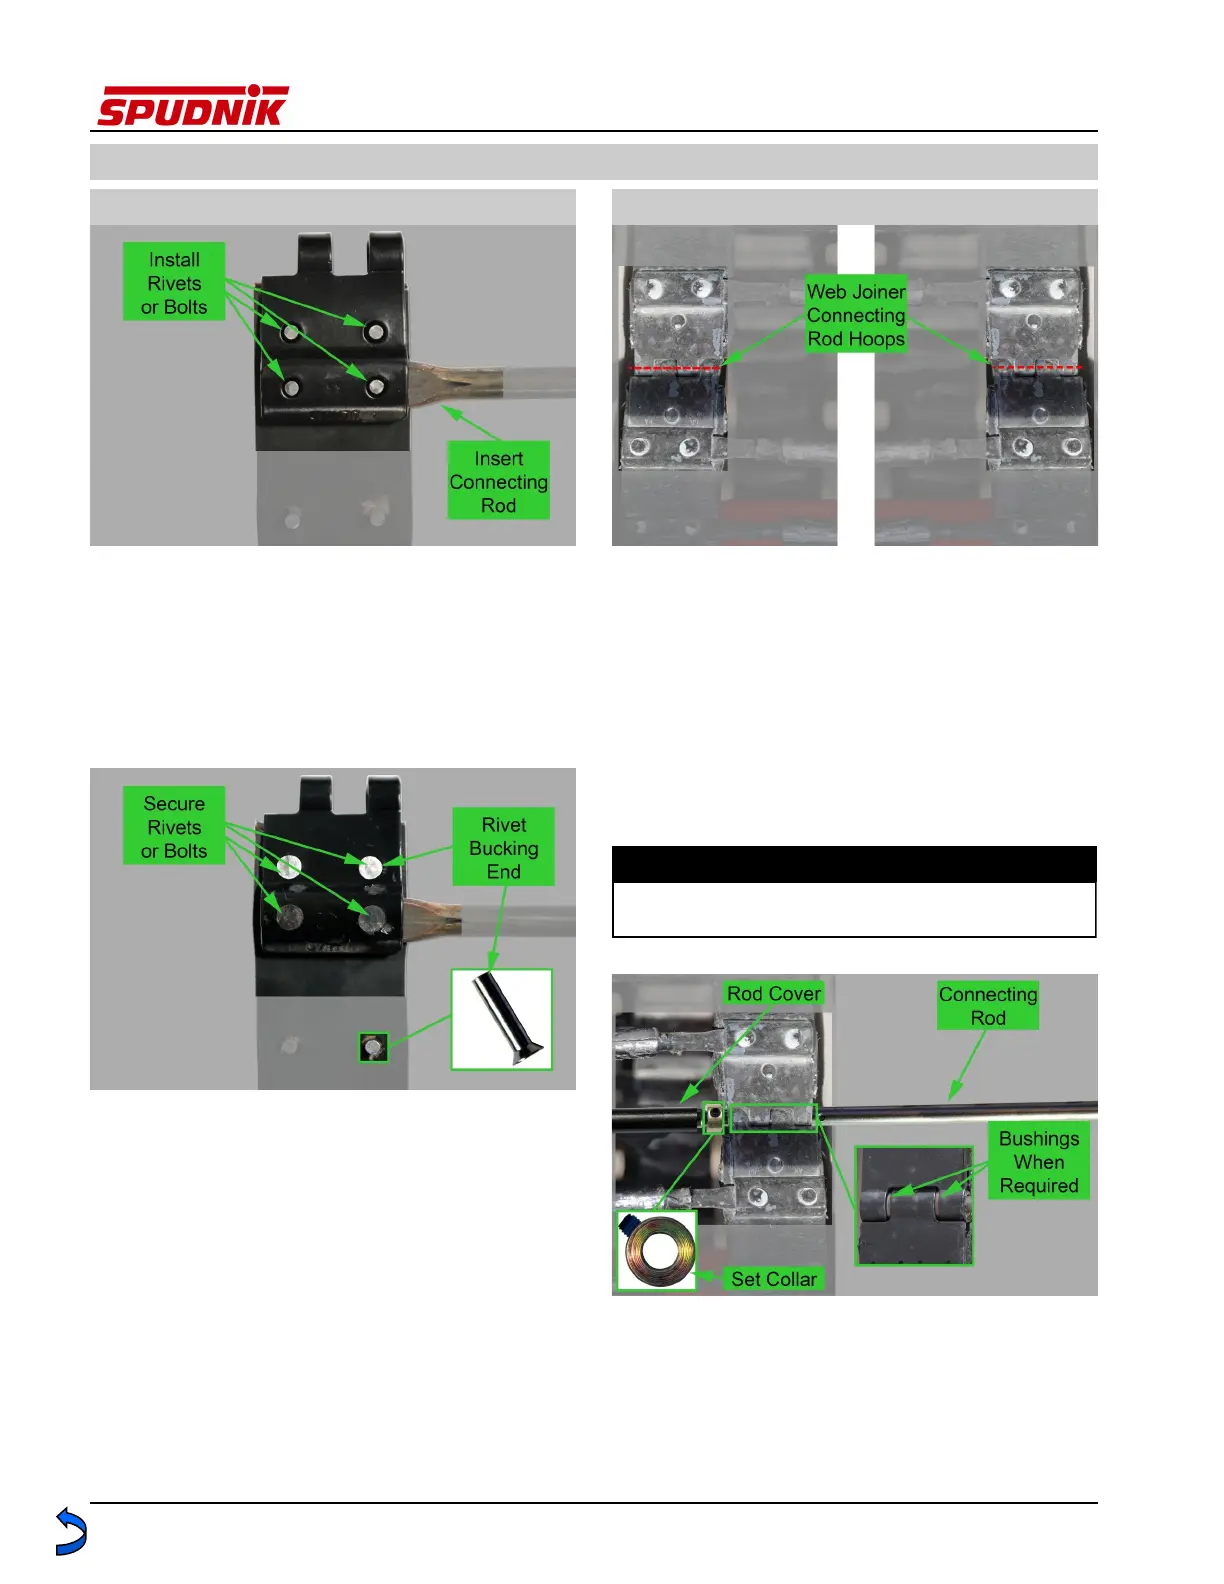
5.4. Belted Chain repair (Cont.) 5.4. Belted Chain repair (Cont.)
Squeeze the Web Joiner together so it is tight
against the webbing. If rivets are used, flatten
the bucking end of the rivets so they securely
hold the Web Joiner and Chain Rod. If bolts
are used, install and tighten locking nuts so
they securely hold the Web Joiner and Chain
Rod. (See Figure 16)
Repeat the preceding steps for the other end
of the webbing to be joined.
If required, repeat the preceding steps for the
webbing on the other side of the belted chain.
With the Belted Chain correctly routed on the
machine, pull the ends of the belted chain,
along with all available slack, to the bottom of
the chain track. Pull the ends of the Belted
Chain together so the Web Joiners interlock
with the Connecting Rod Hoops aligned. (See
Figure 17)
Working from one side, insert the Connecting
Rod through the Connecting Rod Hoops on
the Web Joiner. Depending on the type of
Web Joiner, it may or may not require bush-
ings. As the Connecting Rod is pushed from
one side to the other, install Set Collar/Rod
Cover/ Set Collar, as required. If the Belted
Chain has a center web, it will require two
sets of Rod Covers and Set Collars. Insert the
Connecting Rod until it is flush on both sides
of the Belted Chain. (See Figure 18)
Depending on the Belted Chain and type of
Web Joiner used, the connection may be
friction lock or may require a Locking Plate. If
a locking plate is required, position the lock-
ing plate at least 2 inches (51mm) from the
Belt Joiner. This spacing is required to allow
Figure 15
Primary Belted Chains are not padded. No covers are
used on the Connecting Rods.
NOTE
Figure 16
Figure 17
Figure 18